


+15 More
Digital Aura Portal - FZCO
Building A1, Dubai Digital Park, Dubai Silicon Oasis, Dubai, United Arab Emirates Premises Number 72647 - 001
Business registration number: 70647
gamer-choice.com © 2026
Digital Aura Portal - FZCO
Building A1, Dubai Digital Park, Dubai Silicon Oasis, Dubai, United Arab Emirates Premises Number 72647 - 001
Business registration number: 70647
There are countless bosses you can challenge in Old School RuneScape, each rewarding in its own way when defeated. Among the most notable is the Alchemical Hydra, an intimidating Slayer boss located in the Karuulm Slayer Dungeon. If this fearsome creature has been giving you trouble, then this detailed guide will help you prepare and finally overcome it.
Here you’ll find everything you need to know about the fight, including:

Buy OSRS Gold
Get OSRS gold today and level up quicker!

When facing the Alchemical Hydra, preparation is everything. The Twisted Bow is your best weapon, as it scales based on the enemy’s magic level, making it extremely powerful in this encounter. Pair it with Dragon arrows for maximum efficiency. A Slayer helmet, Necklace of Anguish, and Max Cape are also highly recommended. If you opt to use a blowpipe instead, bring Ava’s assembler to complement it. As for darts, adamant darts work best against the Hydra.
Your inventory should include around 20 prayer potions to sustain you through the long battle. Make sure you bring plenty of food, an Antidote++ to counter poison, and a few ranging potions to give you a needed edge during combat.
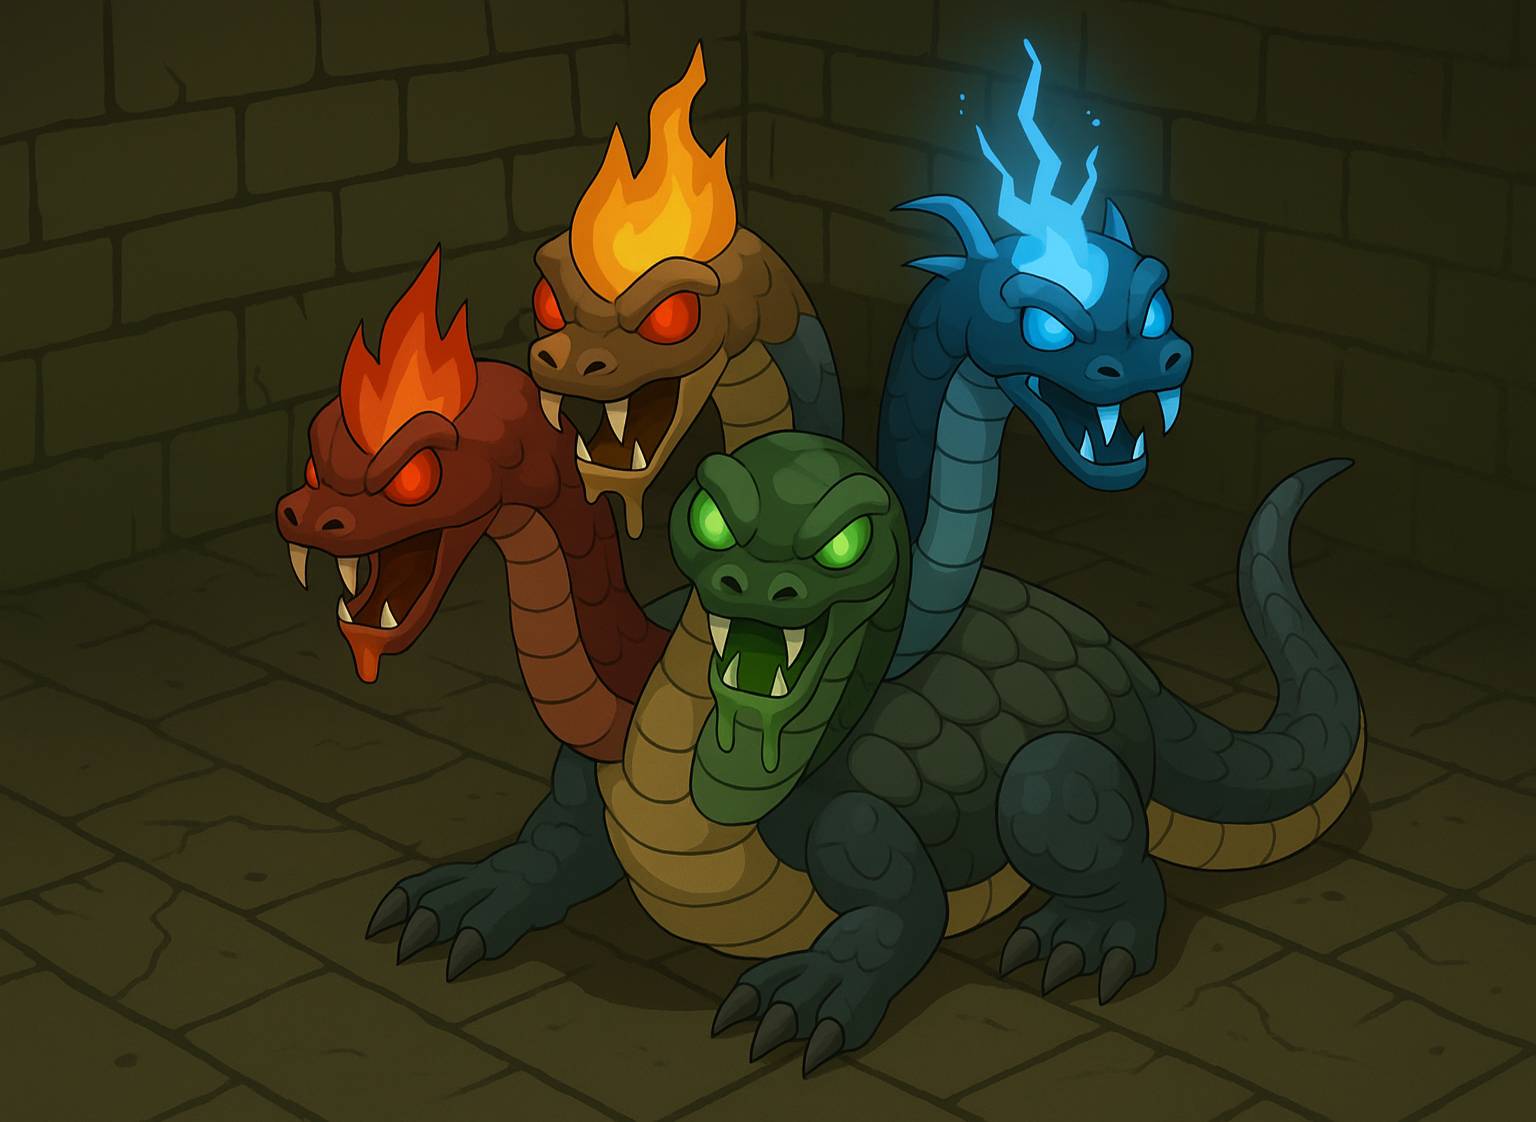
The Alchemical Hydra is a level 95 Slayer boss that you can only fight while on a hydra task. You’ll encounter this boss deep within the Karuulm Slayer Dungeon.
To reach it, travel north past the Tasakaal, then head east where hydras spawn. Continue until you find the lair entrance close to Orrvor quo Maten. Alternatively, if you have 88 Agility, you can take a shortcut using the pipe behind Kaal-Ket-Jor. Keep in mind though, the shortcut doesn’t really save much time compared to the standard path.
This battle is instanced, which means if you die, Orrvor quo Maten will hold your items. You’ll need to pay 100,000 gold to reclaim them. Be aware though, if you die elsewhere while your items are stored, they’ll be lost for good.
Once inside the room with the Alchemical Hydra, you can’t exit through the doors. You may teleport out if needed, but the Hydra takes 20 seconds to respawn. The boss alternates between magic and ranged attacks every three strikes. Magic appears as small green projectiles, while ranged looks like fang-shaped shots. Each attack comes from one of the Hydra’s side heads—the left head for magic and the right head for ranged. In earlier phases, the Hydra’s attacks hit twice until one of the lower heads falls off, reducing its offensive output.
Although the Hydra has strong offensive power in both ranged and magic, its defence is relatively low. Using dragon hunter weapons provides extra bonus damage, making them an excellent choice for this fight.
In the poison phase, the Alchemical Hydra displays a green carapace. To handle this, lure it towards the red chemical pool. After its first three attacks, it will throw poison orbs that create a 3×3 splash zone. They land on you and four random surrounding spots. To avoid these splashes, move west towards the red pool, then south, stand two tiles north of the Hydra near the pool, and finally step two tiles west to dodge the poison safely.
When its health reaches 75%, the bottom-right head falls off and the carapace turns blue, signaling the beginning of the next phase. At this point, move north to lure the Hydra to the green chemical pool.
During the lightning phase, lure the Hydra towards the green pool. This time, the boss unleashes electricity across the middle of the room, and four lightning bolts spawn from the corners moving toward you. You can avoid them by circling around or sticking close to the northern wall before moving west while attacking. Another effective strategy is trapping the lightning by moving to the north-western corner of the room.
When the Hydra’s health drops to 50%, the carapace changes to red. Now lure the boss west of the blue chemical pool to transition to the next phase.
In this phase, lure the Alchemical Hydra over to the blue chemical pool. The Hydra will position itself at the center of the room, facing you. Watch out for its fire-breathing attack, which creates a 5×5 zone of flames. If you stand under the Hydra, you’ll be pushed out automatically. To evade the fire attack, walk in a straight line—running will only make the flames track you faster.
At 25% health, the carapace turns grey, leading into the final and most dangerous phase.
Unlike the earlier phases, you don’t need to lure the boss to any chemical pools here. The Alchemical Hydra becomes fully enraged, and you’ll receive a warning message when this happens. In this phase, it alternates between ranged and magic after every single attack, making protection prayers and strong healing crucial. The poison attack also returns, coming back after three auto-attacks, then again after every nine subsequent attacks.
This is the toughest stage, as only a couple of hits from the Hydra can take you out. Managing your prayer switches carefully and keeping your health topped off is the key to survival and victory.

Buy OSRS Accounts
Get OSRS accounts with maxed stats and gear!
That’s everything you need to know to conquer the Alchemical Hydra in OSRS! With proper preparation, the right gear, and an understanding of its attack patterns and phases, you’ll be able to bring this Slayer boss down. Always ensure you have strong prayer support and plenty of supplies to withstand its relentless assault. With focus and patience, you’ll claim victory and all the rewards the Hydra has to offer.