


+15 More
Digital Aura Portal - FZCO
Building A1, Dubai Digital Park, Dubai Silicon Oasis, Dubai, United Arab Emirates Premises Number 72647 - 001
Business registration number: 70647
gamer-choice.com © 2026
Digital Aura Portal - FZCO
Building A1, Dubai Digital Park, Dubai Silicon Oasis, Dubai, United Arab Emirates Premises Number 72647 - 001
Business registration number: 70647
Greetings, Guardians! In this guide, we’ll break down exactly how to get Barrow-Dyad in Destiny 2. This new exotic SMG was initially believed to be locked behind Episode 3 of the Heresy Episode, but in reality, the weapon is tied to a long and challenging exotic questline. To acquire it, you’ll need to complete a series of unique puzzles, fight through Taken realms, and finish an exotic mission on the Dreadnaught. Let’s jump into the details of this Barrow-Dyad guide.
Unlocking the Barrow-Dyad requires multiple steps: tracking down Taken Blights, solving teleportation rune puzzles, and gathering Osseous Fragments across several zones. Along the way, you’ll face combat-heavy Curse quests, defeat Taken bosses, and eventually unlock the Derealize exotic mission, where the final boss fight will secure the weapon.
If you’d prefer not to spend hours grinding through the quest, you can simply buy Barrow-Dyad at Gamer Choice. With this service, professional Destiny 2 players handle the process for you quickly and securely at a fair price. It’s the fastest way to ensure you don’t miss out on one of the game’s most powerful new exotics.

Buy Destiny 2 Boost
Get Destiny 2 boosts from trusted pros now!

If the exotic mission is not in the current rotation, there’s no method to acquire Barrow-Dyad. In that case, you’ll need to wait until the Derealize exotic mission becomes available again.
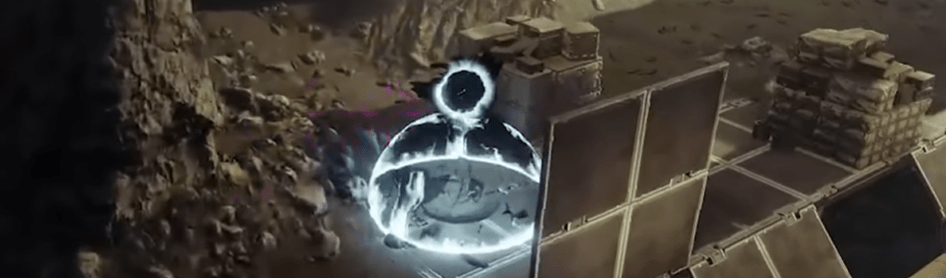
Starting the Barrow-Dyad quest isn’t straightforward. First, you’ll need to run the Nether activity. Any variation or location will do. During the activity, search for a Taken Blight, which looks like a giant black sphere hidden off the path. These spawn randomly, so you may need to reload the activity multiple times until you find one.
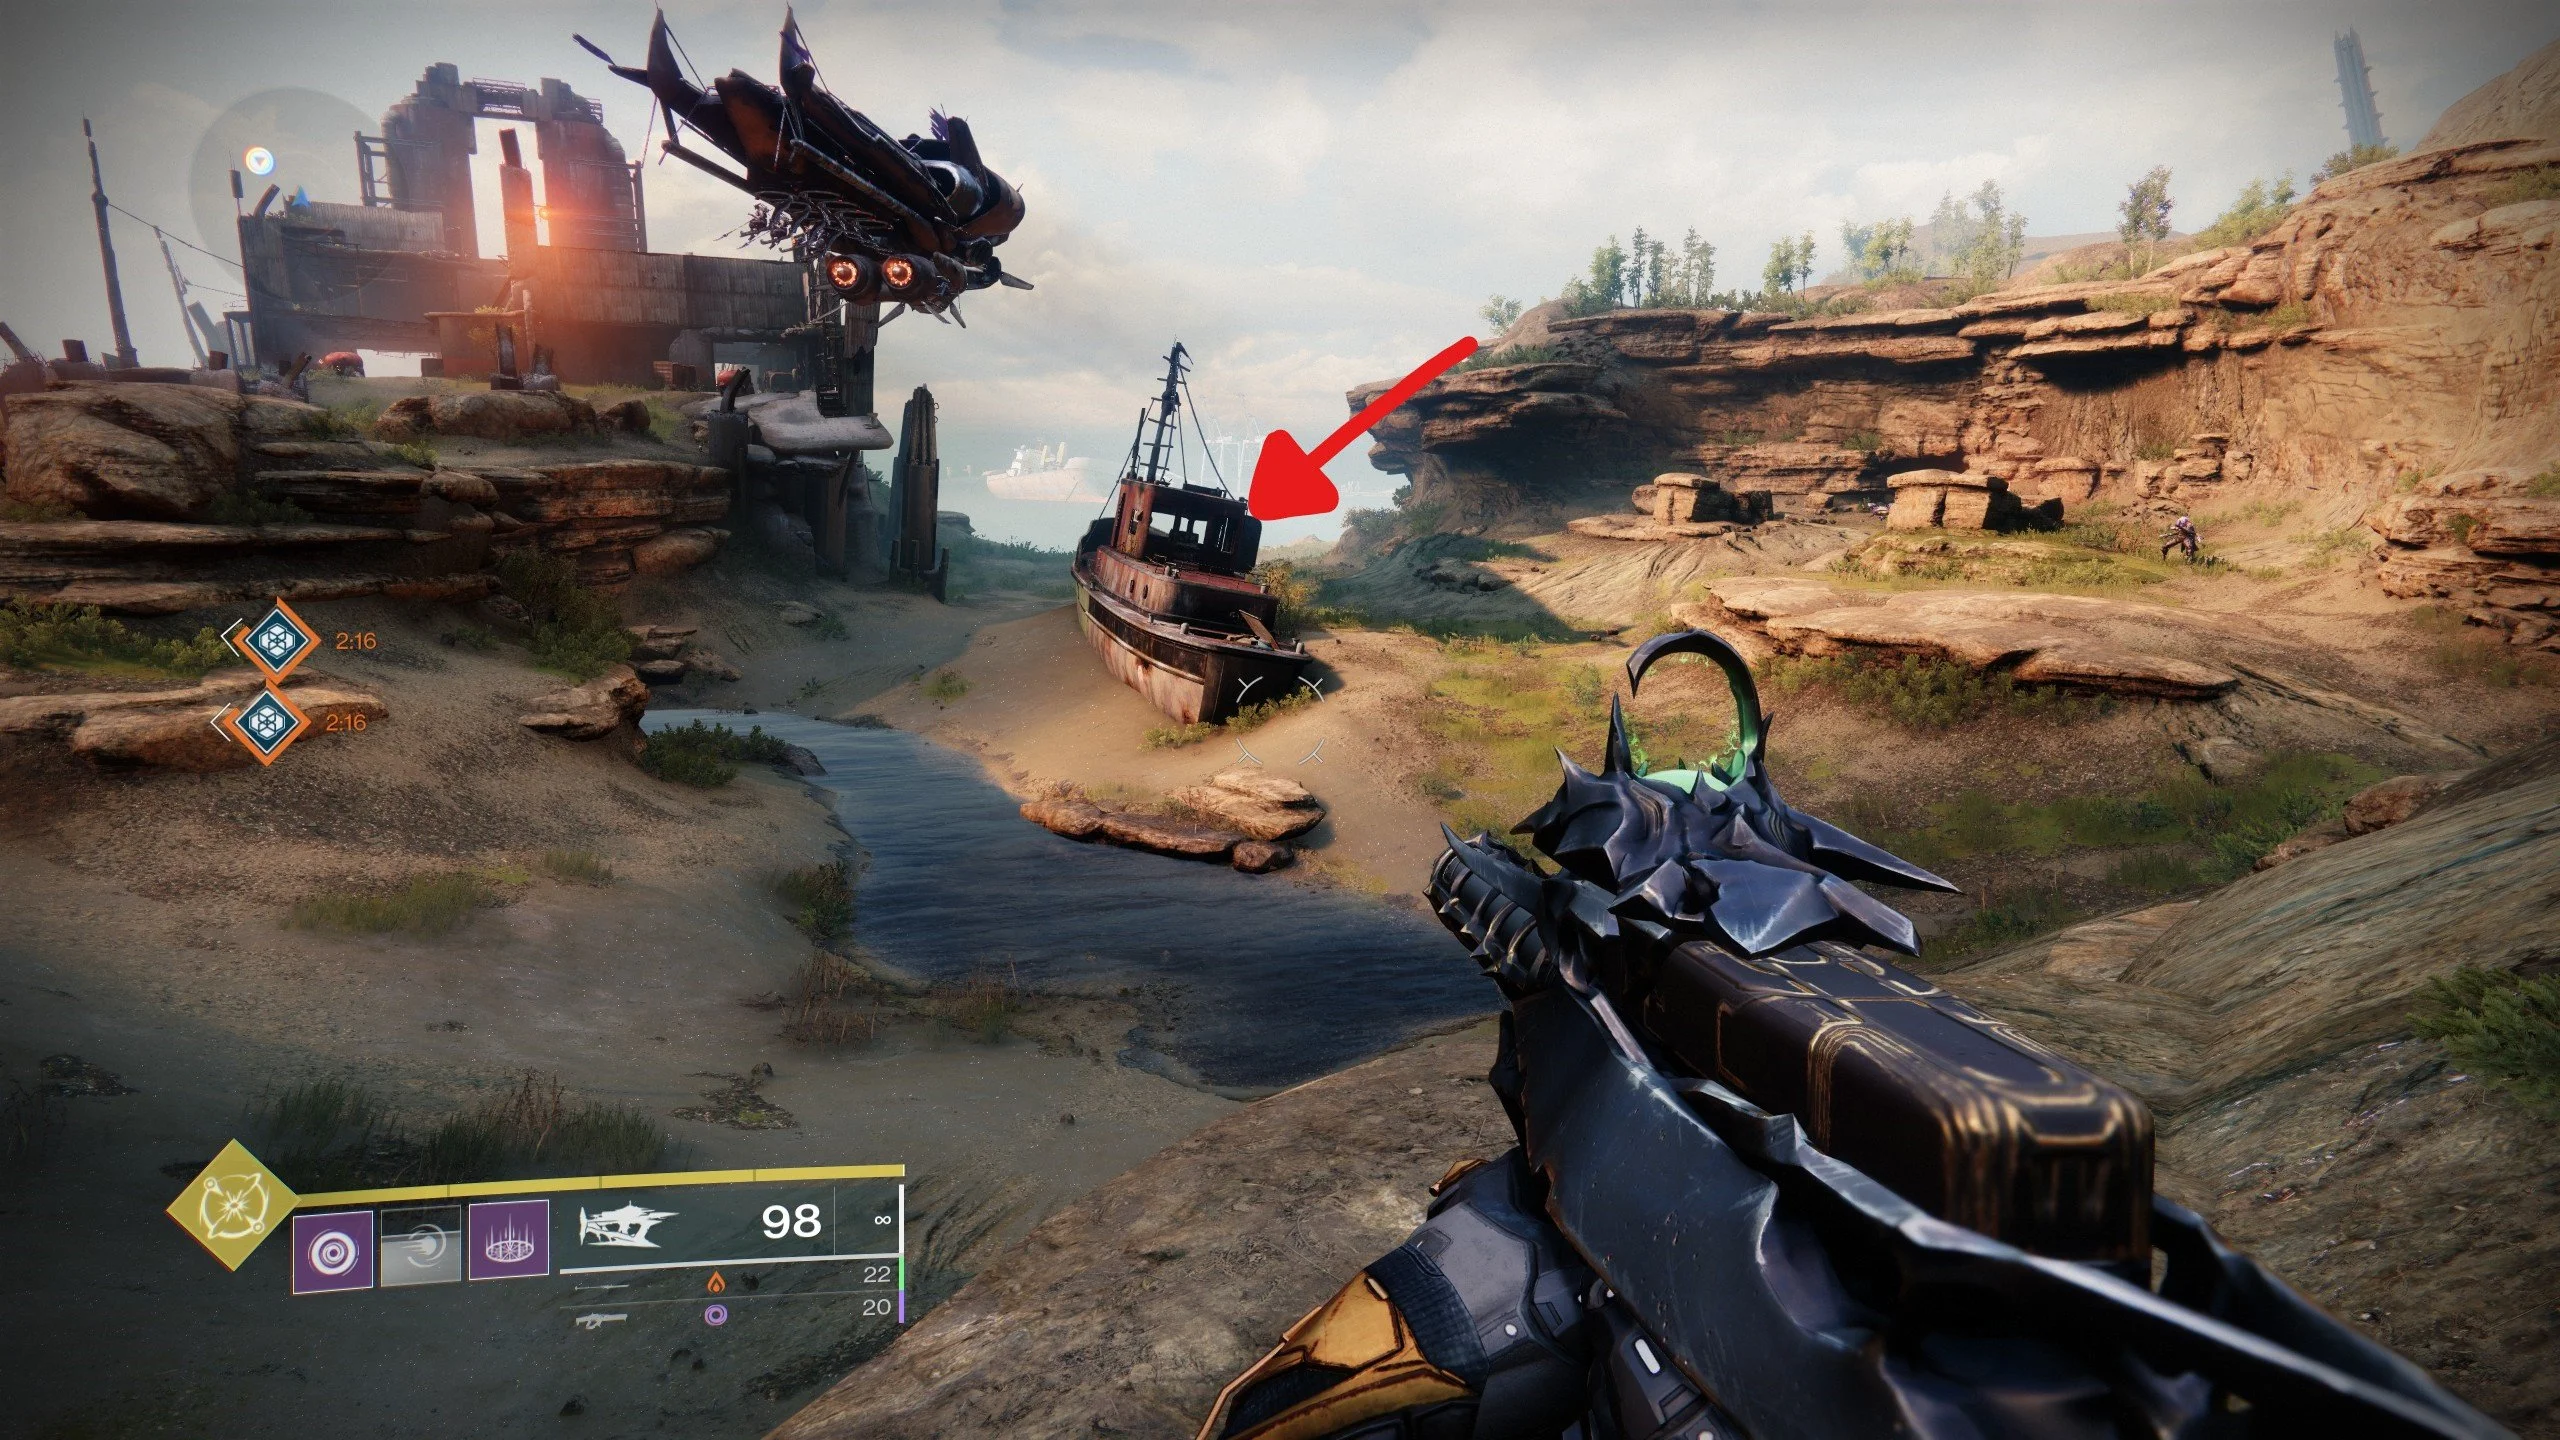
Once inside the Taken realm, you’ll see a portal behind a green barrier with a round tablet nearby. Stand on the arrow pointing toward the tablet and shoot it. A rune will appear with the prompt “Something whispers to the right…” Step off the arrow to the right, and you’ll be teleported past the barrier. Inside, you’ll find a podium holding your first Taken Osseous Fragment.
Next, head to the Shaping Slab located in Eris Morn’s apartment. Here you’ll pick up the first Barrow-Dyad quest, titled The Taken Path.
At this stage, Sloane and her Ghost Síocháin analyze the fragment and discover it carries two intertwined energy signatures in a quantum-dyadic state. A matching signal is detected on the Moon, linked to Hive activity. Sloane suggests using a Hive-related sigil to uncover hidden paths and illusions. You’ll need to remember this location, as you’ll return to it multiple times throughout the questline.
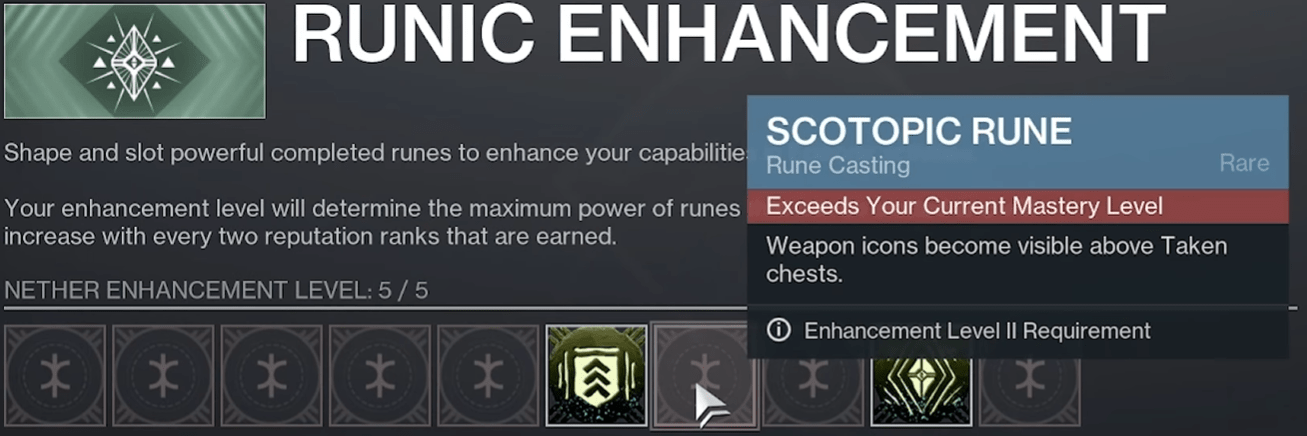
After speaking with the vendor, select the Heretical Rituals option and then “Runic Enhancement.” This feature lets you insert runes to increase your strength in Episode activities. Choose the 7th rune, “Scotopic,” which highlights weapon icons above Taken chests. This rune is mandatory for the Barrow-Dyad quest and costs 150 Sigil Shards if you don’t already own it.
Land in Sorrow’s Harbor on the Moon and head into the K1 Revelation Lost Sector. Near the start, destroy the orb shielding the arrow, then stand on it and shoot the tablet on the wall. Follow the prompt that instructs you to move backward. This action teleports you to the beginning of the Lost Sector and spawns Taken Blights and waves of enemies. Defeat them, and eventually, the Keeper of Power ogre will drop another Taken Osseous Fragment.
Travel to the Cosmodrome and spawn in Skywatch. Locate the barrier covering an arrow, destroy the orb above it, then repeat the arrow-tablet sequence. This time you’ll follow prompts to move forward, then left, then backward, teleporting through stages until you reach the Lost Sector’s end. Defeat the Keeper of Power here to collect your second fragment.
Return to the Shaping Slab and pick up three quests:
This quest takes place during the Altar of Sorrows on the Moon. Grab the Taken relic, complete the encounter, and defeat the final boss with the curse active to finish the step.
Load into Nightmare Hunt: Pride and progress until the boss fight against the Nightmare of Skolas. Pick up the Taken relic, use its powers, and extend your timer by defeating enemies. Once Skolas is defeated, interact with the glowing object to complete this curse.
Head to the EDZ’s Hallowed Grove Lost Sector. Grab the relic, manage its 25-second timer, and push through until the end where you can dispel the curse to finish the step.

Resume the Barrow-Dyad quest by running the Nether: Explore activity. Look for Hive Thrall statues near each spawn. Interact with them to summon a Wizard mini-boss. Defeat it, then return to the statue to collect a fragment. Repeat this three times to unlock the exotic mission “Derealize.”
This mission occurs on the Dreadnaught. After clearing the Mausoleum of enemies, including a Tormentor, take the Taken portal into the Ascended plane and platform your way forward until you reach the Trenchway. There you’ll face Dread Commander Vrhiisk, Seeker of Power.

The boss fight involves reducing Vrhiisk’s health, triggering immunity, and then defeating Blight Sentinels to spawn Taken Conduits. Defeat them, collect the curse, and destroy marked Blights to unlock a damage phase. Repeat this cycle until he teleports you into the Taken realm for the final battle.
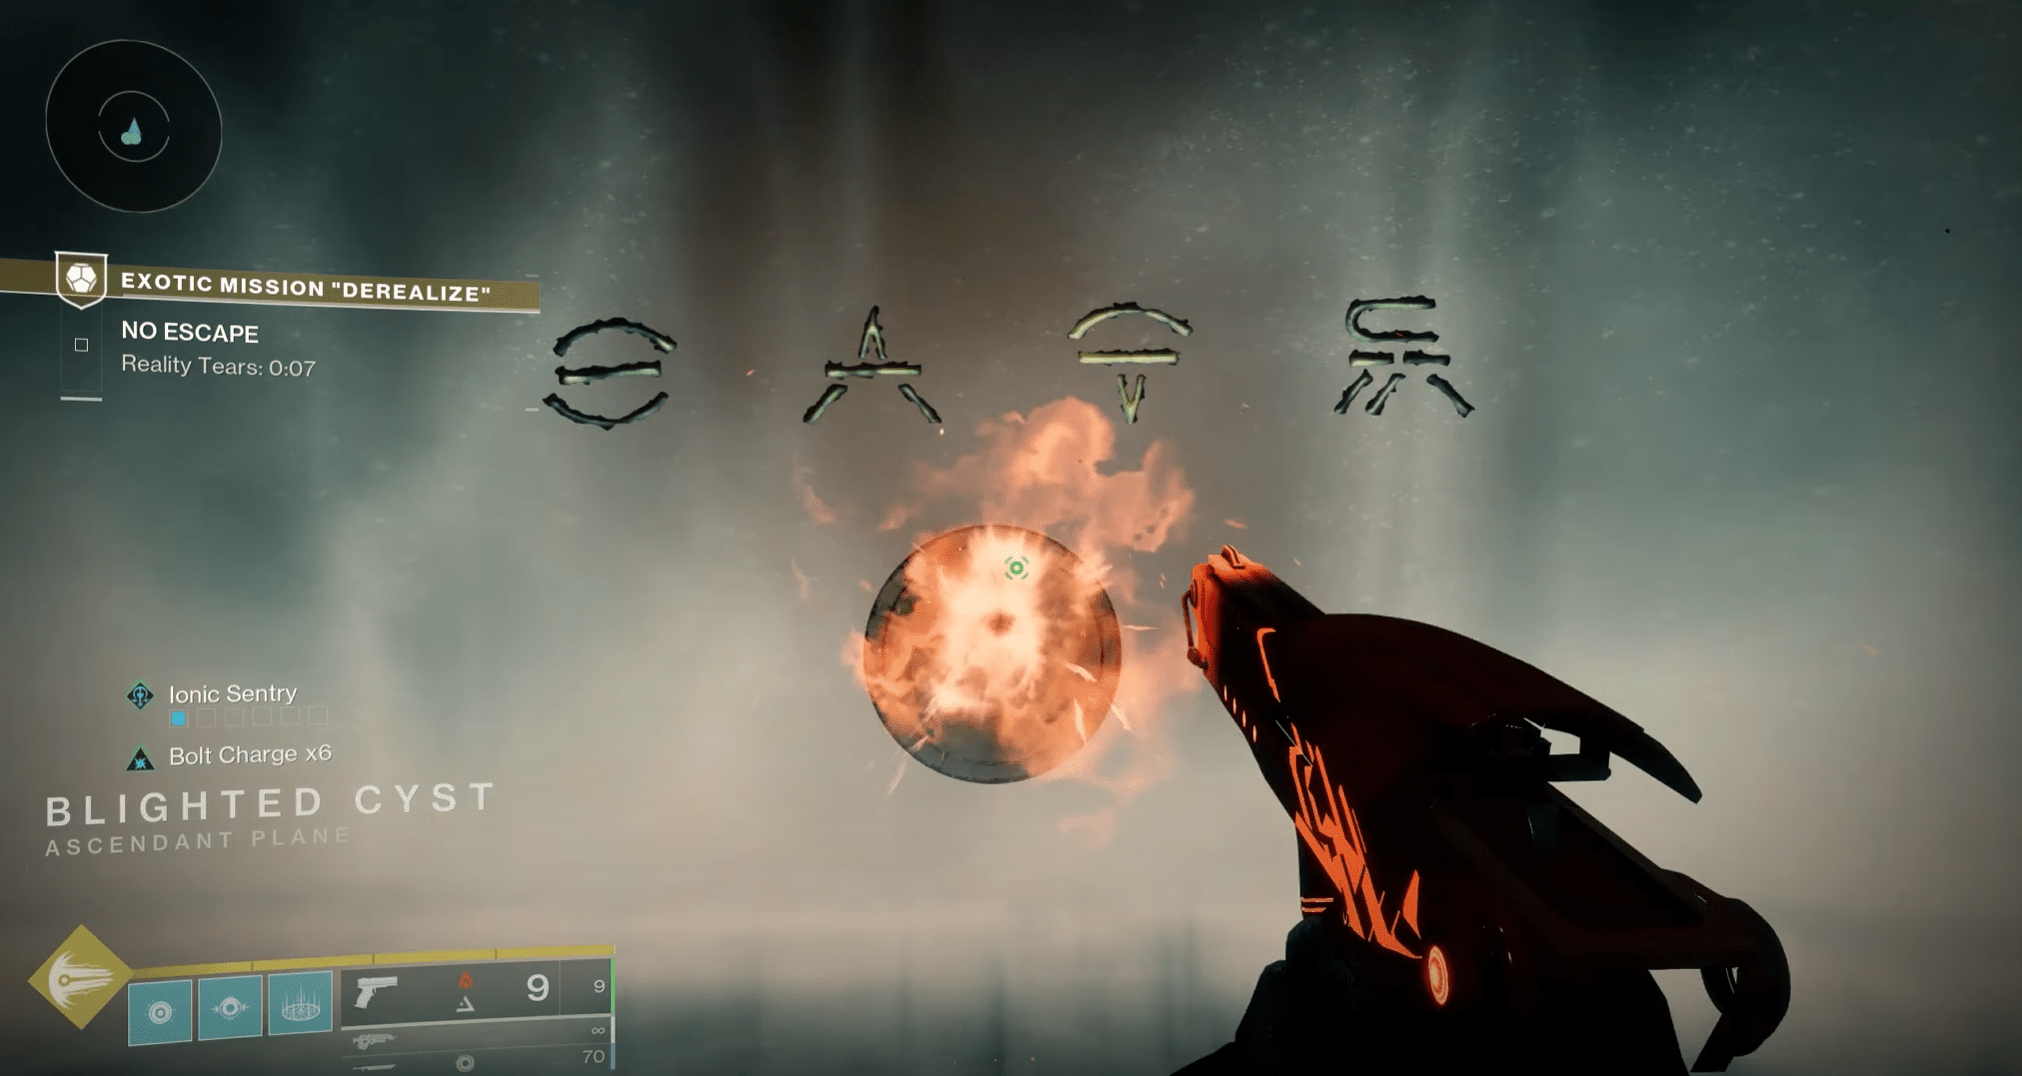
After defeating Vrhiisk, a rune puzzle awaits. Shoot the tablet to see the rune sequence and step in the arrow’s direction to lock in the correct rune. If the arrow doesn’t match, wait for the Reality Tears timer to teleport you to another plate. Repeat this process until all runes are input in the correct order.
Once complete, continue through the traversal section of the Dreadnaught until you reach the rally point for the final encounter.

Buy Destiny 2 Accounts
Grab your Destiny 2 account and start raiding today!
This battle features Xir-Kuur in both Taken and Not Taken forms. The encounter begins when you pick up the Barrow-Dyad from the altar, which you can immediately equip. Alternate between destroying blights, damaging the bosses, and surviving waves until the Not Taken version falls. Escape the arena by sealing the Anteroom, and a chest will spawn to complete the mission and secure your new exotic weapon.
Once you’ve unlocked the Barrow-Dyad, return to the Shaping Slab to pick up the Dyadic Ascension quest. This follow-up requires collecting additional fragments on the Dreadnaught and gradually unlocking intrinsic traits for the weapon. The key perk, Panic Response, has four levels and requires reputation milestones, perks, and more fragments. Final steps, such as obtaining the “Moment of Clarity” upgrade, are expected in Act 2 of Episode Heresy.
To unlock the final step, finish the Derealize exotic mission first. Afterward, continue with the Dyadic Ascension questline, which opens up once you’ve gathered Osseous Fragments and leveled up your reputation at the Shaping Slab.
Yes. As long as the Episode: Heresy activities remain active during The Final Shape expansion, you’ll still be able to obtain Barrow-Dyad by following its related quest steps.
Yes, the full Barrow-Dyad quest can be done solo. However, some encounters, particularly in Derealize, are demanding and may require careful strategy to complete alone.
Barrow-Dyad is included in Destiny 2’s Episode: Heresy, which launched during The Final Shape expansion period.
The Barrow-Dyad exotic SMG is more than just loot—it’s an immersive questline filled with puzzles, story, and Taken lore. Each step, from unraveling rune mechanics to surviving the Derealize mission, reinforces its theme of power and corruption. By the time you’ve mastered its journey, you’ll not only hold one of the most unique exotic weapons but also have experienced one of Destiny 2’s most engaging narratives.