


+15 More
Digital Aura Portal - FZCO
Building A1, Dubai Digital Park, Dubai Silicon Oasis, Dubai, United Arab Emirates Premises Number 72647 - 001
Business registration number: 70647
gamer-choice.com © 2026
Digital Aura Portal - FZCO
Building A1, Dubai Digital Park, Dubai Silicon Oasis, Dubai, United Arab Emirates Premises Number 72647 - 001
Business registration number: 70647
Karve of the Worm is finally here with the launch of Into the Light, bringing back two iconic exotic missions with fresh updates. In this guide, we'll show you exactly how to obtain the Karve of the Worm exotic jumpship by completing a very specific Triumph within the Whisper mission. This is one of the more interesting challenges this season and a must-do if you're aiming to unlock this sleek new ship.
Karve of the Worm is a newly introduced jumpship in Destiny 2 Season 23. Its design appears to draw heavy inspiration from the Vex, one of the game's long-standing enemy factions. To acquire this ship, you need to complete a Triumph called Oracular Seeker, which involves locating and shooting seven hidden Oracles during The Whisper mission. This walkthrough will guide you to each Oracle location with ease.
If you’d rather skip the hassle of hunting down these Oracles, there's an alternative route. You can purchase the Karve of the Worm Exotic Ship boost service from Gamer Choice. Instead of spending hours searching for Oracles, let a professional Destiny 2 player take care of the challenge for you. Gamer Choice ensures a safe and streamlined process from order placement to completion. Save your time and effort — get your Karve of the Worm today!

Buy Destiny 2 Boost
Get Destiny 2 boosts from trusted pros now!

Before diving into the Oracle locations in Destiny 2, here are a few important notes:
Interestingly, there's a helpful bug: if you shoot an Oracle and return to its spot later, your weapon's reticle will still turn red even though the Oracle is gone. This same behavior appears in other areas, giving us strong hints where future Oracles will be located. Please remember that unconfirmed Oracle locations are speculative until they’re officially added. We’ll keep this guide updated weekly as new Oracles become available.
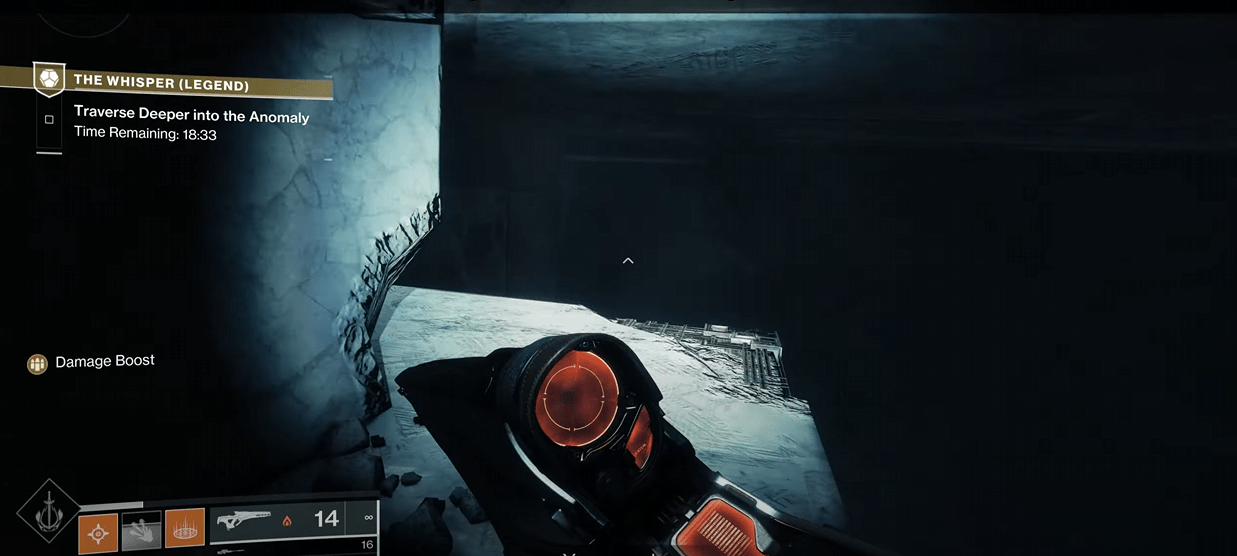
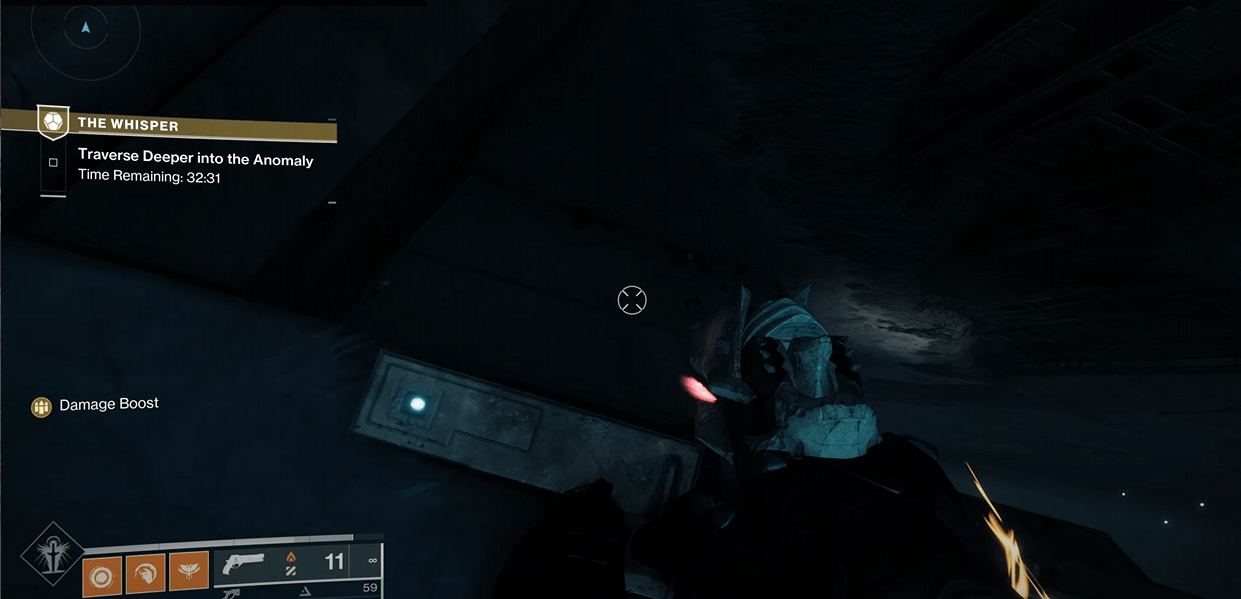
The first Oracle is located shortly after jumping down the hole following the initial Taken Blight orb encounter. After jumping into the hole, you’ll begin a red-lit platforming section. As you progress, look for a red platform facing a wall. Don’t jump onto it. Instead, turn left and hop over a barrier, then follow the ledge to the left. That’s where you’ll find the first Karve of the Worm Oracle.
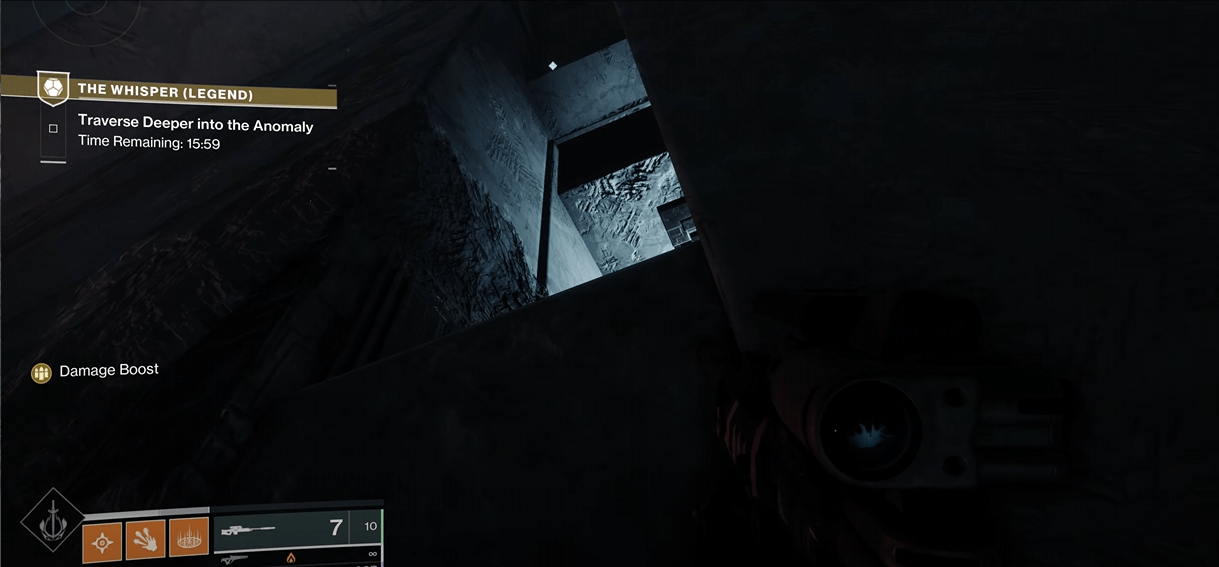
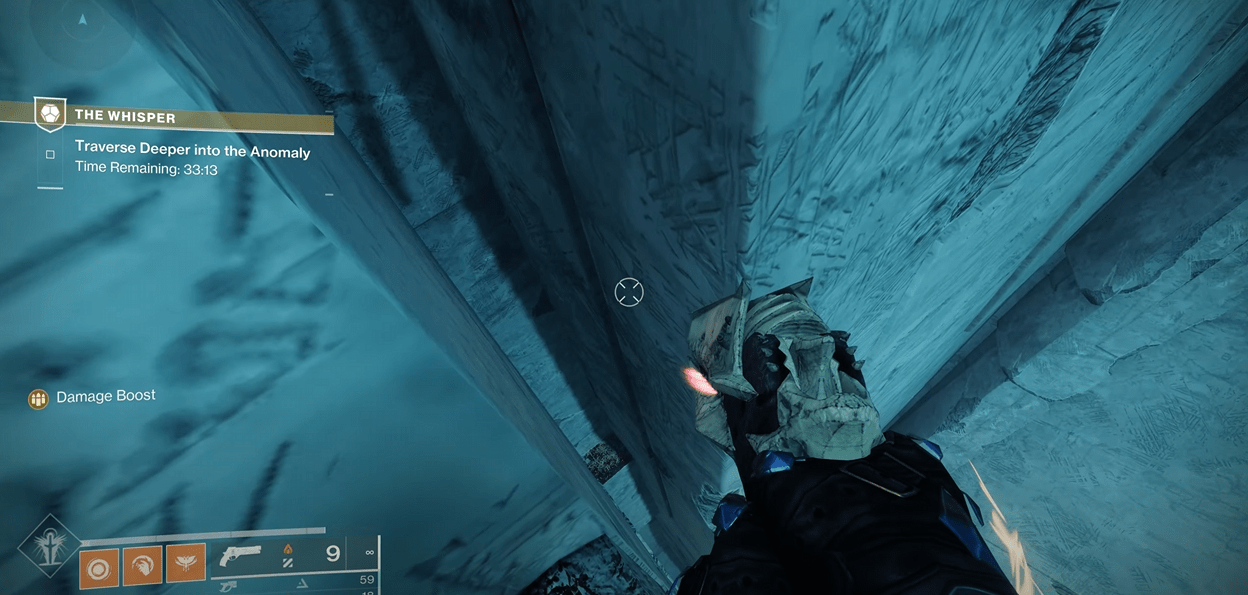
The second Oracle is nearby. Continue through the jumping puzzle until you reach a small platform that moves up and down. Ride it upward and proceed to the next platform. Before entering the corridor to the next area, look up and behind from the final wall-attached platform. You’ll see a glowing spot in the wall — double jump into that gap. Inside the room, you’ll see some dead bodies and the second Oracle on the right side.
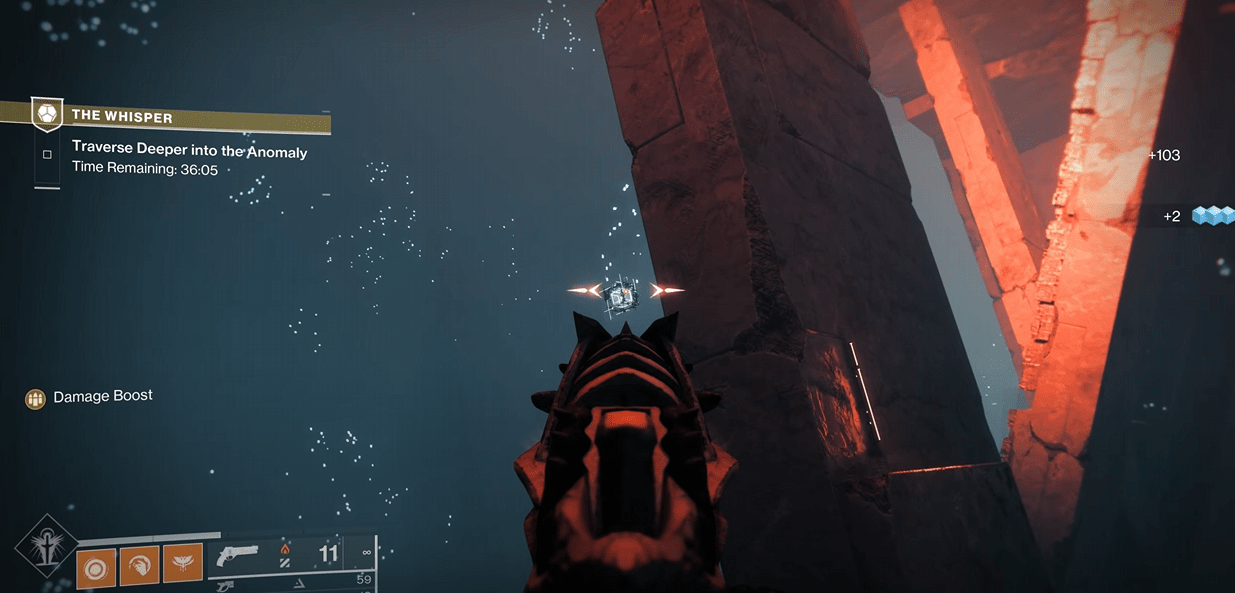
This potential Oracle location is still in the jumping puzzle. Continue onward until you eliminate a sniper enemy. Jump to the sniper’s ledge but stay put — look behind you and spot a floating cube. Shoot it to reveal two hidden platforms. Jump across them and stand on the second one. You’ll see where the third Karve of the Worm Oracle is expected to be placed — your reticle will turn red when aimed at that location.
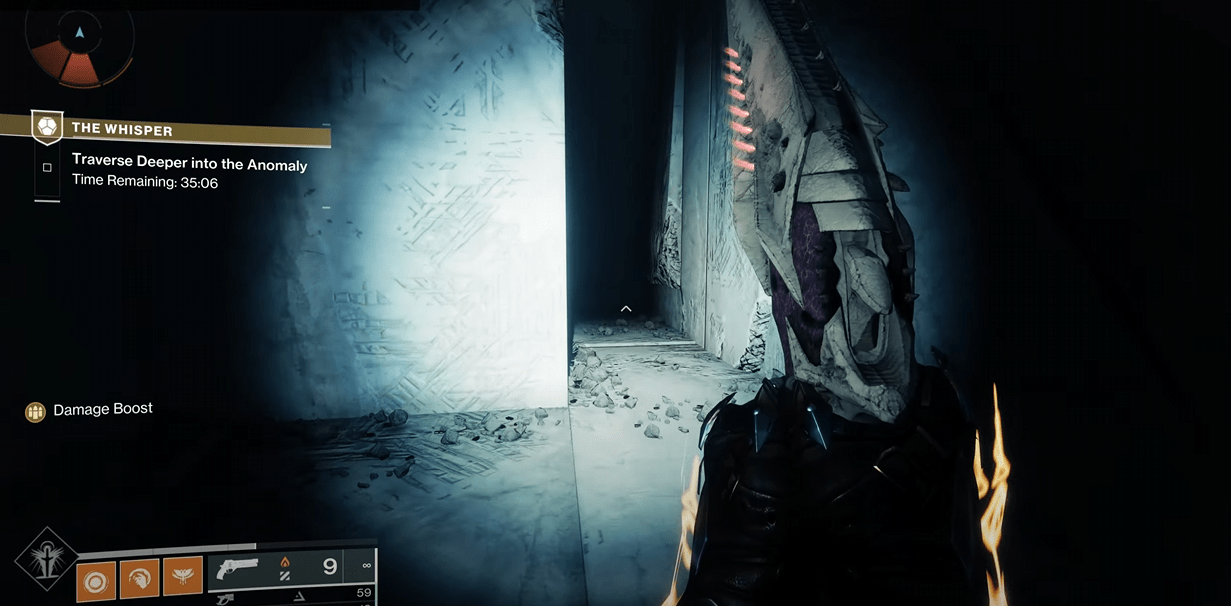
Further ahead in the mission, you’ll encounter a room filled with massive orbs and vacant slots, and the boss voice says “You shall drift.” Turn right and leap over the large orbs to reach the final empty slot. Enter it to find a green-tinted room overrun with foliage. Drop into the crack at its center and deal with some enemies. Continue forward through a narrow corridor, then turn right and crouch into a small opening. You’ll arrive in the room where the fourth Oracle is predicted to spawn.
Backtrack to the green room. On the right wall, you’ll notice grassy ledges. Use them to climb around the room. Eventually, you’ll reach the highest grassy ledge. From there, look left and drop onto a smaller ledge below. Crouch through a hidden entrance into a secluded room where the fifth Karve of the Worm Oracle is expected.
While still near the fifth Oracle’s location, perform a long downward jump to reach a curved ledge wrapping around a wall. If you hear the phrase “You shall drown in the Deep,” you’re in the right place. Follow this ledge until it ends, then jump down into another concealed chamber where the sixth Oracle should appear in the future.
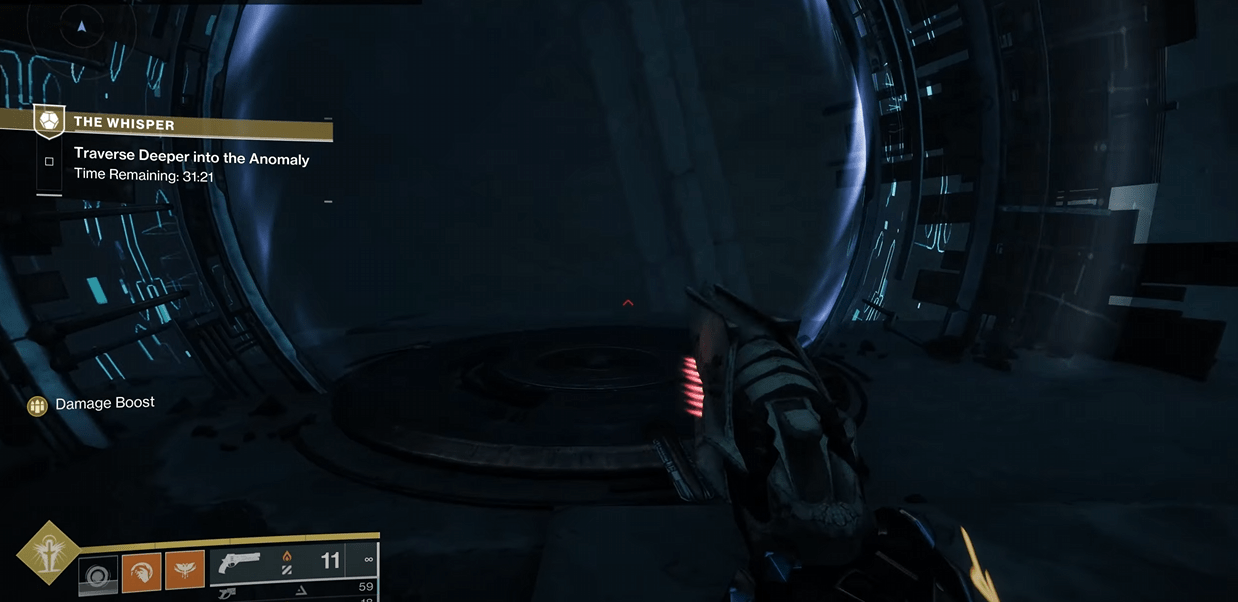
The final Oracle is predicted to be located behind a circular portal. To reach it, return to the start of the ledge near the voice line and jump to the opposite wall, using a few platforms to climb up. Approach the inactive portal and go through it. The Oracle should be found there, as the red reticle bug activates at that spot.
This quest is time-gated, so not all Oracles are available right away. During the first week after the update, only the first two Oracles can be found, with the rest being added gradually in the following weeks.
You need to complete the Oracular Seeker Triumph, which involves locating and shooting down seven hidden Oracles scattered throughout The Whisper mission.
No, progress is not shared. Each player must individually shoot down the Oracles, so doing the mission solo makes it easier to ensure your progress counts.

Buy Destiny 2 Accounts
Grab your Destiny 2 account and start raiding today!
Acquiring Karve of the Worm isn’t overly difficult. All you need to do is locate seven hidden Oracles scattered throughout The Whisper mission and shoot them down. However, only two are currently live in the game — the remaining Oracles are being introduced gradually with future updates.
Thanks to the red reticle bug, we’ve been able to identify possible Oracle spots ahead of time. This makes it easier to prepare yourself for the upcoming weeks. Grab the first two Karve of the Worm Oracles now, and keep this guide handy to find the rest as they go live. And if you'd prefer to skip the grind entirely, Gamer Choice has your back with a quick and safe Karve of the Worm boost service, getting you that stylish jumpship without the stress.