


+15 More
Digital Aura Portal - FZCO
Building A1, Dubai Digital Park, Dubai Silicon Oasis, Dubai, United Arab Emirates Premises Number 72647 - 001
Business registration number: 70647
gamer-choice.com © 2026
Digital Aura Portal - FZCO
Building A1, Dubai Digital Park, Dubai Silicon Oasis, Dubai, United Arab Emirates Premises Number 72647 - 001
Business registration number: 70647
Swarm, Riot Games’ latest PvE mode, is set to become one of the most immersive cooperative experiences yet. Whether you enjoy solo action or team-based gameplay, this game mode offers something for everyone. This Swarm map guide is here to help you navigate every terrain and challenge the mode throws at you.
In Swarm, players can choose from nine champions: Jinx, Seraphine, Aurora, Illaoi, Leona, Xayah, Yasuo, Riven, and Briar. Each champion brings unique combat mechanics to four distinct maps, each with its own layout, bosses, and environmental hazards. You'll even encounter iconic League champions like Aatrox, Yuumi, and Rek’Sai in the form of dangerous enemies.
This guide delivers in-depth strategies tailored to each map, champion choice, and whether you're running solo or with friends on various difficulty levels.

Buy LoL Boost
Get LoL rank boosts from trusted players!

While Swarm is open-ended in terms of strategy, the foundation of success lies in smart movement, XP collection, and proper use of game mechanics. This Swarm map guide outlines a baseline strategy that’s effective across all champions and scenarios.
When a Swarm run begins, your first priority is to gather as much XP as possible by defeating waves of enemies. This enables you to unlock your E ability by level 3 and your Ultimate by level 6—both crucial for staying alive and scaling through the match.
Keep rotating across the map, especially around the edges where loot boxes are most abundant. These boxes yield gold, health, and XP—core resources for long-term survival and progression.
When Yuumi missions appear, complete them as they offer valuable buffs. Likewise, mini-bosses that spawn periodically drop cards, which you can either use instantly or save to evolve powerful weapons.
Bel’Veth missions are another key activity. Completing them grants significant in-game advantages, helping you sustain momentum. Staying proactive in these dynamic objectives will help maximize your efficiency and power in every game.
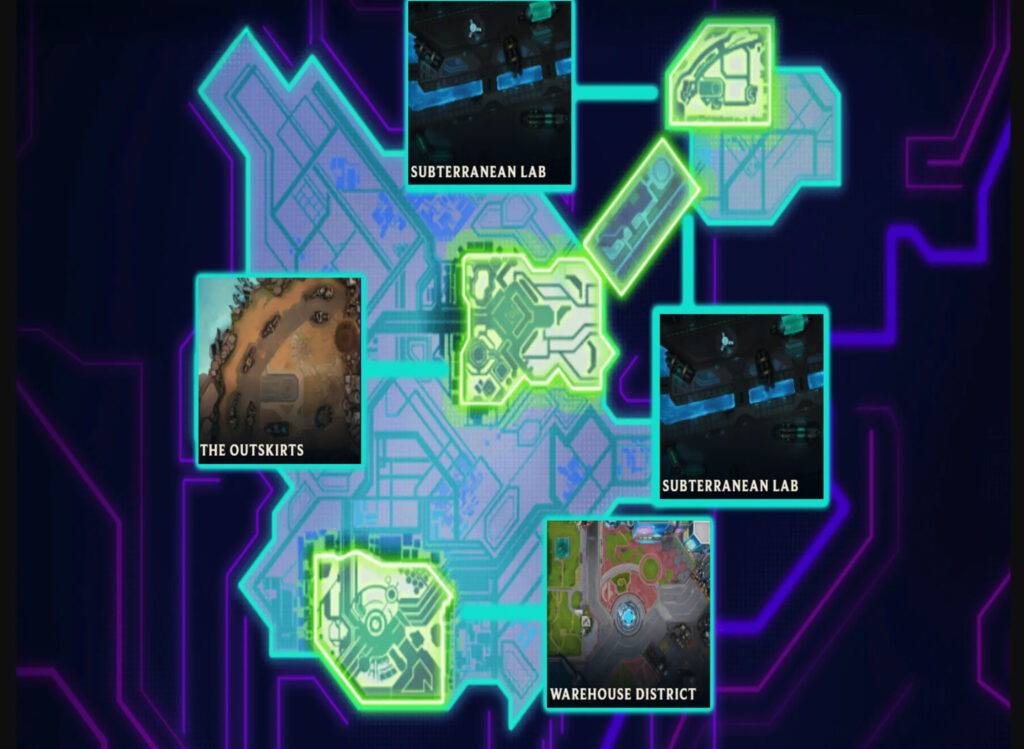
With core strategy in place, this section of the Swarm map guide explores each of the four maps. Understanding map layouts and hazards is essential for maintaining control and executing effective rotations.
On the first Swarm map, avoid the narrow and cramped areas, particularly the bottom right corner. These spots limit mobility and are especially punishing if you lack strong AOE weaponry.
Instead, stick to wide, open zones—like the center fountain area—for better pathing and access to healing. The top left is another efficient farming zone early on, as it provides opportunities to trap enemy spawns and collect loot quickly. Strategic use of space leads to safer and more productive gameplay.
The second Swarm map, The Outskirts, culminates with a boss fight against Briar after 15 minutes. Known for her aggressive combat style, Briar can quickly overwhelm players who aren’t well-prepared.
The key feature on this map is a massive cannon located at the top. A battery is required to power it, which spawns nearby. Once inserted, the cannon can fire a powerful blast at enemies.
Because the cannon has a long cooldown, it’s best to hold off on using it too early. The battery doesn’t expire, so keeping it nearby and activating the cannon only during intense moments is a smart tactic. This area can serve as a stronghold during difficult waves.
Avoid the cramped bottom right of the map. It's a trap zone that can get you cornered quickly. Focus your movement around the central region instead, where there’s plenty of room and better access to battery spawns for cannon usage.
The Subterranean Lab is the third map in Swarm and is one of the more endurance-focused stages. Players must survive until the 15-minute mark, after which they’ll confront the powerful boss Bel’Veth.
This map includes two unique environmental tools: freeze zones. When a player stands within one of these areas for a few seconds, it activates and freezes nearby enemies.
Though you may not need these early on, they become essential in later rounds. As enemy density ramps up, use these freeze traps to control the horde and regroup. Timing is everything—use them as soon as enemy pressure starts to build.
Avoid the top right corner, especially in the later stages of the game. This area becomes increasingly difficult to manage due to its tight confines. It can be used early for XP farming if you have strong AOE weapons, but reposition as the match intensifies.
Always remain in open zones for easier dodging and better rotation. Staying near the freeze zones and rotating between top and bottom areas as each zone recharges is a key tactic for survival.
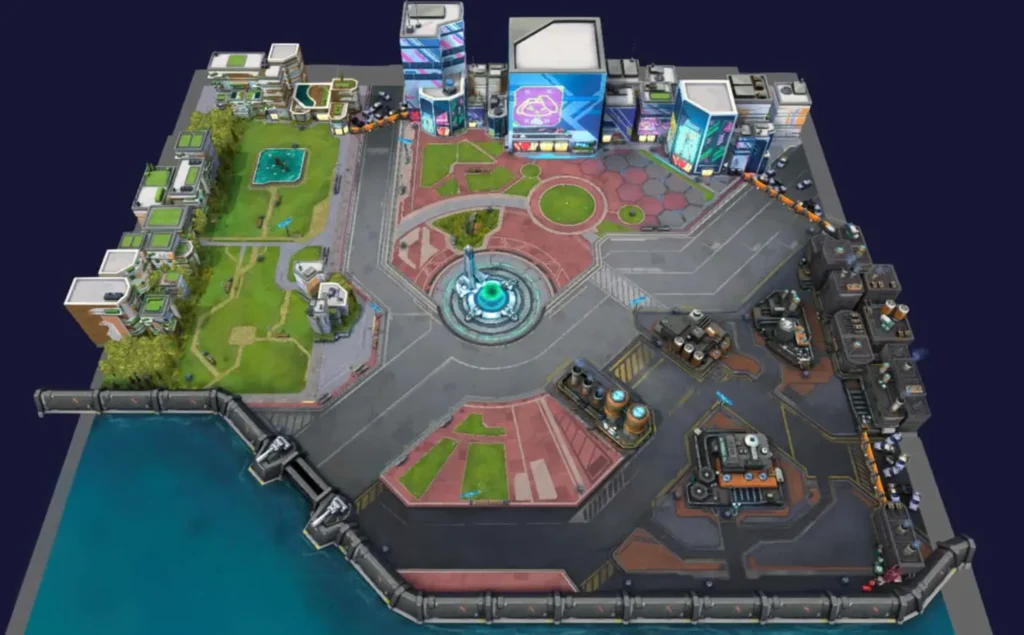
The Beachhead is the final and most difficult map in Swarm. Surviving here for 15 minutes and defeating Aatrox multiple times is your ticket to unlocking the matchmaking game mode.
This map provides two powerful tools to assist you. On the left side is the city, where Miss Fortune provides aerial support by sniping enemies. You can collect XP from the enemies she eliminates.
To the right, along the beach, there are cannons that continuously fire at enemies. These act as automated crowd control and can be a critical source of sustained support.
You can align your strategy depending on your champion. Ranged users may benefit more from staying near Miss Fortune in the city, while melee fighters could prefer the cannon-heavy beach area for safer engagements.
Avoid congested paths near the beach and the far left side of the map in later phases. These zones tend to attract large groups of enemies, increasing your risk of being overwhelmed.
Open areas offer greater safety and maneuverability. Here are two positioning strategies to consider:
Use these tools based on your build and preferred combat range. Both strategies are valid and enhance your chances of survival when used correctly.

Buy LoL Accounts
Jump in with ready-to-play League accounts!
Becoming proficient in Swarm requires mastery of both champion mechanics and map-specific strategies. Each Swarm battleground features its own flow, from the hazards of The Outskirts to the support systems in The Beachhead.
This Swarm map guide gives you a detailed foundation to play smarter, position better, and survive longer. Focus on your strengths—choose melee or ranged tactics based on the map—and leverage each map’s unique elements like freeze zones, cannons, and support NPCs.
Adaptation is the key. Use this Swarm map guide to refine your runs, handle increasing waves of enemies, and ultimately conquer League of Legends’ most thrilling PvE challenge to date.