


+15 More
Digital Aura Portal - FZCO
Building A1, Dubai Digital Park, Dubai Silicon Oasis, Dubai, United Arab Emirates Premises Number 72647 - 001
Business registration number: 70647
gamer-choice.com © 2026
Digital Aura Portal - FZCO
Building A1, Dubai Digital Park, Dubai Silicon Oasis, Dubai, United Arab Emirates Premises Number 72647 - 001
Business registration number: 70647
Welcome to the most straightforward Shattered Veil Easter Egg guide for Black Ops 6 Zombies you’ll find anywhere. This walkthrough breaks down each step in detail so you can secure the final rewards – Carver’s exclusive skin and a unique calling card. No advanced knowledge is needed; the guide is simple and direct so anyone can follow along.
Keep in mind, developers may tweak certain steps in future patches, so revisit this guide if anything feels out of place. Now, gear up, select your perks, and get ready to complete the Shattered Veil main quest by defeating the Z-Rex boss at the end.
If you’d prefer to skip the grind and jump straight to the rewards, Gamer Choice has you covered. Our professional team can finish the Shattered Veil Easter Egg for you quickly and efficiently, including the main quest and optional side objectives. With us, you’re guaranteed the fastest completion time and the best price.

Buy CoD Boost
Get CoD boosts today and crush every match!

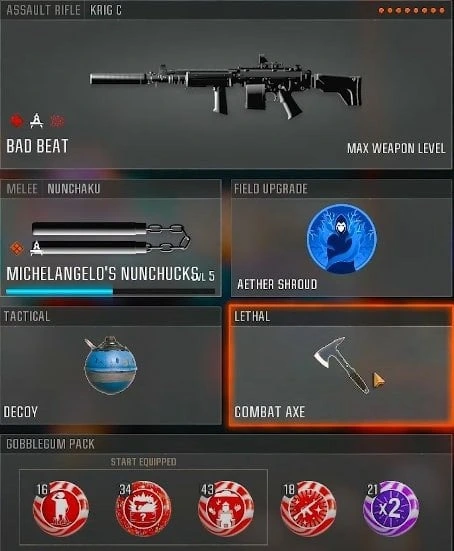
To set yourself up for success in this Shattered Veil Easter Egg walkthrough, you’ll need the right loadout. Equip Aether Shroud as your Field Upgrade. Carry a Combat Axe and pick your preferred Gobblegums. For your primary weapon, a Krig C is an excellent choice, but any strong assault rifle will get the job done.
At the start of the match, you already spawn with one Combat Axe. Turn around to grab a second from the log behind you—both will be necessary later.
As you progress, watch for small gray boxes scattered throughout the map. Shoot them all. They usually drop Salvage, but one box will contain an essential quest item. It could be the very first box or much later, so don’t skip any. This step is critical to unlock future upgrades, so make sure to destroy every box while exploring.
Unlocking Pack-a-Punch is the simplest part of the entire Shattered Veil Easter Egg in Black Ops 6 Zombies. The game provides you with quest markers on-screen, making navigation easy. Just follow the prompts step by step.
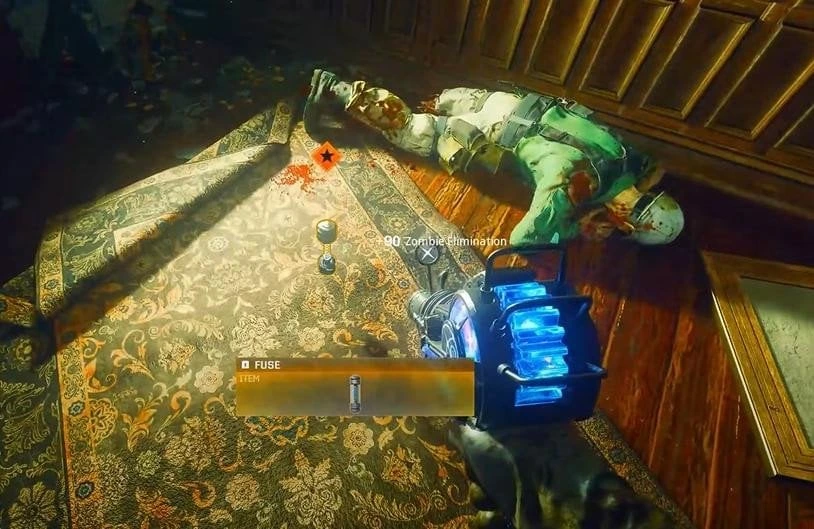
You’ll be asked to collect two specific components. The markers will guide you to each one. After obtaining both, take them to the elevator and perform the repair.
Ride the elevator down to a massive chamber where Samantha is located. Keep following the directional arrow until you reach the Pack-a-Punch machine. Once unlocked, you’re ready to begin the first real Easter Egg objective.
To properly start the Easter Egg, you’ll need the Ray Gun Mark 2. While a Wonder Bar Gobblegum offers a chance at the drop, the guaranteed method is to craft it yourself. Here’s the process:
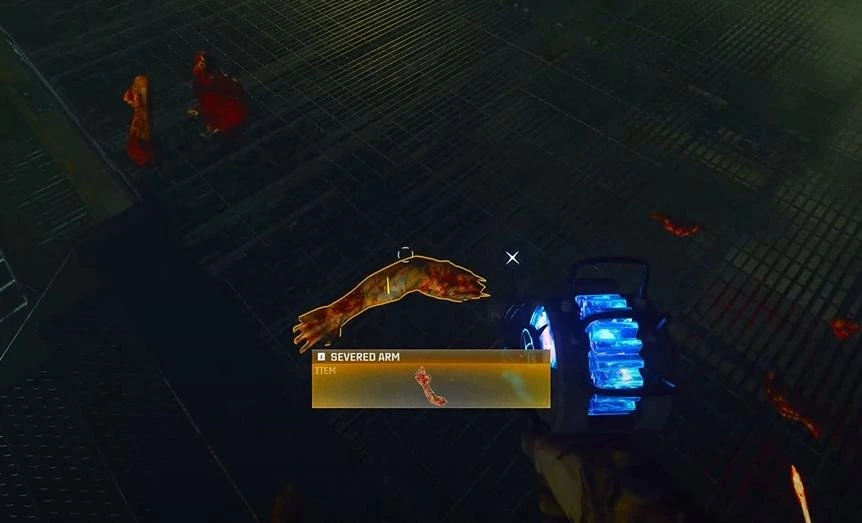
Go to the containment terminal by Pack-a-Punch and enter your 4-digit code. A Doppelghast enemy will spawn—defeat it to obtain a Severed Arm. Bring this arm to the Armory near the underground portal and place it on the fingerprint scanner. The scanner will unlock, granting you the crafted Ray Gun Mark 2, which you can later upgrade.
To begin upgrading your Ray Gun Mark 2, you need to gather three empty canisters. The first is obtained by shooting Dark Aether crystals. Out of four possible crystals, only one will drop the canister, chosen randomly. Here are the locations:
Keep shooting them until the canister drops. Collect it, and you’re set for the next step.
For the second canister, you’ll need a Gersh Grenade, but don’t worry—it’s guaranteed. Follow these steps:
With this second canister secured, you’re halfway done.
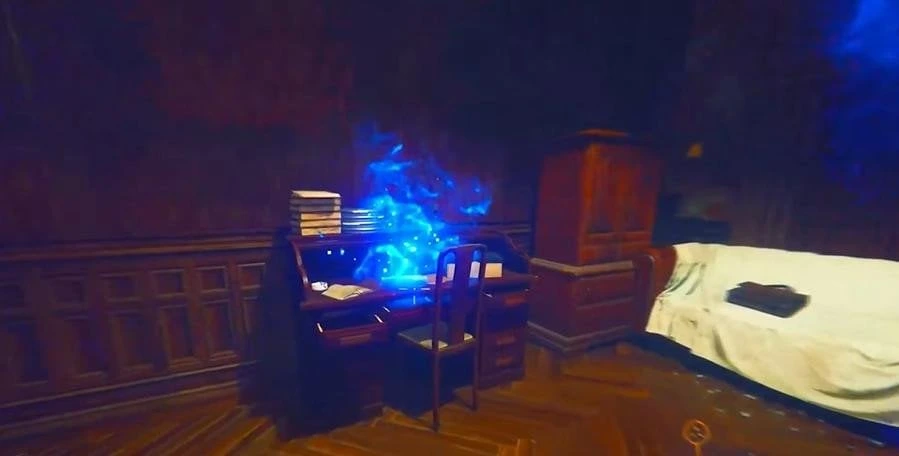
The third canister can be seen inside a human incubation chamber in Samantha’s room. It’s locked, so follow these steps to retrieve it:
Now with all three empty canisters collected, you’re ready to start upgrading your Ray Gun.
With the canisters in hand, it’s time to craft your first Ray Gun upgrade. Head near Speed Cola and locate the receptacle. Place one canister there to begin.
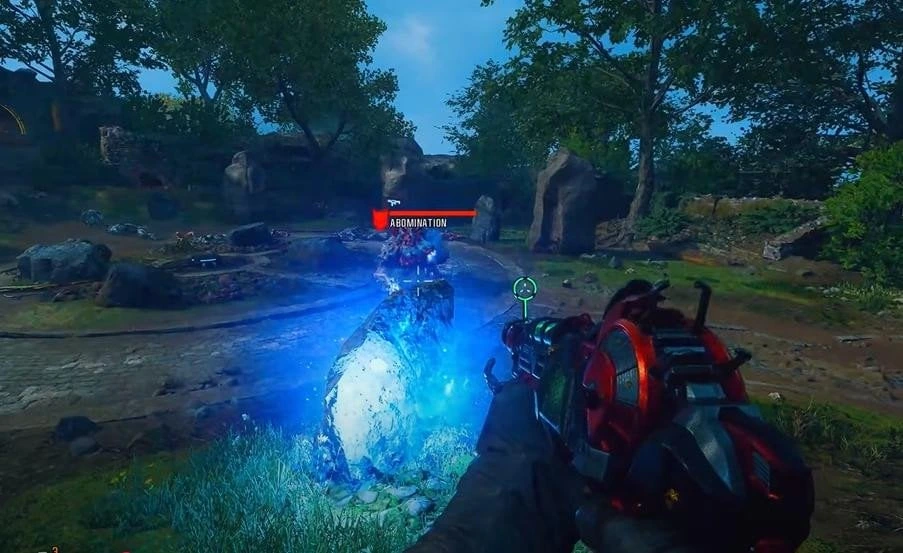
This triggers the appearance of an Abomination. The objective is to manipulate it into interacting with three special rocks:
The Abomination’s attacks are unpredictable, so patience is key. Ideally, attempt this at the end of a round when there are fewer zombies to distract you.
Once all rocks are broken, a second phase begins. The Abomination despawns, and vermin enemies appear, aiming to sacrifice themselves into a glowing pool. You must:
After succeeding, head up the stairs and collect the glowing vial from the ritual area. Bring it to the underground workbench by the portal. Place the vial and craft the upgrade—congratulations, you now wield the automatic Blue Explosive Ray Gun. One upgrade done, two more to follow.
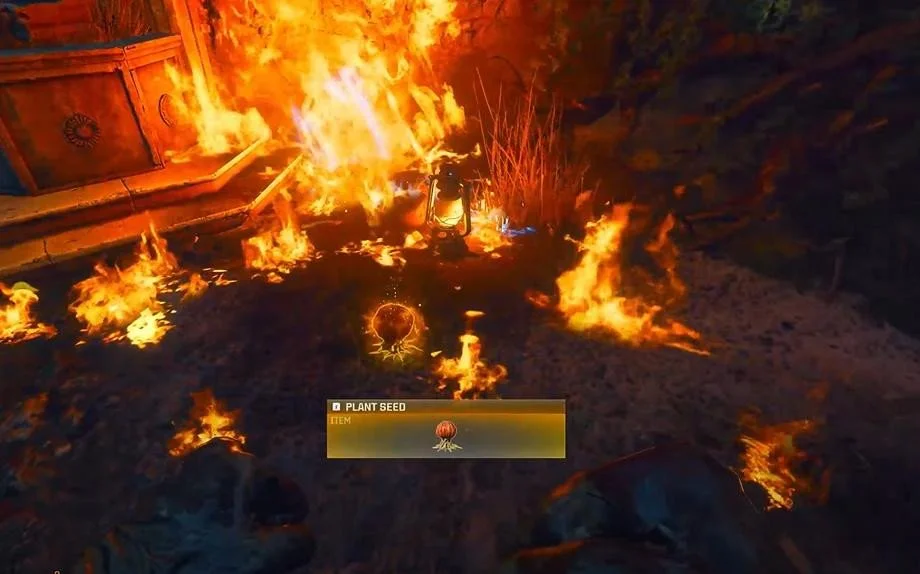
To unlock the Yellow Toxic Ray Gun upgrade in the Shattered Veil Easter Egg, your first step is to collect four toxic plant seeds. These seeds come from special plants that grow larger every round. When they reach full size, they can drop a seed—but only if you defeat them the right way.
Here’s how to handle it properly:
Seed plant spawn locations include:
Not all plants appear in every game, so you’ll need to check all potential locations. Don’t waste bullets—stick to fire or explosives. A handy tip: grab the free Molotov from the dinosaur room near the bar to conserve resources.
After collecting all four seeds, head into the Conservatory. Place one of your canisters into the receptacle here to start the upgrade process. Now you’ll need to plant each of your four seeds in glowing pods nearby:
Each pod has a progress bar. While it fills, defend it against purple-eyed zombies. You can do multiple pods at once, but it’s safer to complete them one by one. After all four are finished, return to the canister site and claim the toxic canister. Go back to spawn, use the crafting bench at the start of the map, and combine it to create the Yellow Toxic Ray Gun.
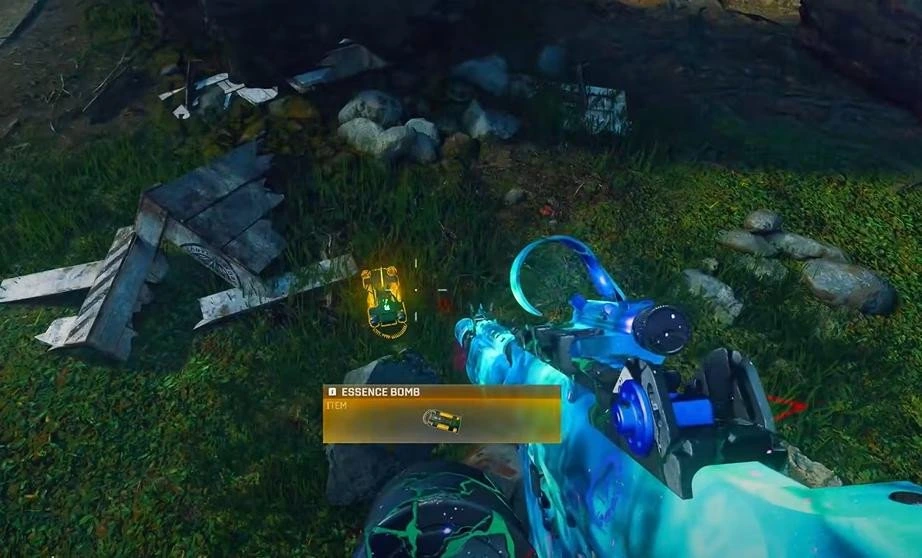
To earn the Purple Shotgun Ray Gun upgrade in the Shattered Veil Easter Egg, you’ll need the Essence Bomb plus two Reflectors. This segment begins after shooting enough gray salvage boxes—eventually, one will drop the Essence Bomb. If it doesn’t appear right away, keep breaking boxes until it does.
Once you have the bomb, visit two lion fountains:
With both reflectors and the Essence Bomb, head underground. Locate the level three wall near the ritual site and place the bomb on the rubble. The explosion reveals a hidden chamber full of petrified statues.
Go to the back wall, place a canister, and a beam of light will shine through the room. Now you’ll begin the reflector puzzle:
After all three Doppelghasts are defeated, collect the purple canister. Then, head to the Director’s Quarters (upper-left area of the map). Inside, you’ll find a crafting bench where you can create the Purple Shotgun Ray Gun. With this, you’ll have all three Ray Gun upgrades completed.

To begin the Purple Ray Gun Ritual in the Shattered Veil Easter Egg, equip the Purple Shotgun Ray Gun. Head past Double Tap into the room with the zipline and interact with the machine near the painting of a man on the wall.
This activates a soul collection challenge. Only kills made with the Purple Ray Gun will count. If you use any other weapon, progress won’t register, and you’ll need to retry the following round.
After collecting enough souls, the room unlocks. Inside, search the tables and the large dining table for the ritual elixir bottle. It glows bright red but may spawn in different spots—easy to spot once you’re looking.
Take the elixir to the box room nearby and pour it into the glass. This summons an Elder Disciple. Kill him, then ensure a symbol appears above the chalice. That confirms the ritual step is complete.
Next, go to the spawn bridge area and find the second chalice. Repeat the same steps: pour in the elixir, kill the Elder Disciple, confirm the symbol. Finally, head to the dinosaur room, top floor, and interact with the third chalice across from the dinosaur. Repeat the process again.
Once all three chalices are filled, return near Double Tap and check the elevator shaft wall. You’ll see three numbers—the safe code. Write them down and take them to the safe near Death Perception in the west hallway. Enter the numbers, open it, and collect your first ritual item.
Now prepare for a mini-boss fight. A boss spawns with a shield that only the Purple Ray Gun can break. Once the shield is destroyed, your team can join in to finish him off. Defeat him, grab the Sentinel Artifact, and the Purple Ray Gun Ritual is complete.
To start the Blue Ray Gun Ritual in the Shattered Veil Easter Egg, make sure you’re holding the Blue Automatic Ray Gun. Go to the underground workbench by the portal, swap it, and head to the Double Tap area.
In the first room with the deer heads, pick up the Lantern in the box and carry it to the main Z-Rex room. Place it next to the matching lantern on the wall to begin a Simon Says mini-game. Repeat the light sequences correctly to unlock a lower area with another painting.
Interact with the machine near that painting. Only kills with the Blue Ray Gun count toward filling the soul collector. Once complete, the room unlocks.
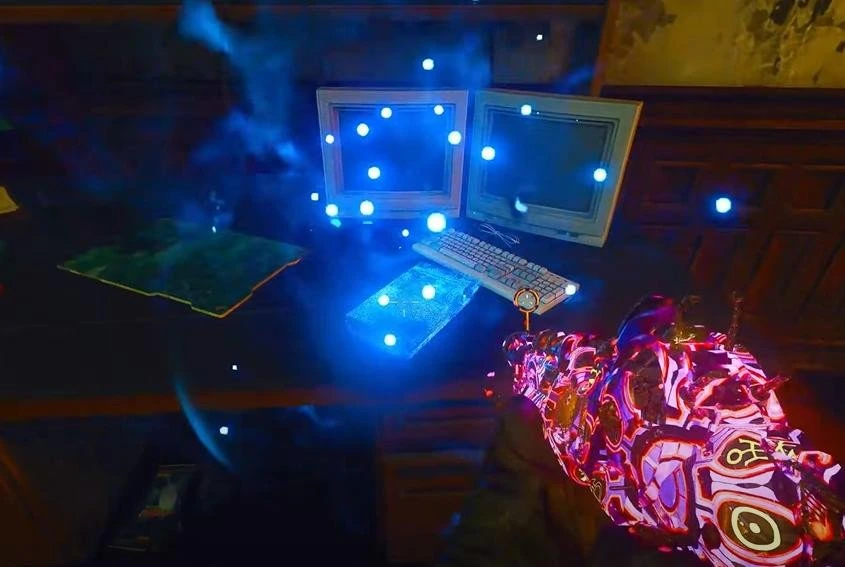
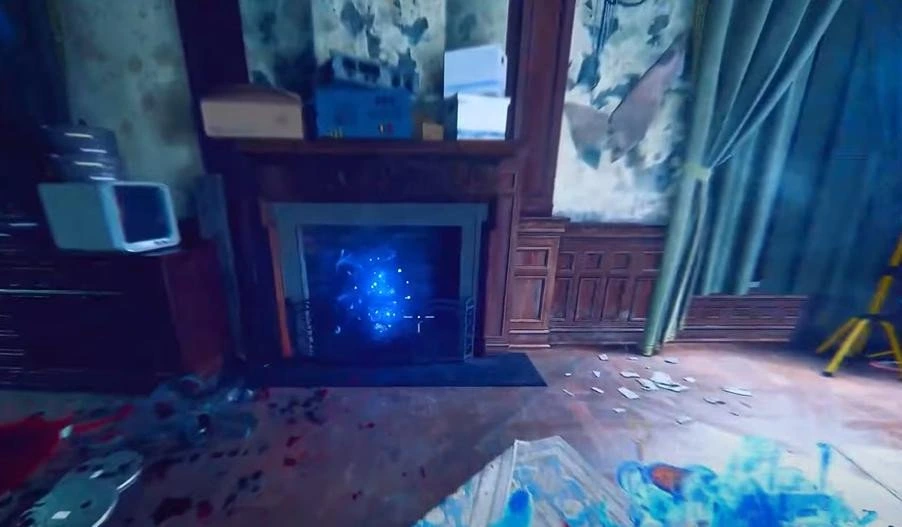
Inside the Elemental Pop area, look near the two computer monitors and hatchet. Break glass to find a bell. It can spawn:
Crouch and interact to pick it up. Once you have it, go to the dinosaur room’s top floor. Place the bell at the “Ring Bell for Service” station.
Before ringing, equip a weapon with the Turned ammo mod. Turn a zombie near the bell, then ring it multiple times. The zombie will hop over the bar, drink, and explode, leaving behind a flask—your second ritual item.
Take the flask to the underground ritual pedestal near the Z-Rex. Place it to begin a mini-boss fight. Only the Blue Ray Gun can break his shield. Once it’s down, finish the boss with your team and claim the Sentinel Artifact.
To complete the Yellow Ray Gun Ritual in the Shattered Veil Easter Egg, pick up your Yellow Ray Gun and head to the library. Interact with the painting to begin. Kill zombies with the Yellow Ray Gun until the wall breaks open, revealing a hidden room.
Inside, you’ll need to collect three invisible items using Aether Shroud:
These can only be seen while in Aether Shroud or just after it fades. Use Gobblegums to recharge quickly, or pace yourself between activations.
Item spawn locations:
Audio Log:
Ledger:
Nuclear ID Card:
Once you collect all three, return to the library and interact with the glowing books. Solve the quick puzzle by pressing them in the correct order until all three activate. This opens a secret wall containing your final ritual item.
Prepare for another mini-boss fight against the Amalgam. Only the Yellow Toxic Ray Gun can break his shield. Once destroyed, your team can help finish him off. This fight is cramped, so bring Aether Shrouds, Gersh devices, and keep moving. When you defeat him, all three rituals are complete—time for the boss fight.
To get ready for the Z-Rex boss fight in the Shattered Veil Easter Egg, head to Samantha’s Room and place the Cintilla Artifact on the console. Samantha’s dialogue will play, and the pre-fight cutscene begins. Before starting, ensure your squad is fully prepared.
Once your team is ready, trigger the fight—it’s going to be intense.
The grand finale of the Shattered Veil Easter Egg is the Z-Rex boss battle. You’ll fight him in a confined arena filled with zombies and toxic puddles. Movement is the key—never stand still.
In Phase 1, the fight is manageable, but by Phase 4 everything accelerates—Z-Rex and the zombies become deadly fast. His tail slam is especially dangerous and can kill instantly at higher phases. Stay mobile and dodge the puddles.
Target his glowing eyes to deal damage. Occasionally, toxic nodes appear on his sides—these do massive damage when destroyed, so eliminate them immediately.
Survival tips for the Z-Rex fight:
If you’re struggling, team up with friends. Having more players splits the Z-Rex’s attention, giving you more room to breathe and improving your survival odds.

Buy CoD Warzone Account
Get fully upgraded COD Warzone accounts today!
The Blue Automatic Ray Gun—its high fire rate and reliable range make it the top pick.
Carver’s exclusive skin and a distinctive calling card.
Complete hidden side objectives and secret interactions scattered around the map to earn a free perk.
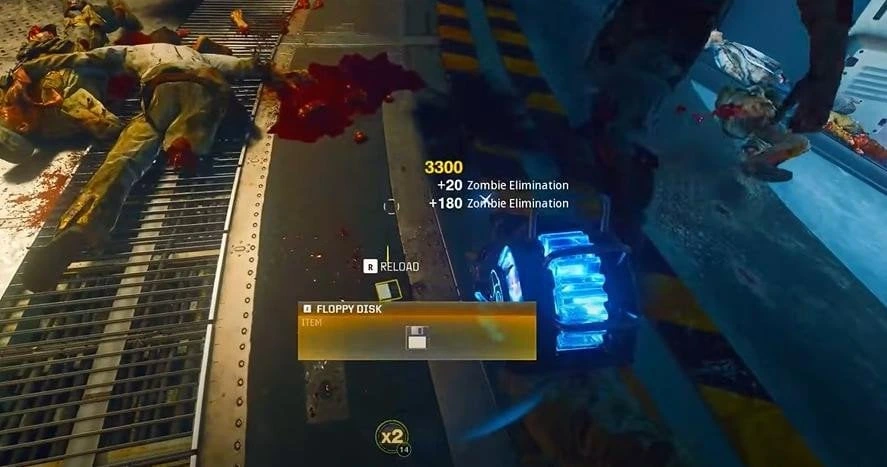
Either roll it from the Mystery Box or craft it via the Floppy Disk sequence and containment terminal code.
Yes—fast-paced, inventive, rich with secrets, and capped by a standout boss fight.
That wraps up our full Shattered Veil Easter Egg guide for Black Ops 6 Zombies. You now know how to unlock every Ray Gun upgrade, complete each ritual, and face the final Z-Rex boss. From the Yellow Toxic Ray Gun to the Blue Automatic and Purple Shotgun upgrades, this guide covers all the steps. Good luck on your run, and may your rewards be well-earned. See you in the game!