


+15 More
Digital Aura Portal - FZCO
Building A1, Dubai Digital Park, Dubai Silicon Oasis, Dubai, United Arab Emirates Premises Number 72647 - 001
Business registration number: 70647
gamer-choice.com © 2026
Digital Aura Portal - FZCO
Building A1, Dubai Digital Park, Dubai Silicon Oasis, Dubai, United Arab Emirates Premises Number 72647 - 001
Business registration number: 70647
If you're progressing through Stella Montis, Arc Raiders' first post-launch map, there's a good chance you've picked up the Snap and Salvage quest along the way. This objective-heavy mission asks you to interact with several specific locations across the map while also tracking down a couple of important loot items. It’s not always obvious where to go or what to look for, so we’ve put together a clear, step-by-step breakdown to help you get through it smoothly.
Keep in mind that every part of this quest can be completed over multiple raids, so there’s no pressure to finish everything in a single run. However, once you locate the Magnetron and Flow Controller, you’ll need to successfully extract with them. Because of that, bringing an augment with one or two safe pockets is highly recommended, as it can save you from losing these critical items if things go sideways mid-raid.
Below is everything you need to know to complete Snap and Salvage in Arc Raiders.

Buy ARC Raiders Boosts
Get gear, XP, and progression fast with ARC Raiders boosts!

To photograph the rovers in the Sandbox, you’ll need to travel to the Sandbox POI located on the lower level of the map. As the name suggests, this area sits roughly in the center of Stella Montis and is relatively easy to reach. That said, it’s also very open, which makes it a risky place to linger. Try to move quickly and keep an eye out for other raiders passing through.
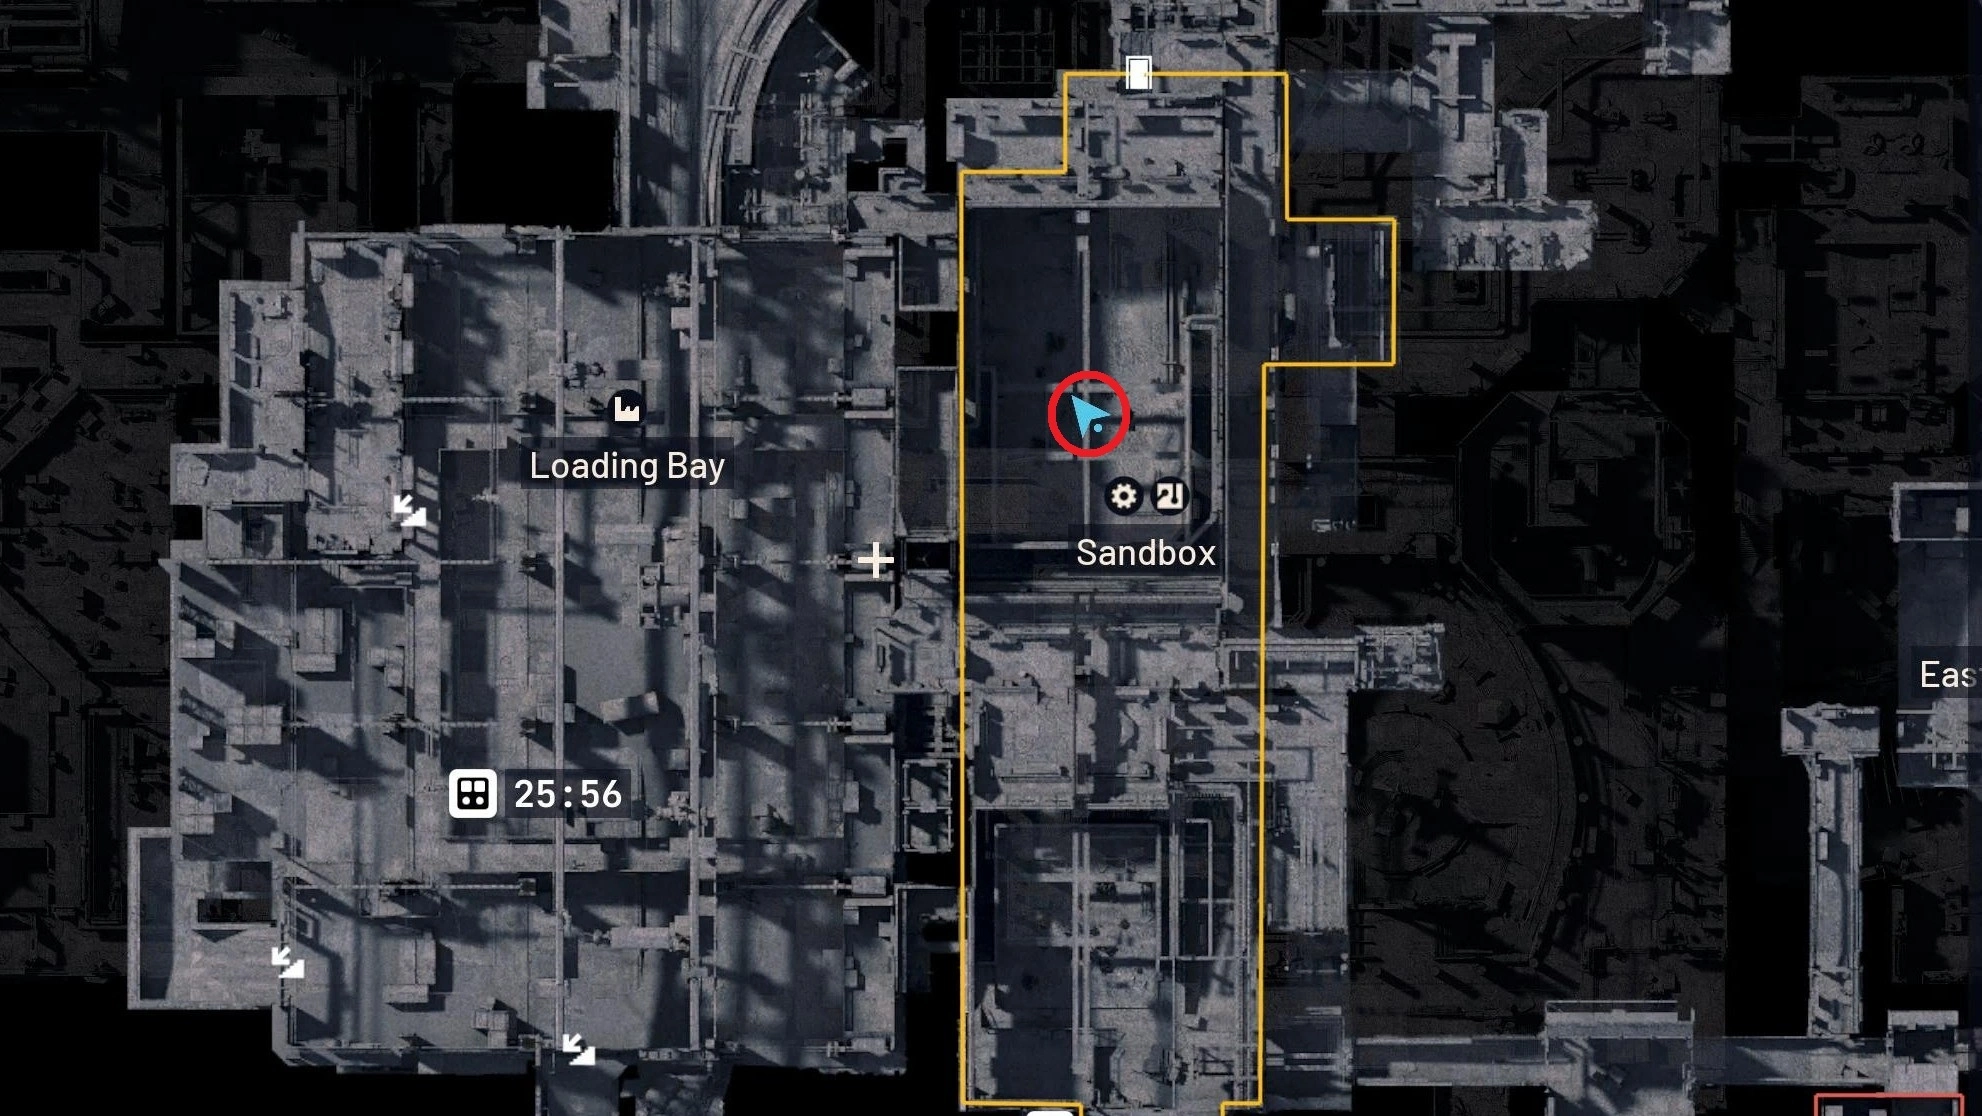
Once you drop down into the lower section of the Sandbox—where the terrain is covered almost entirely in sand—you’ll see several rovers sitting out in the open.
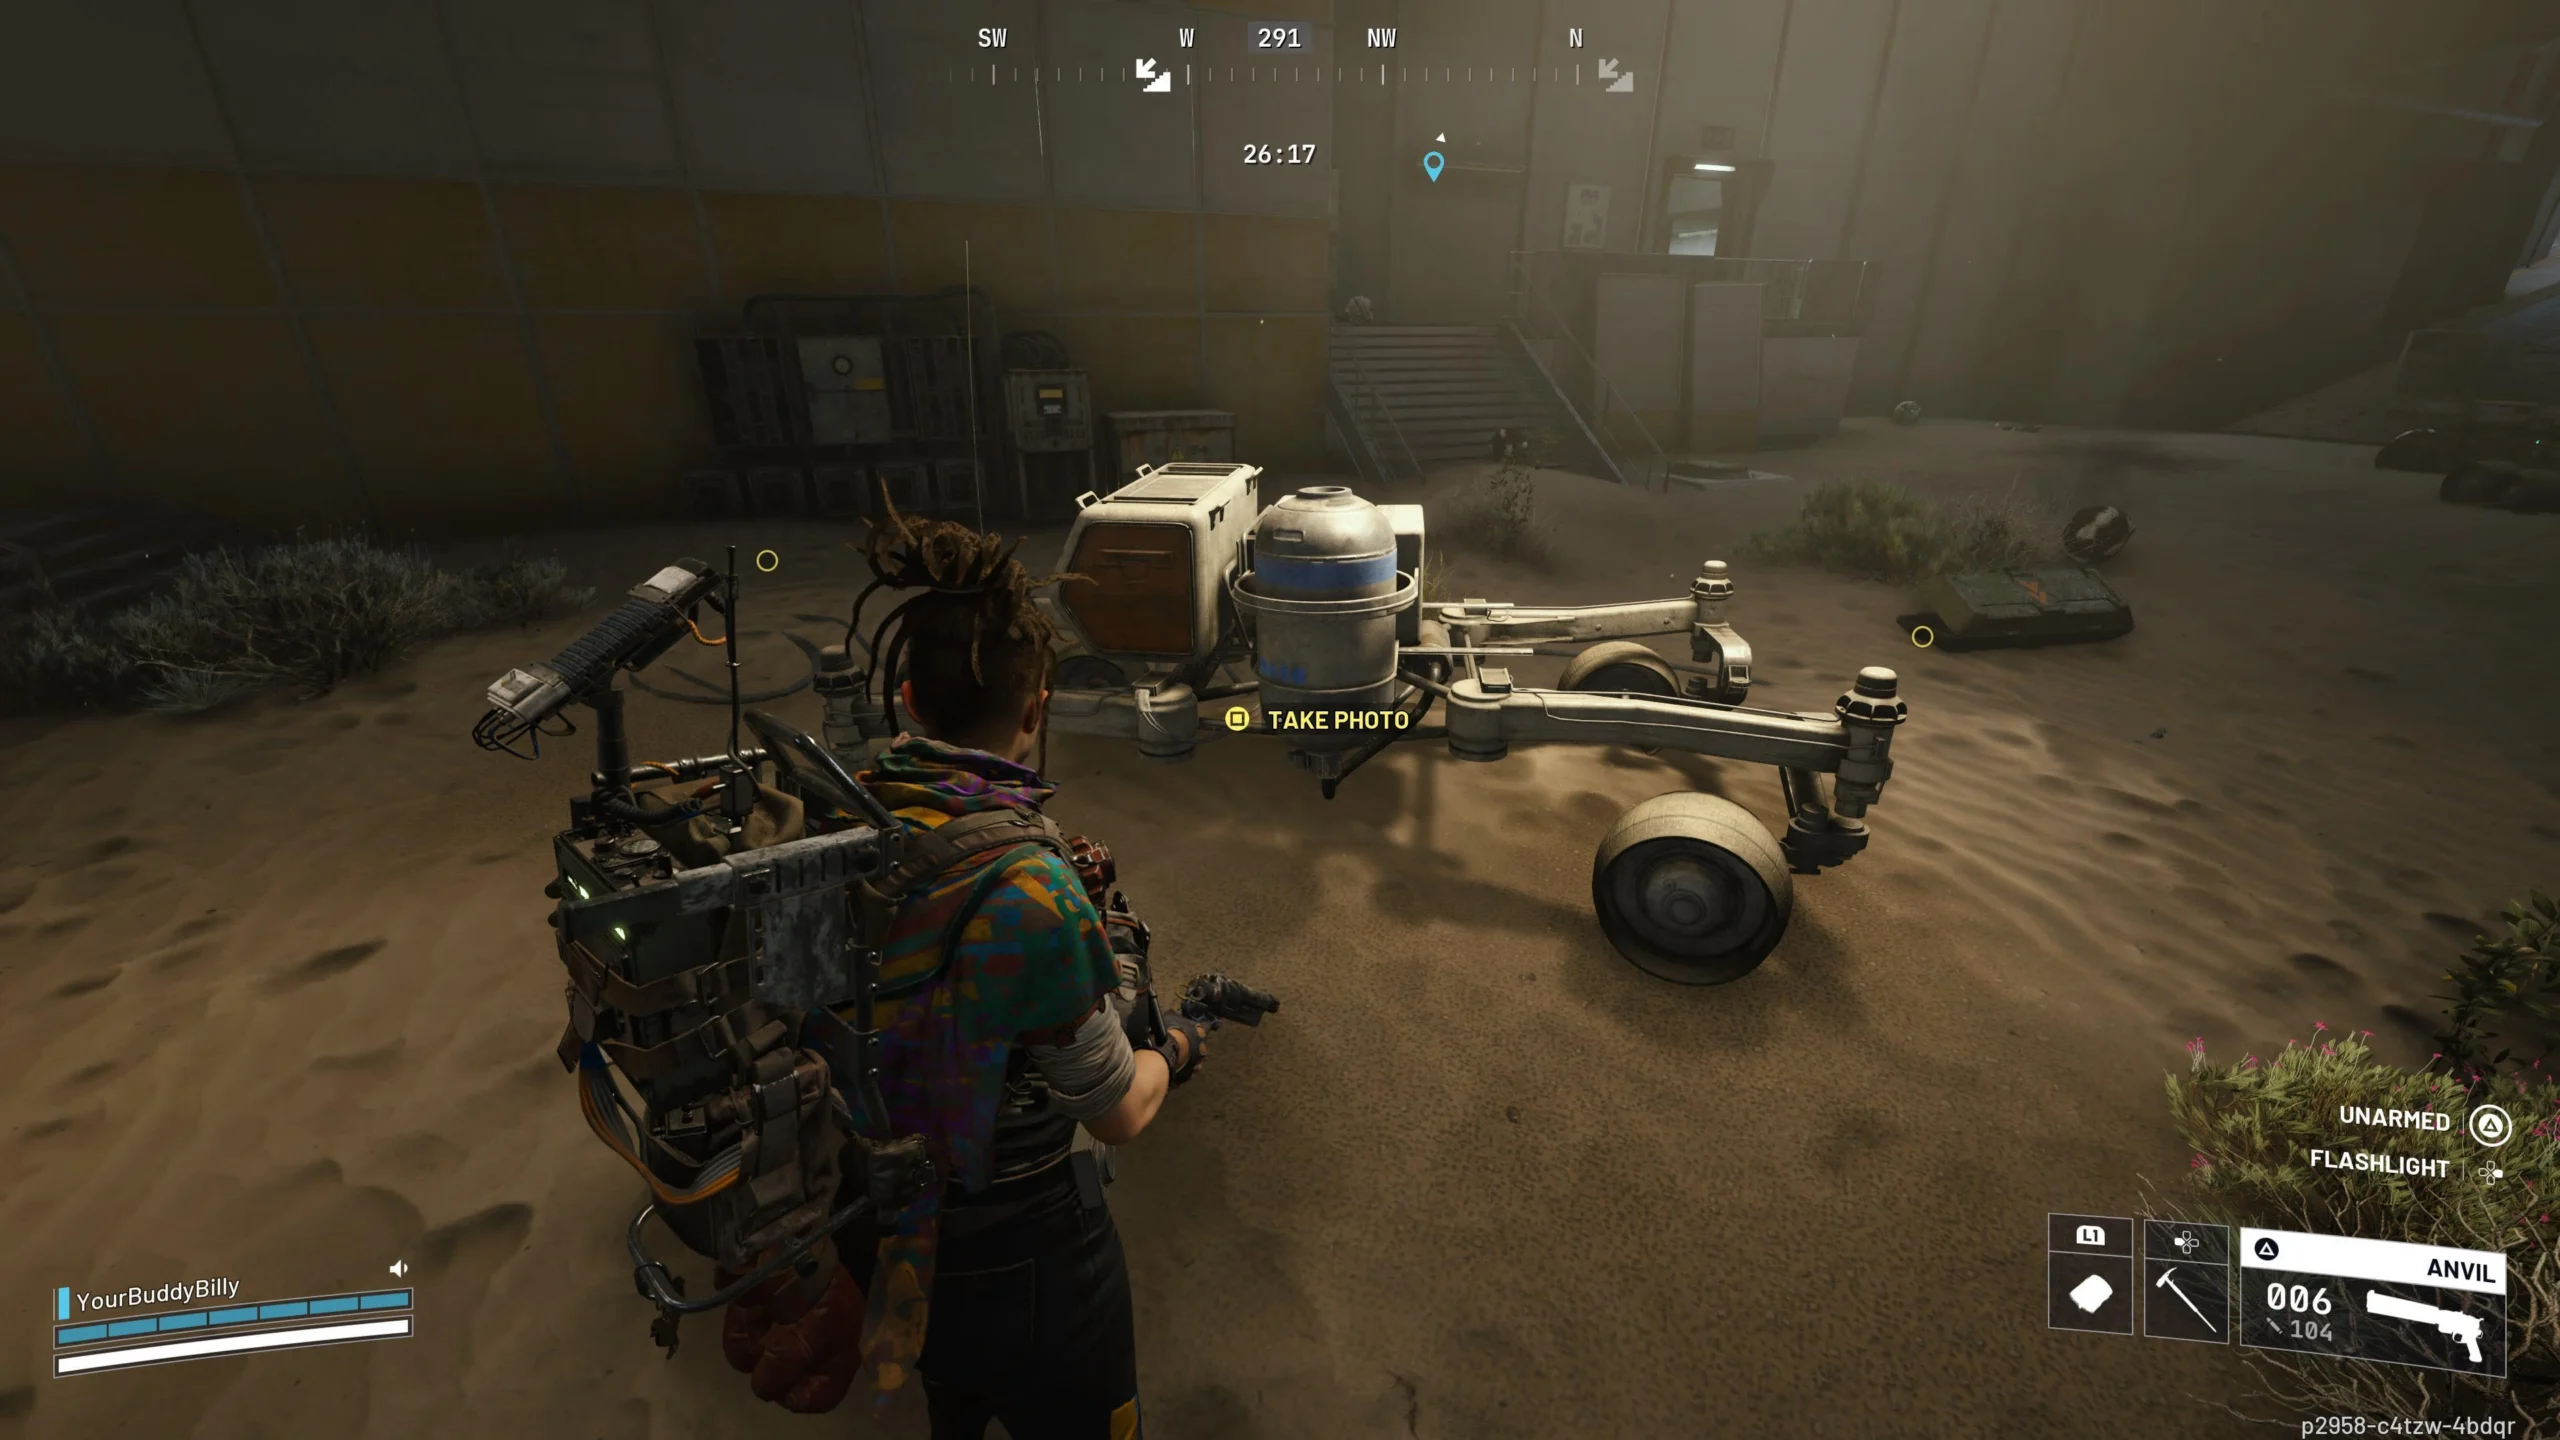
When you approach one of the rovers, a yellow interaction prompt will appear, allowing you to take a photo. Interact with it, snap the picture, and that objective will be marked as complete.
Your next stop is the Security Checkpoint near the Lobby. This area is another high-visibility location with long sightlines, making it a popular place for player encounters. Take your time when approaching, and consider playing friendly if you run into other raiders to avoid unnecessary conflict.
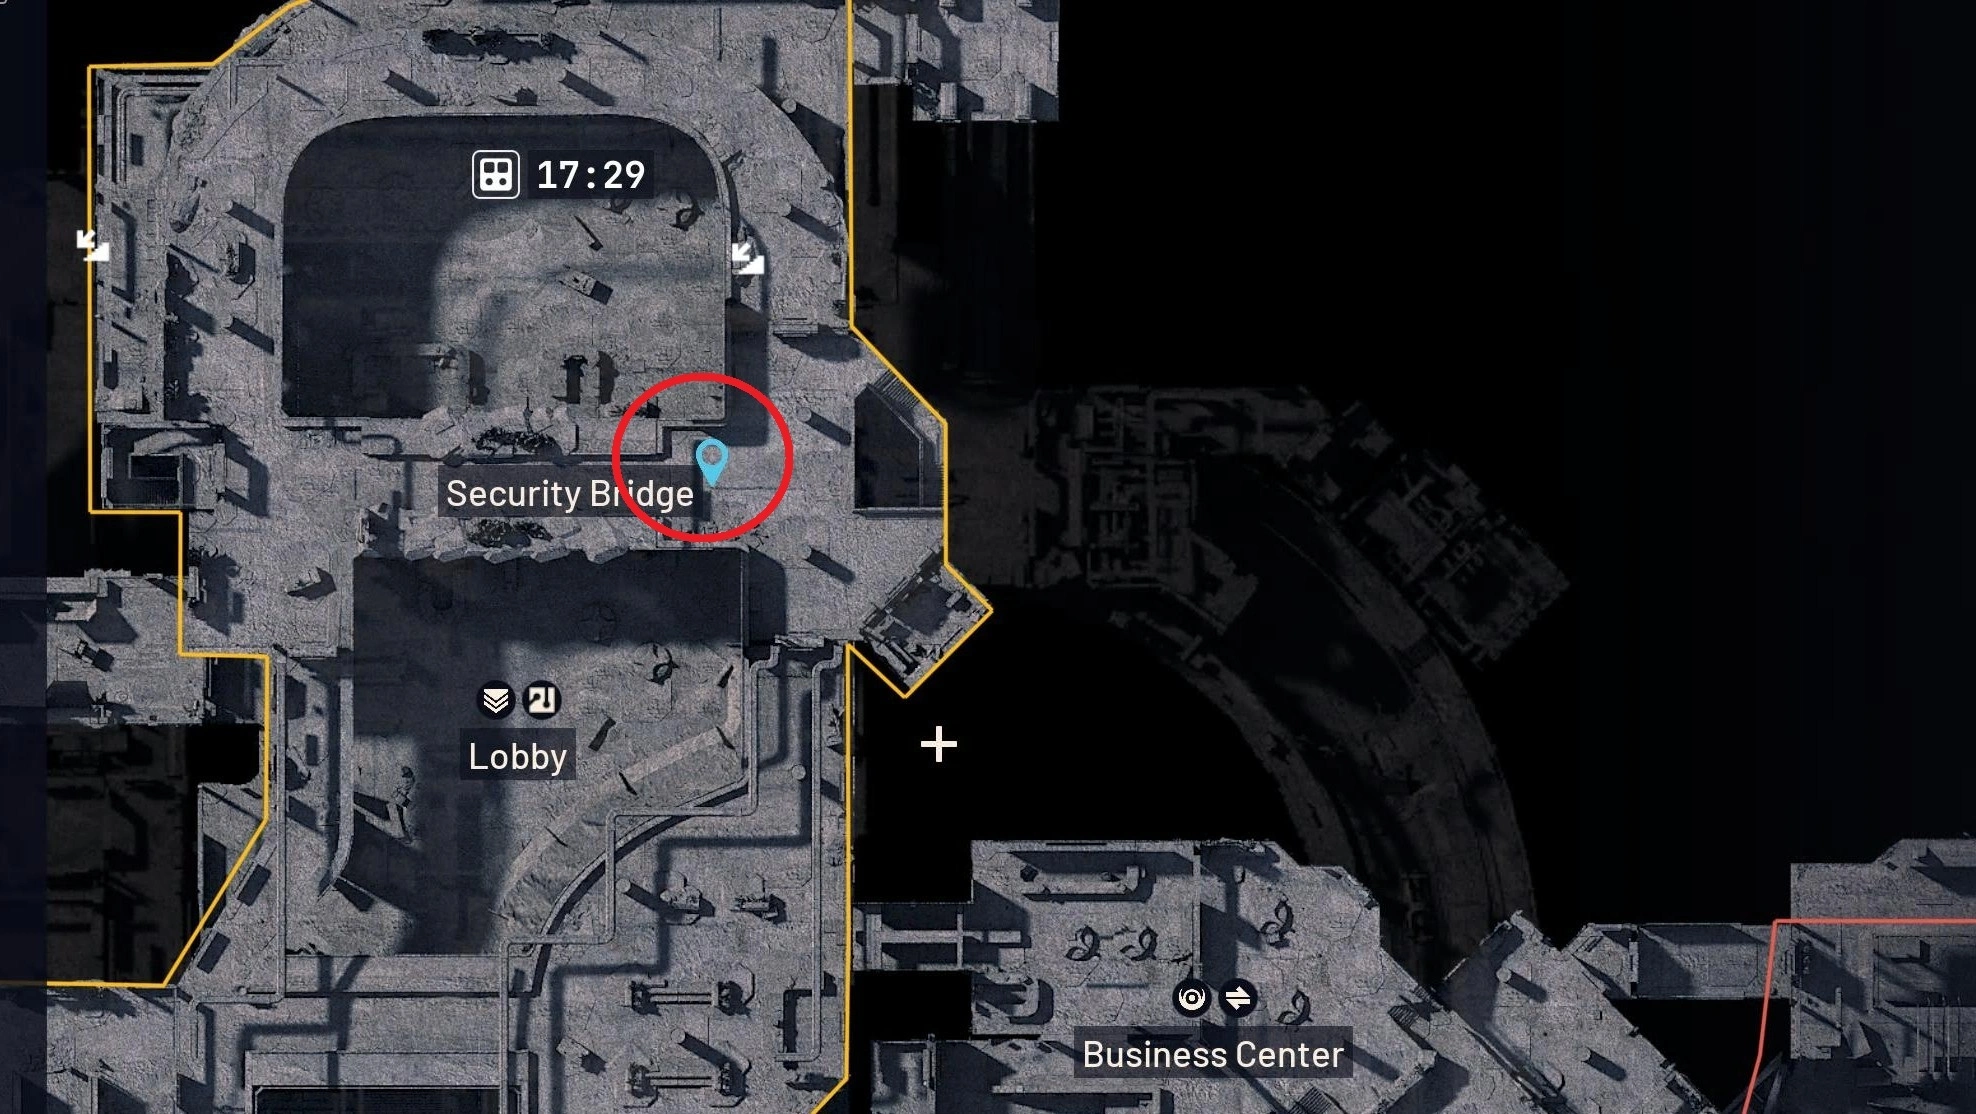
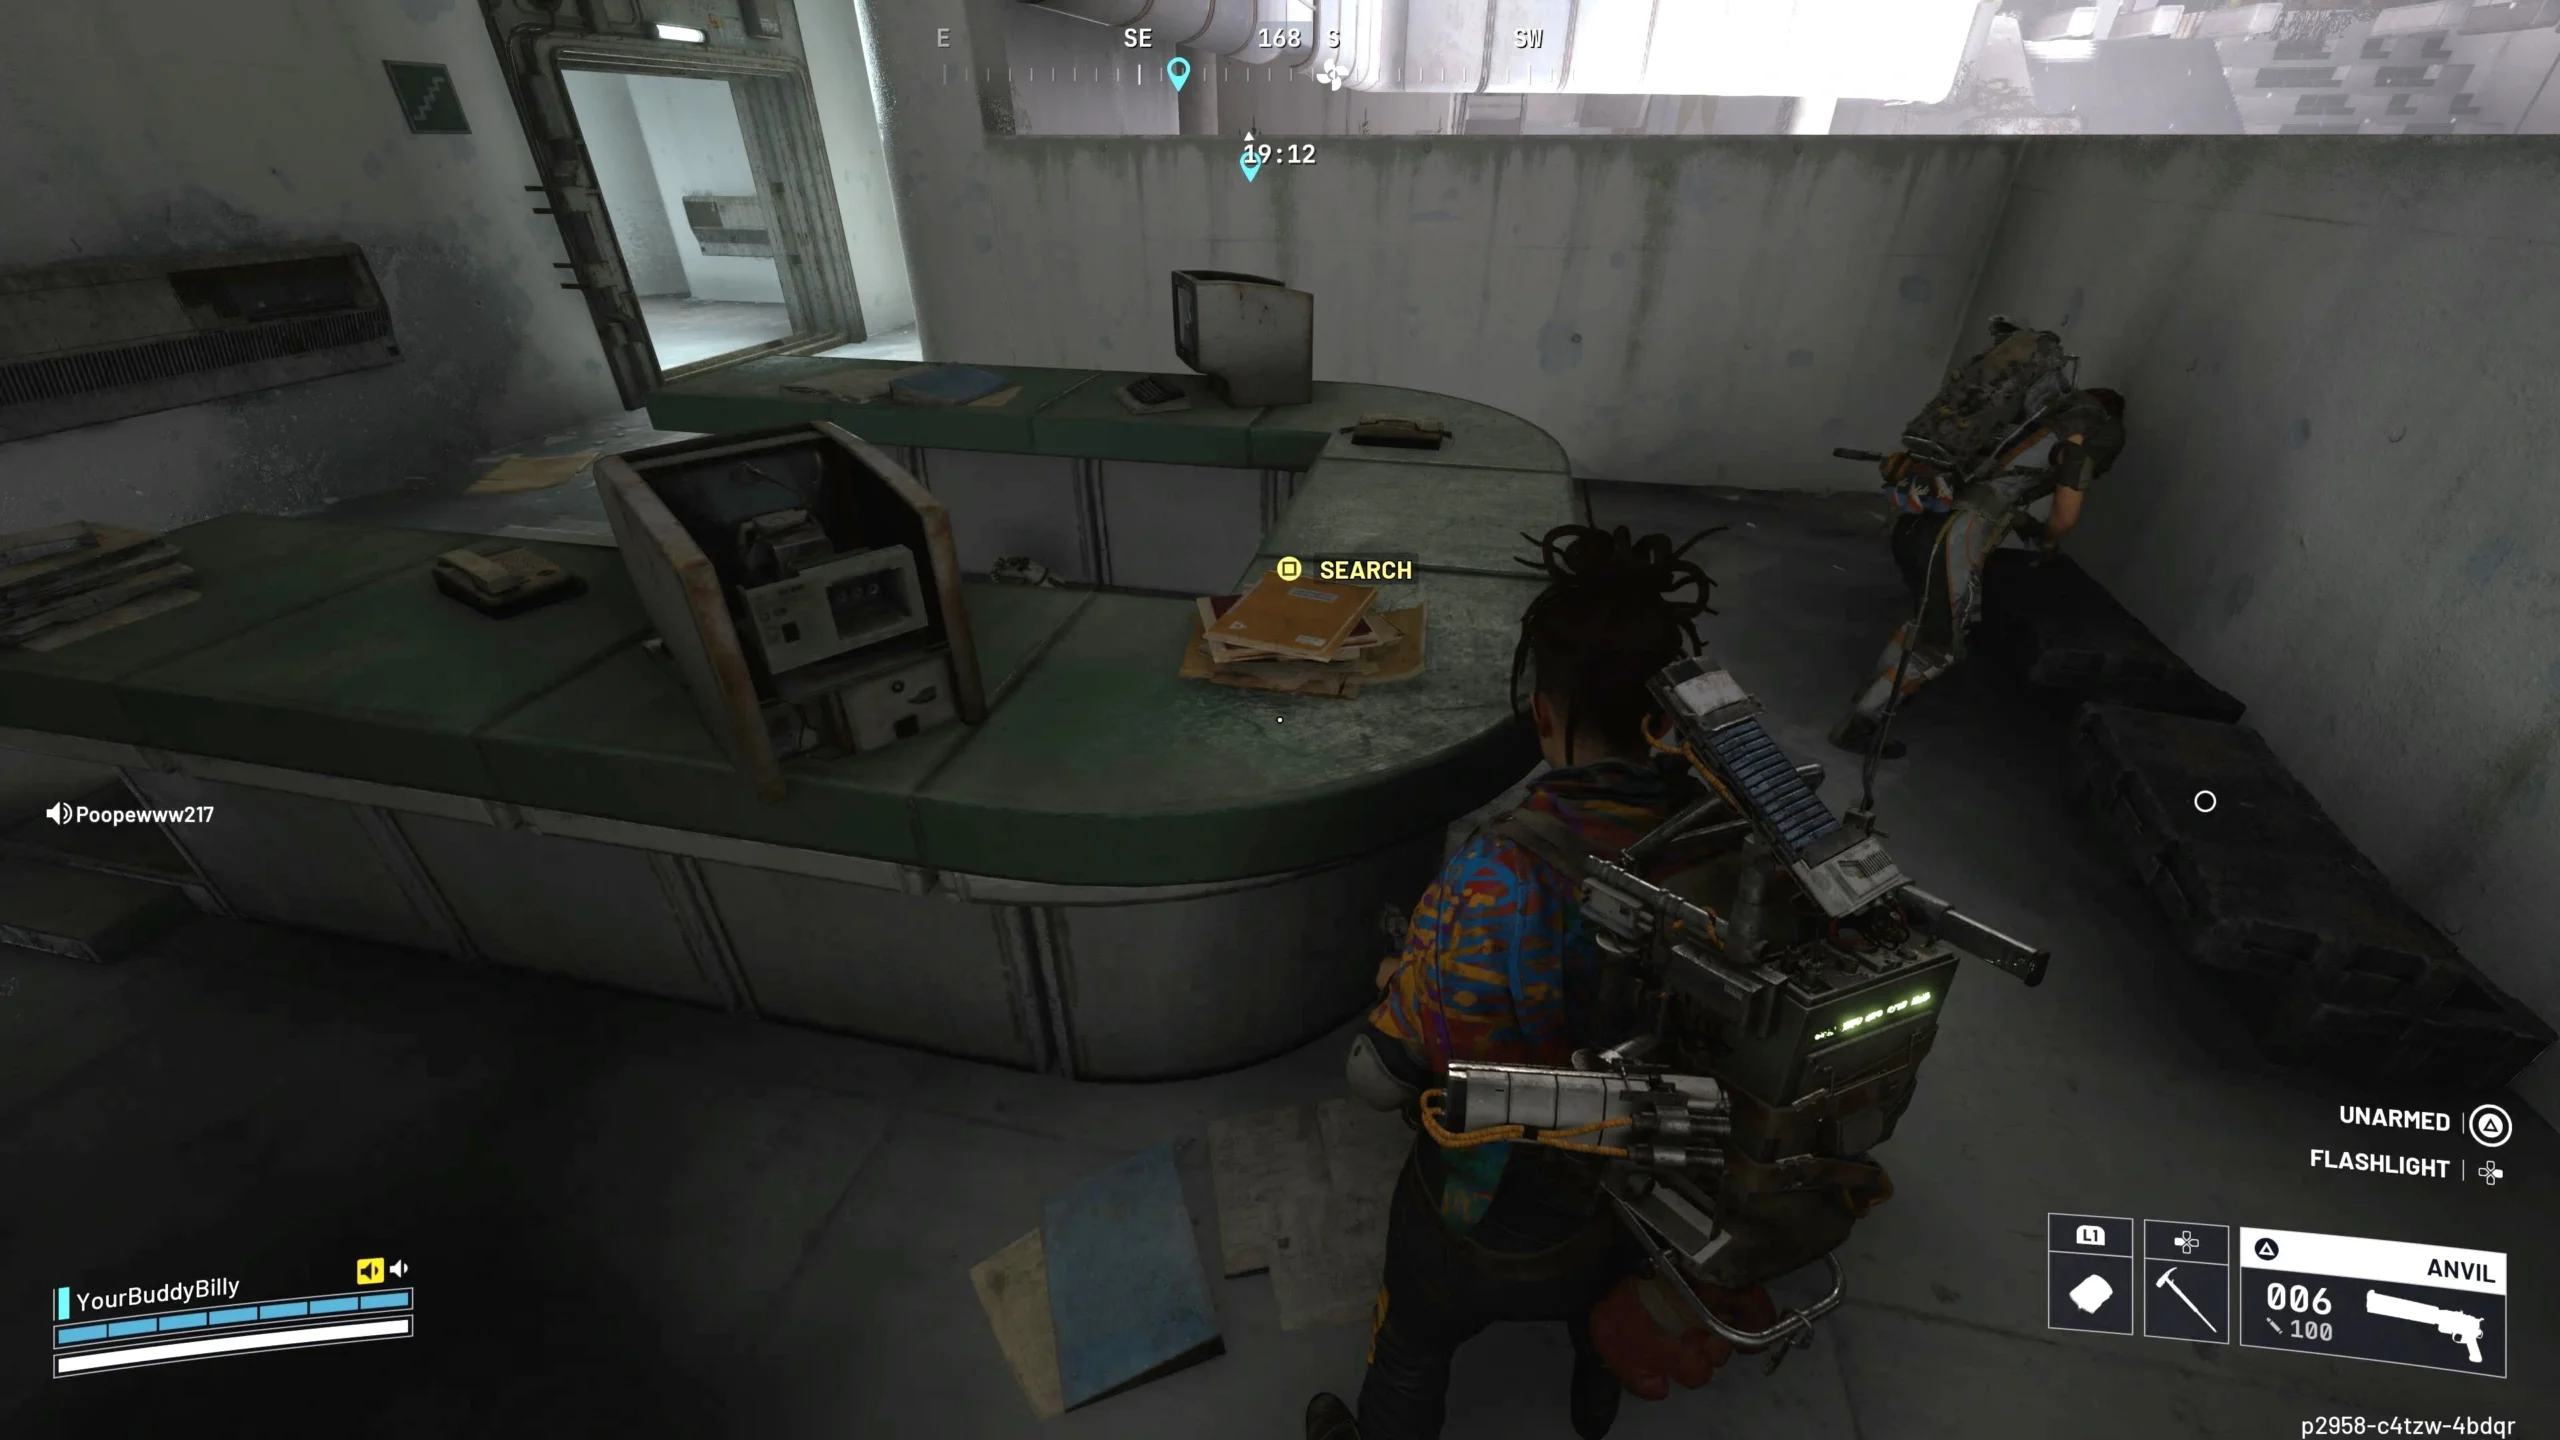
Inside this large open space, look along the eastern wall for a door marked “Security: Restricted Access.” If the area hasn’t already been cleared, you’ll need to breach the door yourself, so make sure the coast is clear before starting the process.
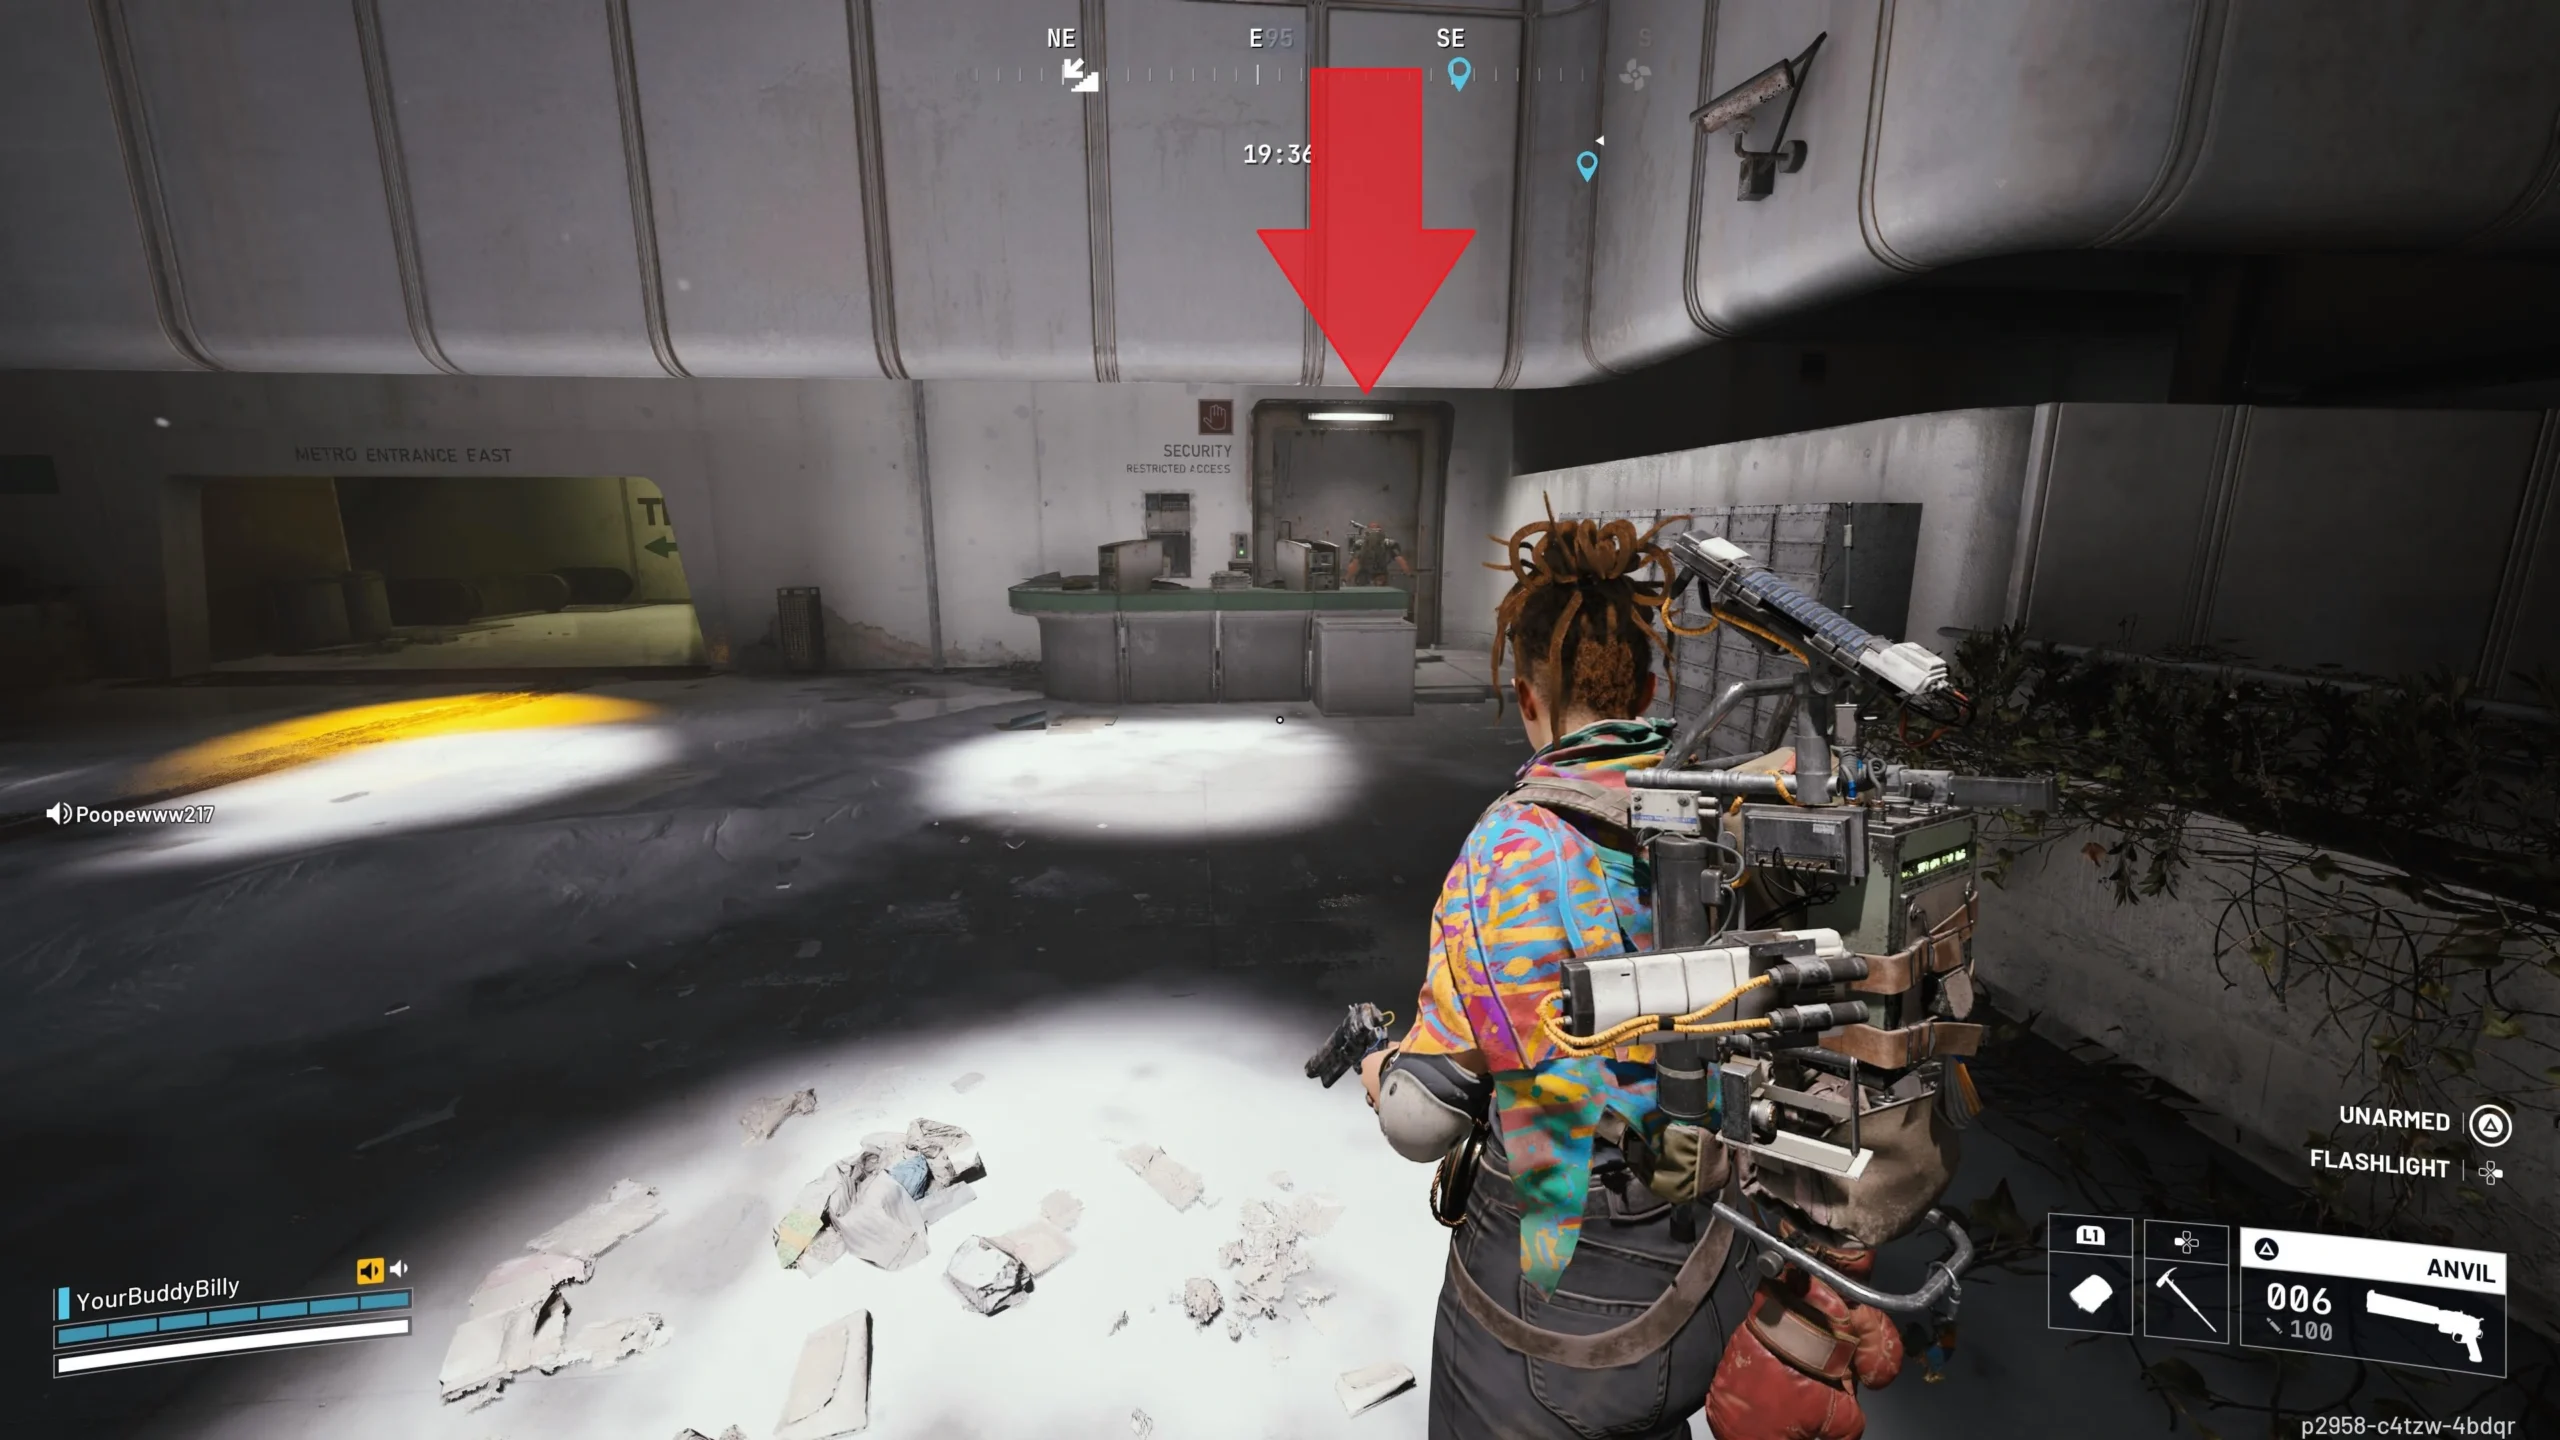
After breaching the door, head inside and turn immediately to the right. You’ll find a reception desk here, which is where the papers you’re looking for can be searched and collected.
With those objectives completed, the final step of the quest is simply looting until you track down the required items.
Finding the Magnetron and Flow Controller is less straightforward than the earlier objectives. These items don’t spawn in fixed locations and instead appear as random loot throughout Stella Montis. To improve your chances, be thorough—search drawers, lockers, breached rooms, and any other lootable containers you come across.
Both items note in their tooltips that they’re most commonly found in Exodus locations. Because of that, you’ll want to focus your efforts on areas with that designation, such as the Assembly POI.

Loot everything you can in these areas, then extract and reset if needed. In our experience, the Magnetron and Flow Controller didn’t take too many runs to find while looting naturally across the map, so with a bit of persistence, you should be able to secure them without too much trouble.
Once you’ve got them, make sure to stash both items in a safe pocket if possible, then head for the nearest extraction point and return to Speranza. Losing them at the last second would be a brutal way to end the run.
For more Arc Raiders help and walkthroughs, be sure to check out our full Arc Raiders quest list over at Gamer Choice.