Arms Warrior DPS Guide - Midnight (12.0.1)
Select your Specialization
In this detailed WoW The War Within Arms Warrior Guide, we delve into the core essence of the Arms Warrior class and share a wealth of useful tips to enhance your adventures. The Arms Warrior in World of Warcraft is an ideal specialization for embodying the role of a heroic champion of your favorite race, cutting through enemies on the battlefield with a mighty two-handed weapon.

Table of Contents
Arms Warrior Overview
Arms Warriors are very straightforward damage dealers which revolve around frequent short cooldown burst damage windows with Colossus Smash. Their greatest strength comes in the form of a versatile toolkit, offering single target, multitarget cleave, burst AoE, and even a limited physical damage immunity, though their greatest weakness comes from inherent limitations of melee range and mediocre self-sustain.
Arms Warrior Strengths and Weaknesses
Strengths
- Very flexible toolkit, able to spec into strong single target, two-target cleave, sustained multitarget, or Execute capabilities.
- Reduced rage economy retains the same gameplay, but with better pacing, instead of being resource capped or starved at all times.
- Significantly improved multitarget options compared to previous expansions, further enhanced by hero talents.
- Multiple defensive abilities on very short cooldowns make Arms a fairly tanky melee damage dealer.
- Source of the important offensive Battle Shout buff and defensive Rallying Cry.
- High mobility class due to Charge, Intervene, and Heroic Leap.
Weaknesses
- Emphasis on priority and sustained damage leaves Arms less suited for short lived waves of adds frequently found in raid content.
- Awkward class tree talent pathing requires taking Shockwave in single target content that it has no use in.
- Downtime significantly penalizes damage potential.
- Defensively weaker than Fury, with some defensives sacrificing damage to increase survivability.
- Slayer requires Bladestorm in all of its builds, resulting in somewhat reduced customization and build variety.
Arms Warrior Basic Gameplay
Arms Warrior is a very straightforward and relatively simple spec which generates almost all of its resources passively through auto-attacks, while spending them with various active abilities. Predicting this flow of resources and keeping track of important ability cooldowns is important to ensure that you neither find yourself Rage starved and unable to use Mortal Strike on cooldown or capping and wasting Rage generation during Ravager or Bladestorm.
Although Rage generation has been slowed down significantly in The War Within, so too has the cost of nearly all abilities, resulting in generating and spending in smaller amounts. This makes the rotation more controlled, less prone to spikes which leave resources starved or overcapped, and the spec still has virtually no downtime, filling almost all of its Global Cooldowns with Mortal Strike, Overpower, Slam, or Execute.
Arms Warrior Changes in Patch 11.2
Patch 11.2 introduces minor changes that enhance Arms Warrior's multitarget abilities and address PvP and quality-of-life issues. Notably, Demolish no longer cancels easily when the primary target is pulled slightly out of range, though the resulting AoE is now limited to 5 yards around the Warrior.
- All ability damage increased by 5%.
- Bladestorm damage increased by 15%.
- Demolish channel will only break if the target moves more than 50 yards away. Single-target attacks still require melee range, and the final AoE is limited to 5 yards.
- The global cooldown of Hamstring is now 0.75 seconds (was 1.5 seconds).
- Fixed an issue where Berserker Rage could remove Scatter Shot. Tooltip now clarifies it works only on certain Incapacitate effects.
Tier Set Updates
Season 3 tier set bonuses are now organized by hero talent rather than specialization. For Arms Warriors:
- The Slayer set increases Sudden Death and Reap the Storm procs.
- The Colossus set boosts bleeds and Demolish.
These changes slightly adjust talent builds and rotational priorities; refer to the guide for updated recommendations.
Arms Warrior Leveling Guide for The War Within
Arms Warrior Leveling Playstyle
Arms Warriors primarily have a single playstyle, which develops over time. Early on, they can feel like a mediocre leveling spec, with only Sweeping Strikes offering multi-target utility. Around level 30, they begin gaining more effective tools, allowing them to pull multiple mobs and cleave them down efficiently. Abilities like Die by the Sword help mitigate damage, while Victory Rush keeps their health up between fights. By rotating through their offensive cooldowns, Arms Warriors can move from pull to pull with minimal downtime.
Open combat with Charge whenever possible. Use Heroic Throw or Heroic Leap to pull additional enemies if needed. Against groups of enemies, use Sweeping Strikes, Cleave, Overpower, and Thunder Clap (if enemies will live long enough for the bleed effect). When only a few enemies remain, or in between AoE abilities, focus on Mortal Strike and Execute to eliminate priority targets. While abilities like Warbreaker and Bladestorm can be used often, it's usually best to reserve them for larger packs or tougher enemies.
War Mode Talents for Leveling as an Arms Warrior
The following PvP talents are recommended while leveling or doing solo/small group PvE content. Depending on your personal style, you may find alternative talents more useful—so feel free to experiment!
Recommended PvP Talents
- Rebound — Enhances Spell Reflection, providing both offensive and defensive value in exchange for a slightly longer cooldown.
- Sharpen Blade — Increases the damage of Mortal Strike.
- Battlefield Commander — Enhances each Shout ability, increasing overall power and survivability.
Arms Warrior DPS Spec, Builds, and Talents
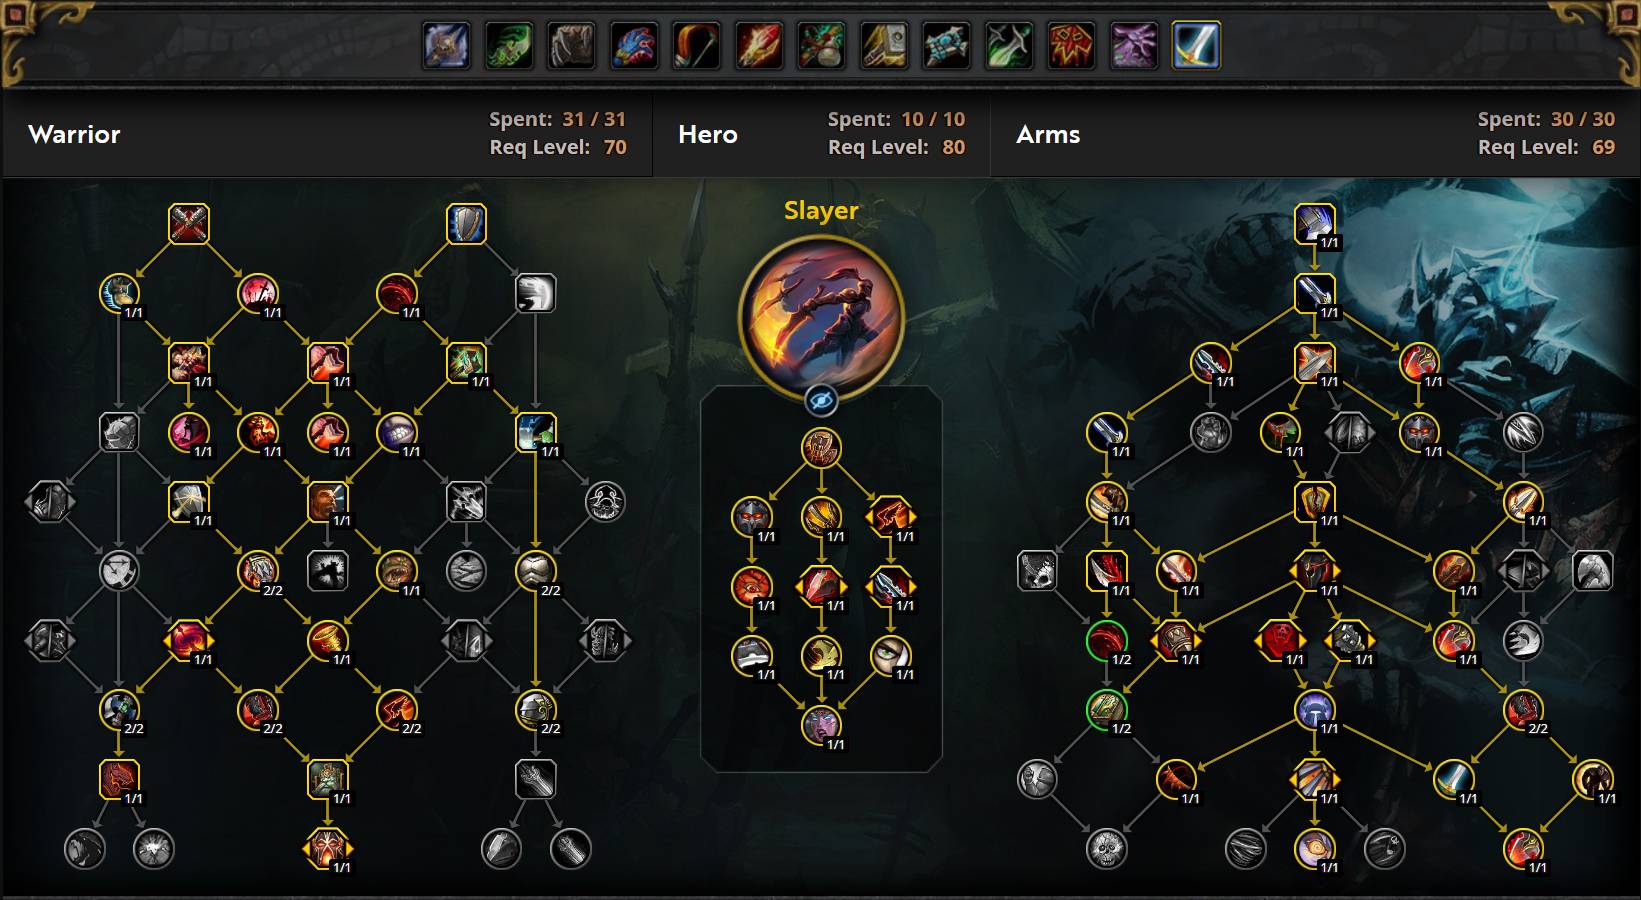

Copy the Arms Warrior talents, paste them into the game.
Slayer Single Target Raid Talents
Colossus Mythic+ Talents
PvP Talents for Arms Warrior in The War Within
Since Battle for Azeroth, players can enable War Mode, allowing participation in open-world PvP. Enabling War Mode provides several benefits:
- PvP talents are enabled in the outdoor world
- 10% increased World Quest rewards at max level
- 10% more experience while leveling
- Earn Conquest Points weekly, which can reward gear
Given these benefits, enabling War Mode is recommended to speed up leveling and gain better rewards. However, enabling it means you can be attacked by other players while questing or leveling.
Recommended PvP Talents
- Battlefield Commander — Enhances each Shout ability, boosting overall power and survivability.
- Rebound — Boosts the value of Spell Reflection, offering both offensive and defensive advantages at the cost of a slightly longer cooldown.
- Sharpen Blade — Adds an off-global cooldown buff that increases the damage of Mortal Strike.
War Banner — Provides increased mobility; useful situationally for outdoor PvE.
Master and Commander, Disarm, and Duel — All offer situational utility depending on your needs and encounter type.
Best Hero Talents for Arms Warrior in The War Within
Raiding Hero Talents for Arms Warrior
Colossus is slightly less competitive in single-target encounters but offers additional defensive bonuses. Demolish provides a strong burst of damage on a very short cooldown.
Slayer performs very well in all situations, offering stronger single-target damage, especially during the execute phase. It also has a smoother damage profile and includes its own powerful cooldown, Bladestorm. Instead of defensive utility, Slayer provides increased mobility, which may or may not be useful depending on the encounter.
Mythic+ Hero Talents for Arms Warrior
Colossus excels in multitarget situations, with frequent damage spikes followed by periods of lower output between cooldowns. It performs competitively against Slayer, generally offering slightly higher average damage, though with less priority target focus.
Slayer delivers strong sustained multitarget damage with a smoother overall output and better priority damage than Colossus. However, it lacks the sharp damage spikes. Overall performance between the two is close, with effectiveness depending more on encounter timing and context than raw numbers.
Arms Warrior DPS Stat Priority
The Basics of Stats for Arms Warrior
Both Colossus and Slayer Arms Warriors primarily value item level for Strength, followed by Critical Strike and Haste, then Mastery or Versatility. These stat values fluctuate as you accumulate more of them, so it's common to stack Critical Strike and Haste early, then shift to gemming or enchanting for Mastery or Versatility. By the time you're moderately geared, the general priority should look like:
- Strength
- Critical Strike
- Haste
- Mastery
- Versatility
At very high gear levels, diminishing returns balance these stats more evenly, making them nearly interchangeable in value. Because of this, traditional stat weights are less effective, and it's recommended to regularly simulate your gear to determine optimal upgrades.
Getting a Better Understanding
Strength: Your primary stat, found on plate gear, weapons, and trinkets. It increases Attack Power, which boosts all ability and auto-attack damage.
Critical Strike: Doubles your attack damage by default and increases Rage generation from auto-attacks by 10%. With talents like Impale, crits can exceed the base +100% bonus.
Haste: Reduces global cooldowns, ability cooldowns, and time between auto-attacks. It also speeds up effects from Mortal Strike, Skullsplitter, Cleave, Bladestorm, Ravager, Rend, and Deep Wounds.
Mastery: Increases the damage bonus from Deep Wounds, which is maintained through Mortal Strike, Colossus Smash, Bladestorm, Warbreaker, Cleave, and Ravager. Once weaker in AoE, it's now more valuable due to Cleave's ease of application.
Versatility: Increases damage dealt and reduces damage taken by half that amount. It's especially valuable for external sources of damage that don't scale with Attack Power.
Breakpoints
Certain Haste breakpoints allow for additional global cooldowns during Colossus Smash. Haste remains a strong stat due to its ability to shorten time between cooldowns and synergize with Anger Management, helping you cycle cooldowns faster. However, In For The Kill slightly reduces its value by extending its uptime.
Arms Warrior DPS Rotation, Cooldowns, and Abilities
Arms Warrior Single-Target Rotation
The Arms rotation follows a conditional priority list that changes based on your talent choices. Use the checkboxes below to customize your rotation accordingly, and ensure that Battle Stance is always toggled on. These same toggles apply to both single-target and multi-target rotations.
- Rend to apply or refresh with 4 seconds remaining
- Thunderous Roar
- Avatar just before or with Colossus Smash/Warbreaker
- Colossus Smash
- Overpower with Opportunist active
- Mortal Strike
- Execute with three stacks of Marked for Execution
- Bladestorm
- Skullsplitter
- Overpower
- Slam to fill the rotation
In simple terms, the Arms Warrior rotation revolves around keeping Mortal Strike on cooldown while regularly using various talented cooldowns, Overpower, and Slam to fill in the gaps. While straightforward, the real challenge is managing multiple cooldowns that don’t always align naturally.
Slayer allows for more frequent casts of Execute and cooldown reduction for Bladestorm, which leads to more free global cooldowns and a surplus of Rage. This setup helps quickly stack and maintain Juggernaut, strengthening the Execute phase, even though Slayer primarily focuses on Sudden Death and Marked for Execution over regular Execute usage.
Colossus introduces Demolish to the rotation—a powerful, short cooldown that should be used as often as possible. The main difference from Slayer is the use of Ravager, which adds passive damage and additional Rage generation, helping sustain Mortal Strike and Execute usage.
Execute Phase
Execute deals very high damage and refunds some of the Rage spent if the target survives, offsetting its high cost. Outside of Sudden Death procs, it becomes your primary Rage spender when the target falls below 20% health—or 35% if you have Massacre talented.
- Thunderous Roar
- Avatar just before or with Colossus Smash/Warbreaker
- Colossus Smash
- Overpower with Opportunist active
- Bladestorm with two stacks of Executioner's Precision
- Skullsplitter
- Mortal Strike with two stacks of Executioner's Precision
- Execute with over 20 Rage
- Overpower
While Execute may appear to have a low priority, it becomes the primary Rage spender during its phase, fully replacing Slam. Mortal Strike is still used semi-regularly with stacks of Executioner's Precision for increased damage, while also maintaining Rend and Deep Wounds. However, Colossus avoids casting Mortal Strike while Ravager is active, preferring Execute and Overpower instead, allowing Unhinged to passively consume damage buffs.
Opening Rotation for Arms Warrior
The Arms opener mirrors the standard rotation, beginning with Charge to engage and generate Rage. Rend is then applied, followed by activating cooldowns and Colossus Smash as detailed in the single target priority list.
Multiple-Target Rotation for Arms Warrior
There are two multitarget Arms rotations: a two-target setup similar to the single target rotation, and another that uses Cleave to focus on sustained damage against larger groups. Use the checkboxes below to customize based on your talent setup.
Two Targets
The two-target rotation is nearly identical to the single target rotation, with the addition of using Sweeping Strikes on cooldown to cleave attacks onto a secondary target. Since this also applies Colossus Smash to the second target, Warbreaker is not necessary unless facing more than two enemies.
3+ Targets
For three or more targets, the most common multitarget build is a hybrid setup focusing on Cleave for sustained AoE damage. It retains Blunt Instruments instead of Warbreaker for increased Haste and better priority target damage.
- Thunder Clap to apply or refresh Rend under 4 seconds remaining
- Sweeping Strikes
- Thunderous Roar
- Avatar
- Colossus Smash
- Cleave
- Execute with less than 3 stacks of Imminent Demise
- Overpower during Sweeping Strikes
- Bladestorm
- Mortal Strike with 2 stacks of Executioner's Precision
- Execute with Marked for Execution
- Mortal Strike
- Overpower
- Thunder Clap
- Execute
- Slam
Mastering Your Arms Warrior
The Arms multi-target rotation is extremely dynamic, frequently changing based on the number of enemies, available buffs, and whether Sweeping Strikes is active. In Season 2, Cleave helps maintain the powerful tier set bonus and Deep Wounds almost passively by striking multiple targets.
Aligning Cooldowns
Arms cooldowns tend to align naturally, especially with Anger Management. Still, it's crucial to ensure that Colossus Smash and Deep Wounds are applied to as many targets as possible before entering your main cooldown cycle.
Avatar
Avatar is a powerful cooldown, though its Tormented follow-up talents have shifted. Warlord's Torment has been depowered with reduced Rage generation and is no longer triggered by Colossus Smash, while Blademaster's Torment now increases Sweeping Strikes and Cleave uptime rather than offering extra Bladestorm casts.
Ravager and Bladestorm
Both Bladestorm and Ravager serve as strong AoE cooldowns, providing high Rage generation and significant single-target value via Unhinged. Talent choices guide your selection—Slayer leans on Bladestorm, while Colossus favors Ravager for more Mortal Strike casts and extra Colossal Might stacks.
Skullsplitter
Skullsplitter applies a debuff that causes Rend and Deep Wounds to tick twice as fast, increasing their damage in a shorter window. This fits neatly into cooldown phases like Colossus Smash and Thunderous Words. Although it requires more frequent Rend refreshes, the tradeoff is generally worth it.
Managing Deep Wounds
Maintained via Mortal Strike, Colossus Smash, Bladestorm, and Cleave, keeping Deep Wounds active on all enemies is key for maximizing damage. With a 12-second duration, it typically remains up through normal rotation, but in multitarget scenarios, ensure coverage across all enemies for maximum value.
Rage Management
Rage is generated through auto-attacks and Charge, and nearly every ability consumes it. Prioritize keeping enough Rage for Mortal Strike on cooldown, as it sustains both damage and Deep Wounds. Sometimes, skipping a filler ability and letting a global cooldown go unused is better than letting Deep Wounds drop.
In The War Within, Rage generation and costs have been lowered. While it's now harder to Rage-starve, it's also harder to dump Rage quickly—opening up room for abilities like Ignore Pain without compromising your primary rotation.
Cycle Charging
A small optimization involves moving out of melee range to use Charge during rotation, gaining extra Rage. Do this between auto-attacks and only when Colossus Smash isn't active. Heroic Leap can also create distance on large-hitbox bosses, enabling what's known as a "Heroic Charge."
Group Buffs
Arms Warriors provide Battle Shout, increasing all party and raid members' Attack Power by 5%. This buff should be applied before combat begins.
The 5% Attack Power boost translates to roughly a 5% damage increase for melee classes and Hunters. However, its overall impact is slightly reduced due to the presence of non-scaling damage sources such as trinkets and potions.
Arms Warrior DPS Gems and Consumables
Best Gems for Arms Warrior in The War Within
We highly recommend using Raidbots to simulate your character's ideal gems and enchants, as they may differ from general recommendations.
Raiding
The top stats for Arms Warriors in raid settings are Haste and Critical Strike, so gemming should prioritize those.
Culminating Blasphemite provides the highest overall performance, although the critical effect increase is minimal. For practical movement benefits, Elusive Blasphemite may be more appealing.
For other sockets, make sure you have one of each gem type:
Fill remaining gem slots with Quick Ruby. As your gear improves, optimal gems may shift slightly toward more Critical Strike or Versatility.
Mythic+
In Mythic+, Haste and Critical Strike remain the top priority stats for Arms Warriors, and gemming should reflect that.
Culminating Blasphemite again offers top performance, though its extra crit effect is minor. Elusive Blasphemite can be useful for its movement speed increase, depending on the dungeon and affixes.
Ensure you use one each of the following gems:
Fill remaining sockets with Quick Ruby. As with raiding, higher gear levels may shift optimal gem choices slightly toward other secondary stats.
Best Flask for Arms Warrior in The War Within
Always use the Flask of Alchemical Chaos for maximum benefit.
Best Potion for Arms Warrior in The War Within
Your primary stat potion should be Tempered Potion. These are most effective during periods of high damage output, such as when your cooldowns are active or during Bloodlust or Heroism. Additionally, you can obtain Fleeting Tempered Potion from Alchemist Cauldrons.
Keep some Invigorating Healing Potion on hand for emergencies when your health is low. If you’re in a group with a Warlock, also grab their Healthstone as an alternative. Be sure to use these separately, not in a macro. You can also obtain Fleeting Invigorating Healing Potion from Cauldrons as well.
Best Food for Arms Warrior in The War Within
Since secondary stats generally provide more value per point than Agility, you should prioritize food that boosts secondary stats. Options include Beledar's Bounty, Outsider's Provisions, Jester's Board, Empress' Farewell personal food, or the The Sushi Special Feast. All of these offer identical benefits.
If you can afford it, consider using a Crystallized Augment Rune to boost your primary stat further. Augment Runes are expensive and are lost upon death, so be strategic about their use.
Best Enchants for Arms Warrior in The War Within
| Slot | Enchantment |
| Necklace | Magnificent Jeweler's Setting (adds up to 2 sockets to a Ring or Neck) |
| Main Hand |
Enchant Weapon - Authority of the Depths (Single Target) Enchant Weapon - Council's Guile (Multi Target) |
| Chest | Enchant Chest - Crystalline Radiance |
| Bracers | Enchant Bracer - Chant of Armored Avoidance |
| Legs | Defender's Armor Kit |
| Boots | Enchant Boots - Defender's March |
| Rings | |
| Cloak | Enchant Cloak - Chant of Winged Grace |
Arms Warrior DPS Gear and Best in Slot
This section will cover everything you need to know about equipping your character correctly.
BiS Gear for Arms Warrior
| Slot | Item | Source |
| Helm | Living Weapon's Faceshield (TIER) | Forgeweaver Araz in Manaforge Omega |
| Neck | Salhadaar's Folly | Nexus King Salhadaar in Manaforge Omega |
| Shoulder | Living Weapon's Ramparts (TIER) | The Soul Hunters in Manaforge Omega |
| Cloak | Reshii Wraps | Ghosts of K'aresh Campaign |
| Chest | Living Weapon's Bulwark (TIER) | Fractillus in Manaforge Omega |
| Bracers | Everforged Vambraces | Crafted — Blacksmithing |
| Gloves | Living Weapon's Crushers (TIER) | Soulbinder Naazindhri in Manaforge Omega |
| Belt | Everforged Greatbelt | Crafted — Blacksmithing |
| Legs | Living Weapon's Legguards (TIER) | Loom’ithar in Manaforge Omega |
| Boots | Interloper's Plated Sabatons | The Soul Hunters in Manaforge Omega |
| Ring #1 | Band of the Shattered Soul | Dimensius The All Devouring in Manaforge Omega |
| Ring #2 | Devout Zealot's Ring | The Dawnbreaker |
| Trinket #1 | Ara-Kara Sacbrood | Ara-Kara, City of Echoes |
| Trinket #2 | Astral Antenna | Loom’ithar in Manaforge Omega |
| Weapon | Maw of the Void | Nexus King Salhadaar in Manaforge Omega |
Best Trinkets for Arms Warrior in The War Within Season 3
Best Raiding Trinkets for Arms Warrior
This Trinket Tier List is single target biased, as this tends to be the most important aspect of Raiding. The best trinkets tend to be those that provide stat boosts, enhancing the performance of burst cooldowns, although there are a handful of strong direct damage trinkets in Season 3 of The War Within as well.
Using two on-use trinkets is usually not preferred due to the shared 20-second lockout period they incur, making it harder to use both with important cooldowns, though direct damage trinkets do not need to be timed with anything in particular, allowing them more flexibility.
- Astral Antenna spawns a nearby orb, which can be collected to grant a moderate stacking critical strike buff. Although it can be collected, the orb lasts 20 seconds and will slowly move toward the player, allowing it to be passively collected after a short delay. This makes the trinket much simpler than it appears, and can be treated passively in all but the most movement intensive situations.
- Eradicating Arcanocore passively deals direct damage, best used against a single enemy, though the total damage does increase when split between multiple targets.
- Ara-Kara Sacbrood is a powerful passive trinket that grants a great deal of strength, though the spawned add does next to no appreciable damage.
- So'leah's Secret Technique allows some control over which player it is used on to gain the appropriate stat, though care should be taken to ensure the buff remains active.
- Ticking Sack of Terror deals direct single target damage after several applications.
Best Mythic+ Trinkets for Arms Warrior
This Trinket Tier List is multitarget biased, as this tends to be the most important aspect of Mythic+. The best trinkets tend to be those that provide stat boosts, enhancing the performance of burst cooldowns, although there are a handful of strong direct damage trinkets in Season 3 of The War Within as well.
Using two on-use trinkets is usually not preferred due to the shared 20-second lockout period they incur, making it harder to use both with important cooldowns, though direct damage trinkets do not need to be timed with anything in particular, allowing them more flexibility.
- Astral Antenna spawns a nearby orb, which can be collected to grant a moderate stacking critical strike buff. Although it can be collected, the orb lasts 20 seconds and will slowly move toward the player, allowing it to be passively collected after a short delay. This makes the trinket much simple
- Ara-Kara Sacbrood is a powerful passive trinket that grants a great deal of strength, though the spawned add does next to no appreciable damage.
- Improvised Seaforium Pacemaker remains a decent option due to its predictability, though this can be a liability in some situations in which it triggers automatically at inopportune times.
- So'leah's Secret Technique allows some control over which player it is used on to gain the appropriate stat, though care should be taken to ensure the buff remains active.
- Cursed Stone Idol is the only viable 90-second cooldown trinket to align with Warrior cooldowns, though its stat buff was heavily nerfed in favor of dealing rather a lackluster amount of direct damage.
The War Within Season 3 Tier Set for Arms Warrior
New in Season 3, tier set bonuses are now separated by hero talents rather than traditional specializations. This still results in three distinct groups of bonuses, but instead of separate Arms, Fury, and Protection sets, they are now tailored to Colossus, Mountain Thane, and Slayer.
You only need four out of five pieces to obtain both set bonuses, though Arms can comfortably use all five due to its flexible stat weights. You can use the Matrix Catalyst to convert regular items (such as from Mythic+) into tier pieces.
Slayer Set Bonuses
Warrior Slayer 11.2 Class Set 2pc: Execute damage increased by 10%, and Executes from Sudden Death have a 10% chance per stack of Overwhelmed to trigger a Slayer's Strike at full effectiveness. This can stack up to a 100% chance, greatly boosting single-target damage and generating more Sudden Death procs.
Warrior Slayer 11.2 Class Set 4pc: Overpower damage increased by 10%, and it gains a 2% chance per stack of Overwhelmed to trigger Reap the Storm at 150% effectiveness. This gives up to a 10% chance to trigger Reap, similar to Mortal Strike, though it doesn’t scale with multiple targets.
Colossus Set Bonuses
Warrior Colossus 11.2 Class Set 2pc: Demolish damage increased by 20%, and critical strike damage of your abilities is increased by up to 20% for 10 seconds on targets affected by Demolish, scaling with the number of Colossal Might stacks consumed. This is a simple but powerful damage boost.
Warrior Colossus 11.2 Class Set 4pc: Demolish increases the critical strike chance of your next Mortal Strike by 100%. A Mortal Strike critical hit boosts Rend and Deep Wounds damage by 80% for 8 seconds. These effects are independent, ensuring high uptime on bleed amplification.
Both sets are largely passive in nature, not requiring extra tracking, but they do increase the frequency of Sudden Death, Bladestorm, and Demolish, creating a noticeable difference in playstyle between Seasons 2 and 3.
Addons for Arms Warrior
Generic Addons for Warriors
- ElvUI
- Boss Mods
- Deadly Boss Mods
- BigWigs
- GTFO
- Parrot or Mik's Scrolling Battle Text
- Weak Auras
- TellMeWhen
- Raeli's Spell Announcer
- Recount / Skada / Details!
- Recount
- Details!
- Skada
- Omen Threat Meter
Specific Addons for Arms Warriors
- Currently, no additional addons are necessary to play an Arms Warrior to its full potential, though rotational helpers may assist new players.
WeakAuras for Arms Warrior
WeakAuras is an essential tool for Arms Warrior and DPS players, offering unparalleled customization to enhance your gameplay. Rather than focusing on specific examples, we recommend exploring Wago.io, where you’ll find an extensive library of WeakAuras to suit your needs.
If you are unfamiliar with WeakAuras, it is an incredibly powerful and widely-used AddOn that allows you to create custom displays for nearly everything in the game. This includes tracking buffs, debuffs, cooldowns, Focus, resources, and much more.
To import a WeakAura, visit Wago.io and select one that fits your preferences. Click the "Copy WeakAura Import String" button to copy it to your clipboard. Next, log into the game and type /wa in the chat box to open the WeakAuras interface. Navigate to the "Import" section, press Ctrl+V to paste the copied string, and click "Import". You’re ready to go!
Mastering WeakAuras and customizing it to your playstyle is highly recommended for any serious raider. With countless options available on Wago.io, you can tailor your interface to optimize your performance and focus on what truly matters in combat.
Arms Warrior Frequently Asked Questions
How Much of Each Stat Should I Have?
More is generally better, but diminishing returns start applying around 30% rating (excluding talents like In for the Kill). This system encourages stat diversification rather than only stacking one stat. However, the actual impact varies depending on the situation. Simulating your character is the best way to determine your ideal stat balance. Generally, Arms Warriors prioritize Haste and Critical Strike, while Versatility can become more valuable in fights with high external damage.
Should I Worry About Rage?
Yes and no. The main concern is ensuring you always have enough Rage to cast Mortal Strike on cooldown. This helps maintain consistent damage output and keeps Mastery: Deep Wounds active. With Skyfury and the right talents, Rage starvation is uncommon unless you’re excessively using Ignore Pain or spamming Execute.
Should I Only Use Mortal Strike During Execute?
Yes, but not necessarily on cooldown. Mortal Strike benefits heavily from Executioner's Precision and also maintains Bloodletting and Deep Wounds. The ideal approach is to use Mortal Strike when you have two stacks of Martial Prowess or Executioner's Precision for maximum effectiveness.
What Piece of Gear is Better?
The best answer is to simulate it since many variables—gear, set bonuses, trinkets, and talents—affect performance. However, higher item level is usually better, as primary stat increases are more valuable than in past expansions.
The only exception is fight-specific gearing, where certain talents and gear setups perform better. If you want a raid-specific optimization, check WarcraftLogs.com rankings to see what top players are using.


Digital Aura Portal - FZCO
Building A1, Dubai Digital Park, Dubai Silicon Oasis, Dubai, United Arab Emirates Premises Number 72647 - 001
Business registration number: 70647