Protection Warrior Tank Guide - Midnight (12.0.1)
Select your Specialization
Welcome to our The War Within Protection Warrior Guide! In this guide, we’ll cover the general mechanics of the Protection Warrior class and highlight the changes introduced in The War Within. We hope you find valuable and practical insights to enhance your gameplay experience.

Table of Contents
Protection Warrior Overview
Protection Warriors excel in fights with high amounts of physical damage or where mobility is needed. Much of the damage they take is mitigated through blocking, making their damage intake smooth and predictable. Additionally, they provide a healthy amount of utility, whether it be crowd control or raid buffs. They are a formidable tank all around, making them a worthy choice in both raids and dungeons.
Protection Warrior Strengths and Weaknesses
Strengths
- Excels in situations with high amounts of physical/blockable damage.
- Smooth damage intake thanks to various defensives and high armor values.
- Can specialize for heavy AoE damage, single target damage or go for a fully defensive build with talents.
- Decent raid and dungeon utility in Rallying Cry, Battle Shout, Shockwave, Spell Reflection, and Intimidating Shout.
- Has high mobility with Charge, Intervene, and Heroic Leap.
Weaknesses
- Mediocre AoE DPS.
- Mediocre single-target DPS.
- More unforgiving of mistakes or improper play compared to other tanks.
- Weaker self-sustain compared to some other tank specs. This is only an issue in certain niche situations.
- Shield Block, Spell Block and Spell Reflection can be very inconsistent.
- Has some difficulty against bleeds, damage over time abilities and non-blockable damage.
Protection Warrior Basic Gameplay
As a tank, your main job is to stay alive while keeping the enemies off of your squishier raid/party members. To do so, you will try to generate as much Rage as possible and then use it, depending on the situation, on either defensives, like Shield Block, or offensive abilities, like Revenge.
Protection Warrior Changes in Patch 11.2
Patch 11.2 introduced many updates for Protection Warrior, including a full overhaul of the talent tree. Below are the most impactful changes:
Talent Tree Overhaul
Removed Talents:
New Talents:
- Armor Specialization
- Hunker Down
- Spellbreaker
- Red Right Hand
- Unyielding Stance
- Heavy Handed
- Whirling Blade
Reworked Talents:
- Best Served Cold: now only increases Revenge damage on free casts.
- Bloodborne: now a 1-point node.
- Brutal Vitality: can now increase the value of your next Ignore Pain if none is active.
- Fueled by Violence: healing increased.
- Enduring Alacrity: Armor bonus reduced to 5% (was 8%).
- Reinforced Plates: Armor bonus increased to 8% (was 5%).
- Enduring Defenses: now a 2-point node.
- Fight Through the Flames: magic damage reduction lowered to 4% (was 6%).
- Focused Vigor: Strength and Armor bonus reduced to 3% (was 5%).
- Punish: Shield Slam damage bonus increased to 15% (was 10%).
- Shield Charge: now grantsShield Block.
- Shield Specialization: now a 1-point node.
- Tough as Nails: damage slightly increased.
- Barbaric Training: now also increases Thunder Clap damage by 10%.
- Challenging Shout: now baseline.
Other Additions
- Reshii Wraps: a new Artifact cloak obtainable in 11.2, designed to last the entire patch.
- Tier Set: new bonuses tied to Hero Talents. While strong, they do not change gameplay significantly.
Protection Warrior Leveling Guide for The War Within
Best Protection Warrior Leveling Playstyle
As a Protection Warrior, you can do large pulls and survive them with ease. Tagging as many enemies as possible and grouping them together before dealing damage will lead to fast quest completions.
Additionally, queueing for dungeons while questing is highly recommended. Dungeons provide a significant amount of experience, and as a tank, you'll experience faster queue times compared to DPS specializations. Enemies in dungeons are typically stronger and have more abilities, requiring you to pay more attention and use your abilities more thoughtfully. This helps you improve your gameplay, preparing you for end-game content.
Gear Options
While leveling, always choose the loot with the highest item level. The only exception is if you come across a ring or necklace with slightly lower item level but offers two secondary stats instead of one.
War Mode Talents to Level Up as a Protection Warrior
The following PvP talents are recommended for leveling and solo or small group PvE content. Depending on your playstyle, different PvP talents may work better for you, so experimentation is encouraged!
General PvP Talent
- Morale Killer significantly reduces the cooldown of Demoralizing Shout, allowing for more damage reduction and output when paired with Booming Voice.
Protection Warrior PvP Talents
- Dragon Charge improves mobility and deals moderate damage to targets along your path.
- Sword and Board provides a near-constant increase to Shield Slam and Devastate damage through more frequent critical strikes.
Protection Warrior Tank Spec, Builds, and Talents
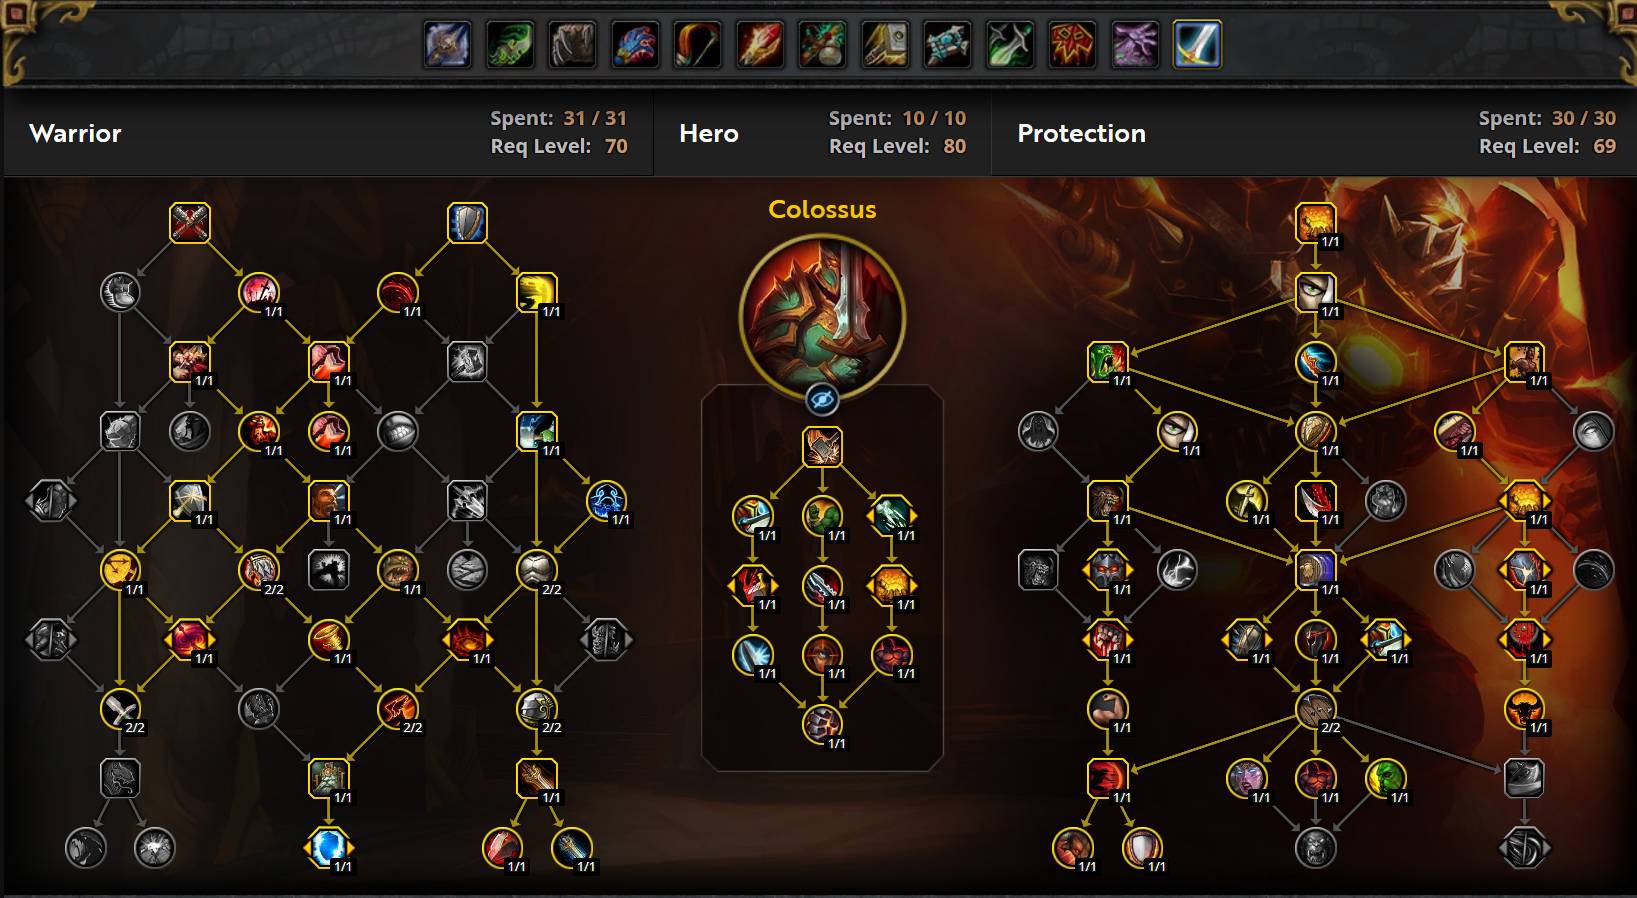

Copy the Protection Warrior talents, paste them into the game.
Colossus Standard Raid
Mountain Thane Standard AoE/Mythic+
PvP Talents (War Mode)
Enabling War Mode makes you eligible for open-world PvP, but also comes with several benefits:
- 10% increased rewards from World Quests at maximum level.
- 10% increased experience while leveling.
- Access to PvP talents in open-world content.
Because of these benefits, it is recommended to enable War Mode while leveling and for open-world PvE content. However, enabling War Mode also opens you up to the risk of being attacked by other players.
PvP Talents for Protection Warriors
Below are the recommended PvP talents for leveling and general PvE content. You may select one general PvP talent and three spec-specific talents.
Protection Warrior PvP Talents
- Morale Killer reduces the cooldown of Demoralizing Shout by 15 seconds, bringing it down to 30 seconds. It also causes enemies to deal reduced damage to all allies, not just yourself, providing excellent uptime for mitigation.
- Dragon Charge lets you charge a long distance in the targeted direction, dealing damage and knocking back enemies in your path. It doesn’t require a target and offers excellent mobility, similar to another Heroic Leap.
- Bodyguard helps reduce the physical damage taken by an ally, offering utility and protection in group content.
- Disarm is a powerful tool that significantly lowers the damage output of weapon-dependent classes by removing their weapon for a short time.
Best Hero Talents for Protection Warrior in The War Within
Mountain Thane and Colossus each bring unique strengths and weaknesses to both Raiding and Mythic+. Their contrasting designs offer a refreshing variety to the class.
Raiding
- Mountain Thane is the safer option due to increased Rage generation, making it more forgiving and stable in long encounters.
- Colossus can be a stronger offensive pick with the right talent setup, offering more burst potential.
Mythic+
- Colossus stands out as the preferred choice for Mythic+ thanks to its consistent damage and powerful burst with Demolish. It requires more strategic Rage management, but rewards skilled play.
- Mountain Thane remains a solid alternative, offering stronger defensive benefits, though at the cost of lower damage output.
Protection Warrior Tank Stat Priority
The Basics of Stats for Protection Warriors
The general stat priority for Protection Warriors is:
- Item level
- Haste
- Critical Strike = Versatility
- Mastery
Versatility and Critical Strike are roughly equal in value. Versatility offers constant damage reduction—including against magic—while Critical Strike helps mitigate physical attacks through increased Parry and boosts your damage output more significantly.
Although Mastery is the lowest secondary stat, the value of all stats is fairly close, so it’s not a "bad" stat. This priority mostly applies when comparing gear of the same item level—higher item level gear is generally better regardless of secondary stats.
It’s also worth noting: more stats are better than “better” stats. For example, 20 Critical Strike is usually better than 10 Haste.
Enchanting and gemming should also follow the general stat priority.
Diminishing Returns on Secondary Stats
Diminishing returns start after reaching 30% of any secondary stat (like Haste) from gear. Beyond this point, it takes more rating to gain the same percentage increase. This makes it more effective to diversify your stats once you reach 30% in any one stat.
Understanding Protection Warrior Stats
As a tank, your primary focus is survival. Once you're comfortable and confident in your survivability, you can consider shifting toward a more DPS-oriented stat setup.
Haste
Haste reduces your global cooldown, increases attack speed, and lowers the cooldowns of Shield Slam and Thunder Clap, improving Rage generation and damage output. Most importantly, it reduces the cooldown of Shield Block, giving you more frequent access to active mitigation and reducing damage spikes.
Higher Haste also increases the amount of Ignore Pain you can cast by increasing Rage generation. More Rage also means more cooldown reduction through Anger Management.
Versatility
Versatility boosts your damage, healing (including Ignore Pain), and reduces all incoming damage. It doesn't depend on RNG or specific mechanics and is especially valuable in magic-heavy encounters.
Mastery
Mastery: Critical Block increases your Block and Critical Block chance and boosts your Attack Power, improving both damage mitigation and the size of your Ignore Pain absorbs.
Critical Strike
Critical Strike is more valuable in Mythic+ content due to its offensive and defensive benefits. It increases your chance to Parry, reducing melee damage intake, and enhances your overall damage. However, it offers no defense against non-physical or unblockable damage.
Strength
Strength increases your Attack Power, improving Ignore Pain. It also boosts your Armor via Vanguard, adding to your physical damage reduction.
Armor
Armor passively reduces physical damage taken, making it a reliable and consistent stat for survivability. However, it offers no contribution to your damage output.
Stamina
Stamina increases your health pool, reducing the impact of incoming damage much like damage reduction does. While essential for surviving lethal mechanics, excessive Stamina can make healing more difficult, as it requires more healing to top off. It’s a good stat, but should be balanced carefully to avoid becoming a “healing sponge.”
Protection Warrior Tank Rotation, Cooldowns, and Abilities
Single-Target Rotation for Protection Warrior
The single-target rotation for a Protection Warrior is based on the following priority system. This is not a fixed sequence of actions but a priority list. Each time you're able to cast an ability, you should begin at the top of the list and use the first available ability that meets its conditions.
This rotation guide does not include active mitigation abilities. Active mitigation is more situational and nuanced, and we cover it separately in its own section. Including it here would not result in optimal usage.
The primary goal of your rotation is to generate as much Rage as possible through Rage-generating abilities. That Rage is then used for survivability through active mitigation.
- Cast Avatar on cooldown
- Cast Demoralizing Shout on cooldown (only with Booming Voice)
- Cast Champion's Spear
- Cast Ravager
- Cast Demolish on cooldown
- Cast Shield Charge
- Cast Shield Slam on cooldown
- It can be reset anytime you cast Devastate, Thunder Clap, Revenge, or Execute, so watch out for these procs.
- Cast Thunder Clap on cooldown
- Cast Execute, if you do not need Rage for survivability
- Cast Revenge, if the enemy is above the Execute health threshold and you do not need Rage for survivability
Single-Target Opener for Protection Warrior
- Cast Ravager
- Cast Charge
- Cast Avatar as you Charge
- Cast Shield Block
- Cast Shield Slam
- Cast Demoralizing Shout (only with Booming Voice)
- Cast Champion's Spear
- Cast Demolish
- Cast Shield Charge
- Cast Thunder Clap
- Proceed with the appropriate ability priority.
Additional Rotation Notes
- Ignore Pain should be used before any other ability if your next cast would exceed your maximum Rage. Otherwise, use it to dump excess Rage, as it is off the global cooldown.
- Outburst should always be used in conjunction with Shield Slam for single-target situations.
- To maximize your damage output, try to sync your strongest abilities with Avatar and Demoralizing Shout windows. This lets you take full advantage of their damage boosts—just be cautious not to delay your casts so much that you waste them.
Multi-Target Opener for Protection Warrior
When playing defensively against multiple targets, the ability priority remains the same as the single-target rotation. This ensures maximum Rage generation and, consequently, better survivability.
- Cast Revenge early in the fight to apply Deep Wounds across multiple enemies, even if it is not free.
- In dungeon scenarios, where new enemies frequently appear, prioritize Thunder Clap (or Revenge if Thunder Clap is on cooldown and even if it costs Rage) over Shield Slam. Gaining aggro quickly takes precedence over efficient Rage usage.
- Cast Avatar on cooldown
- Cast Demoralizing Shout on cooldown (only with Booming Voice)
- Cast Ravager on cooldown
- Cast Champion's Spear on cooldown
- Cast Shield Charge on cooldown
- Cast Thunder Blast on cooldown
- Cast Shield Slam on cooldown
- Cast Thunder Clap on cooldown
- Cast Revenge
- Ignore Pain should be prioritized over any other ability if your next cast would put you over the maximum Rage. Otherwise, use it to dump excess Rage, as it is off the global cooldown.
- Outburst usage in AoE depends on your Hero Talent tree:
- Below 4 targets: use Outburst on Shield Slam
- 4 or more targets: use Outburst on Thunder Clap or Thunder Blast
- The effectiveness of Outburst in AoE also depends on active buffs such as Avatar and Demoralizing Shout . These increase the value of Thunder Clap in AoE scenarios, especially with Unstoppable Force.
- You should still use abilities like Avatar and Demoralizing Shout in multi-target encounters according to their general guidelines.
- Whirlwind is not recommended, as Revenge is superior in every way:
- Revenge applies Deep Wounds, while Whirlwind does not.
- Revenge has a chance to reset the cooldown of Shield Slam; Whirlwind does not.
Active Mitigation Abilities for Protection Warrior
Shield Block
Shield Block is your primary active mitigation ability. In most situations, most of the damage you take is blockable. Therefore, keeping Shield Block up as much as possible is key to smoothing out damage and ensuring your survival. Unlike Ignore Pain, which provides a flat damage reduction, Shield Block scales with the damage you are taking, as it is a percent reduction to damage.
It is important to distinguish between overall Shield Block uptime and effective uptime. You want to maximize effective uptime, which means having Shield Block active when you are tanking something that actually melees you. Simply put, keep Shield Block up as much as possible when tanking, while still using it intelligently, similar to how you would use major cooldowns.
Shield Block has the following properties:
- Causes you to block all melee attacks made against you for 6 seconds, including critical blocks.
- The damage reduction from these blocks is determined by your Block stat.
- Increases Shield Slam damage by 30% while active.
- Costs 30 Rage.
- Has 2 charges with a 16-second recharge time (reduced by Haste).
Shield Block should be used whenever you are taking blockable damage. Here are a few tips for maximizing its effectiveness:
- Time Shield Block with the enemy's melee swings. If you cast it right after a melee hit, you essentially lose 2 seconds of effective uptime.
- If the boss is about to cast a spell, delay Shield Block to avoid wasting its uptime during that period.
- If you know an enemy is about to deal increased damage, delay Shield Block to maximize its effectiveness during that time.
- When not tanking, use Shield Block to boost Shield Slam damage, but be sure to have charges available for when you are about to tank again.
Ignore Pain
Ignore Pain reduces damage by a flat amount and, with current tuning, is generally weaker than Shield Block. Therefore, it should be used in addition to Shield Block, not as a replacement.
Ignore Pain has the following properties:
- Reduces 50% of any given damage event; 50% of the damage is absorbed, and the other 50% is dealt to you.
- Has a maximum absorb size of 30% of your maximum HP.
- Its absorb stacks, but only to a small extent.
- Has a duration of 12 seconds.
- Costs 35 Rage.
To get the most out of Ignore Pain, use it when you’re not tanking and taking minimal damage, or right before large damage spikes to survive them. If you’re not tanking and taking very little damage, don’t waste Rage on Ignore Pain, but instead try casting it before you start tanking again.
If you’re close to Rage capping, it’s fine to use Ignore Pain even if it exceeds the absorb cap. In rare cases with no blockable damage, prioritize Ignore Pain over Shield Block.
Last Stand
When using Bolster, Last Stand should be used like Shield Block unless you need it for a specific mechanic. Last Stand lasts for 15 seconds, giving you time to gain a Shield Block charge (depending on your Haste). If you use Last Stand when you have a Shield Block charge, you may waste some Shield Block cooldown time. Ideally, use Last Stand after both charges of Shield Block are used to maximize effective block uptime.
Defensive Cooldown Usage for Protection Warrior
As a Protection Warrior, you have several defensive cooldowns at your disposal. Proper usage of these cooldowns is crucial for your survival. Planning ahead and maximizing their effectiveness is key to performing well in encounters. Below is an outline of your primary defensive cooldowns and their usage. For more information on cooldown usage in general, see the "how to improve" page.
Last Stand
Last Stand can be used in two main ways depending on the situation:
- If you are using Bolster, Last Stand should be used to extend your Shield Block uptime, as explained in the Shield Block section above.
- If there are several high-damage mechanics or if you are able to maintain Shield Block up for most of your active tanking time, Last Stand should be used as an emergency cooldown when your health drops to dangerously low levels unexpectedly, or as a preemptive cooldown to prepare for a large damage spike.
If you are not using Bolster, simply use Last Stand as an emergency or preemptive cooldown.
Shield Wall
Shield Wall should be used to prepare for a large damage spike or during periods of high damage, particularly against non-blockable damage. It is not recommended to use it if your health drops low suddenly, as it does not restore health. Instead, use it in situations where it increases your chances of surviving high damage periods.
Demoralizing Shout
With Booming Voice, Demoralizing Shout should be used on cooldown for both its damage mitigation and damage purposes. You will likely have it up at an optimal time, helping smooth out your incoming damage.
In certain situations, it may be wise to delay the use of Demoralizing Shout if you anticipate heavy damage and do not have other cooldowns available.
If you are not using Booming Voice, use Demoralizing Shout as a typical defensive cooldown.
Spell Reflection
Spell Reflection can be used in two ways:
- To reflect a specific spell cast at you, or
- As a magic damage reduction cooldown. While most boss abilities cannot be reflected, the damage reduction portion still applies.
In most cases, you will be using Spell Reflection as a magic damage reduction tool. However, in dungeons or similar content, reflecting particularly powerful spells can be a valuable use of Spell Reflection. Keep in mind that once you reflect a spell, the Spell Reflection buff is lost, meaning you also lose the damage reduction effect. Be cautious when you need magic damage reduction but also have reflectable spells being cast at you.
Spell Block
Spell Block allows you to block spells, reducing damage taken from them by a significant amount. It has a 1.5-minute cooldown and a 30-second duration. Unlike Shield Block, Spell Block does not have the 85% damage reduction cap and can reduce up to 100% of the damage from spells.
Spell Block can be used freely due to its relatively short cooldown, but it's ideal to know about the encounter beforehand to avoid wasting it.
Protection Warrior Tank Gems and Consumables
Best Gems for Protection Warrior in The War Within
You should prioritize gems that provide Haste, as it is the most valuable secondary stat for Protection Warriors. Below is a list of recommended gem usage:
- Use Culminating Blasphemite in one socket.
- Ensure you have one gem of each type in the other sockets to maximize the Critical Strike effect. Ideally, use:
- Fill any remaining sockets with Deadly Emerald.
Best Flask for Protection Warrior in The War Within
Always use the Flask of Alchemical Chaos for maximum benefit.
Best Potion for Protection Warrior in The War Within
Your primary stat potion should be Tempered Potion. These are most effective during periods of high damage output, such as when your cooldowns are active or during Bloodlust or Heroism. Additionally, you can obtain Fleeting Tempered Potion from Alchemist Cauldrons.
Keep some Invigorating Healing Potion on hand for emergencies when your health is low. If you’re in a group with a Warlock, also grab their Healthstone as an alternative. Be sure to use these separately, not in a macro. You can also obtain Fleeting Invigorating Healing Potion from Cauldrons as well.
Best Food for Protection Warrior in The War Within
Since secondary stats generally provide more value per point than Agility, you should prioritize food that boosts secondary stats. Options include Beledar's Bounty, Outsider's Provisions, Jester's Board, Empress' Farewell personal food, or the The Sushi Special Feast. All of these offer identical benefits.
If you can afford it, consider using a Crystallized Augment Rune to boost your primary stat further. Augment Runes are expensive and are lost upon death, so be strategic about their use.
Best Enchants for Protection Warrior in The War Within
| Slot | Enchantment |
| Necklace | Magnificent Jeweler's Setting (adds up to 2 sockets to a Ring or Neck) |
| Weapon | Enchant Weapon - Authority of the Depths |
| Chest | Enchant Chest - Crystalline Radiance |
| Bracers | Enchant Bracer - Chant of Armored Leech |
| Legs | Defender's Armor Kit |
| Boots | Enchant Boots - Defender's March |
| Rings | |
| Cloak | Enchant Cloak - Chant of Leeching Fangs |
Protection Warrior Tank Gear and Best in Slot
This section will cover everything you need to know about equipping your character correctly.
BiS Gear for Protection Warrior
| Slot | Item | Source |
| Helm | Living Weapon's Faceshield (TIER) | Forgeweaver Araz in Manaforge Omega |
| Neck | Duskblaze's Desperation | The Soul Hunters in Manaforge Omega |
| Shoulder | Living Weapon's Ramparts (TIER) | The Soul Hunters in Manaforge Omega |
| Cloak | Reshii Wraps | Ghosts of K'aresh Campaign |
| Chest | Breastplate of Otherworldly Influence | Halls of Atonement |
| Bracers | Everforged Vambraces | Crafted — Blacksmithing |
| Gloves | Living Weapon's Crushers (TIER) | Soulbinder Naazindhri in Manaforge Omega |
| Belt | Everforged Greatbelt | Crafted — Blacksmithing |
| Legs | Living Weapon's Legguards (TIER) | Loom’ithar in Manaforge Omega |
| Boots | Interloper's Plated Sabatons | The Soul Hunters in Manaforge Omega |
| Ring #1 | Band of the Shattered Soul | Dimensius The All Devouring in Manaforge Omega |
| Ring #2 | Logic Gate: Omega | Forgeweaver Araz in Manaforge Omega |
| Trinket #1 | Tome of Light's Devotion | Priory of the Sacred Flame |
| Trinket #2 | Brand of Ceaseless Ire | The Soul Hunters in Manaforge Omega |
| Weapon | Oath-Breaker's Recompense | Nexus King Salhadaar in Manaforge Omega |
| Shield | Ward of the Weaving-Beast | Loom’ithar in Manaforge Omega |
Best Trinkets for Protection Warrior in The War Within Season 3
Trinkets are some of the more unique items in the game due to their various effects. They can either help bolster your defenses or assist in dishing out even more damage. Regardless of which you will choose, below you can find a list of other noteworthy trinkets for us.
- Tome of Light's Devotion — This trinket has 2 parts, one is the "defensive" mode, which grants you armor and a magic absorb, the second is a "offensive" mode, which grants you a lot of Critical Strike and a damage proc. The trinket switches between the two modes depending on how many stacks you have currently. You gain stacks by being attacked. You can also use the on-use effect of the trinket to switch to the other mode. This trinket is one of the strongest single target trinkets, as long as you stay in the "offensive" mode.
- Improvised Seaforium Pacemaker — Provides a significant guaranteed Critical Strike buff on a 1-minute cooldown, which can be further extended with critical hits. As we are already stacking Critical Strike, this trinkets value is great.
- Brand of Ceaseless Ire — This trinket has a defensive and a offensive part. It starts off weak, but the longer you are in combat the stronger this trinket gets, thanks to the stacks it builds up. Once you leave combat the stacks start dropping off, so watch out for it.
- Astral Antenna — A passive chance to increase your Critical Strike, which may overlap. Crit is already one of our best stats, so getting even more of it is a no-brainer.
- Signet of the Priory — This trinket can be a decent option if you have multiple other party members who have it equipped. The on-use provides you with a lot of your highest secondary stat while also granting other people who use the trinket the same stat.
- Ara-Kara Sacbrood — A decent trinket which is providing us Haste, a high up-time Strength buff and a bit of damage.
- Eradicating Arcanocore — Passive damage proc, which deals a lot of damage. The trinket itself also has Strength on it, making it even better.
- Cursed Stone Idol — Main stat and a lot of crit on demand. With a 1.5 minute cooldown it lines up more or less with our other offensive cooldowns making it an excellent trinket, especially in AoE.
- Araz's Ritual Forge — Can be paired up with other offensive cooldowns to use every 2 minutes for a big burst of damage.
- Ringing Ritual Mud — Provides a decently strong absorb on a 2 minute cooldown. The cooldown can also be reduced, but this is not always a guarantee.
- Loom'ithar's Living Silk — While it does not have main stat, it does have Haste, which is great. The on-use effect of the trinket is also decent, as it allows you to shield yourself and 4 nearby allies.
The War Within Season 3 Tier Set for Protection Warrior
Tier Sets are class-themed gear pieces that provide unique two- and four-piece bonuses tied to each specialization and Hero Talent. For Protection Warrior, the bonuses are split between Colossus and Mountain Thane.
Colossus Set Bonuses
- Warrior Colossus 11.2 Class Set 2pc: Demolish damage increased by 20%, and your critical strike damage is increased by up to 20% on targets affected by Demolish for 10 seconds.
- Warrior Colossus 11.2 Class Set 4pc: Demolish increases the critical strike chance of your next Shield Slam by 100%. Shield Slam critical strikes increase the damage of Rend and Deep Wounds by 80%.
This is a strong, fully passive set that doesn’t require additional management. Just make sure to hit as many targets as possible with Demolish to maximize its value.
Mountain Thane Set Bonuses
- Warrior Mountain Thane 11.2 Class Set 2pc: Thunder Blast has a 35% chance to call down five Ionizing Strikes on affected targets, dealing Nature damage.
- Warrior Mountain Thane 11.2 Class Set 4pc: Ionizing Strikes deal 100% more damage, and when they trigger, you gain a charge of Thunder Blast, which will deal 100% additional damage.
While this set doesn’t introduce new gameplay mechanics, the impact is noticeable through the increased damage from Ionizing Strikes and frequent free casts of Thunder Blast.
Addons for Protection Warrior
Generic Addons for Warriors
- ElvUI
- Boss Mods
- Deadly Boss Mods
- BigWigs
- GTFO
- WeakAuras
- Details! Damage Meter
- Plater Nameplates
- Angry Keystones
- Method Raid Tools
WeakAuras for Protection Warrior
WeakAuras is an essential tool for Protection Warrior and Tanks, offering unparalleled customization to enhance your gameplay. Rather than focusing on specific examples, we recommend exploring Wago.io, where you’ll find an extensive library of WeakAuras to suit your needs.
If you are unfamiliar with WeakAuras, it is an incredibly powerful and widely-used AddOn that allows you to create custom displays for nearly everything in the game. This includes tracking buffs, debuffs, cooldowns, Focus, resources, and much more.
To import a WeakAura, visit Wago.io and select one that fits your preferences. Click the "Copy WeakAura Import String" button to copy it to your clipboard. Next, log into the game and type /wa in the chat box to open the WeakAuras interface. Navigate to the "Import" section, press Ctrl+V to paste the copied string, and click "Import". You’re ready to go!
Mastering WeakAuras and customizing it to your playstyle is highly recommended for any serious raider. With countless options available on Wago.io, you can tailor your interface to optimize your performance and focus on what truly matters in combat.
Protection Warrior Frequently Asked Questions
Should I Play Defensively or Offensively?
This is the key question for tanking. If you’re progressing on a new boss or are not yet comfortable with your class, play defensively. As you get more experience, you can begin focusing on dealing more damage while slowly sacrificing survivability. Once you fully master the encounter and your character, you can optimize talents for either a more offensive or defensive setup based on your needs.
How Good Are Protection Warriors in The War Within?
Protection Warriors are extremely strong in the right situations. They are more than viable for all types of content, from raids to Mythic+.
What Race Is Best for Protection Warriors?
The differences between races are so small that you should simply pick the one you like the most. Each race has situational bonuses, and the best race depends on the type of content you play. No race provides a significant enough advantage to be considered the absolute best.
Do I Need 100% Shield Block Uptime as a Protection Warrior?
Your priority should be maintaining Shield Block when actively tanking to reduce incoming melee damage. However, effective uptime is more important than total uptime. Effective uptime means having Shield Block active while actually taking melee hits, whereas overall uptime includes time when you are not taking blockable damage. Aim for high effective uptime, and cover any gaps with defensive abilities like Shield Wall when needed.
What Piece Is Better, X or Y?
In general, if an item is a higher item level, it should be equipped. Compare secondary stats only when looking at items of the same item level.
There’s no universal answer, as gear upgrades depend on your entire setup. A piece that’s an upgrade for you may not be for someone else. If you want the most accurate comparison, simulating your gear is the best approach.
How Much Haste Should Protection Warriors Have?
There is no fixed amount of Haste or any secondary stat you should aim for. It’s a common mistake to overestimate the importance of the “right” secondaries—having more total stats is often better than having the perfect distribution.
For example, 120 of your worst stat is usually better than 100 of your best stat, since the differences are not as significant as people often assume. Instead of chasing specific numbers, focus on acquiring high-item-level gear and adjusting based on performance.


Digital Aura Portal - FZCO
Building A1, Dubai Digital Park, Dubai Silicon Oasis, Dubai, United Arab Emirates Premises Number 72647 - 001
Business registration number: 70647