Unholy Death Knight DPS Guide - Midnight (12.0.1)
The one whose name was once whispered by the very forests of Lordaeron is undoubtedly dead now. However, his warriors, the Death Knights, remain—at least on the surface. In this Unholy Death Knight Guide, we will offer an in-depth look at the changes the Death Knights have undergone in the upcoming expansion, along with the fundamentals of their gameplay.

Table of Contents
Unholy Death Knight Overview
The Unholy specialization currently provides high single-target burst as well as good AoE scaling. We are also one of the tankiest classes in the game, something that is very useful in all PvE content!
Unholy Death Knight Strengths and Weaknesses
Strengths
- Frequent cooldown windows every 45 seconds.
- Very high AoE burst potential
- Effective at range.
- Solid Single target that does not require a lot of boss uptime, making it good for progression.
- One of the tankiest specs.
- Knockback prevention with Death's Advance.
- Anti-Magic Zone as a magic damage raid cooldown.
Weaknesses
- Limited mobility.
- Limited mythic+ utility.
- Defile covering ground mechanics.
- Long setup required in Mythic+.
Unholy Death Knight Basic Gameplay
Unholy Death Knight is a spec that is all about managing your resources and maximizing your burst potential with correct cooldown management.
Unholy Death Knight 11.2 Changes
Unholy received a rework in Patch 11.2, including several new, removed, and updated talents. Additionally, new tier sets are now Hero-Talent specific, with separate sets for Rider of the Apocalypse and San'layn, instead of one set per specialization.
The guide has been updated with the new talent trees and builds. The rotation has also been revised to fit the updated playstyle. The gear page includes updated BiS gear along with new pieces, including the Reshii Wraps cloak.
The Unholy playstyle has not changed drastically in Season 3. Abomination Limb has been removed, but new talents like Legion of Souls have been introduced. Dark Transformation is now integrated into Apocalypse when talented, and there is a greater emphasis on pets for AoE damage.
Unholy Knight Leveling Guide for The War Within
Unholy Death Knight Leveling Playstyle
The Unholy Death Knight is a fast leveler, excelling at both multi-dotting and bursting down large packs of enemies quickly. Additionally, it is one of the most mobile leveling classes, thanks to On a Paler Horse once you reach level 71. We also have great self-sustain through procs of Dark Succor, which helps keep us healthy as we AoE down pack after pack of enemies.
Runeforge Choice
When you gain access to Runeforge, make sure to apply Rune of the Fallen Crusader, as it will speed up your leveling process the most! Alternatively, you can use Rune of Unending Thirst for a nice speed boost after killing mobs.
Gear Options
When leveling, always choose the piece of loot with the highest item level. The only exception to this rule is if you come across a Ring or Necklace with slightly lower item level but with 2 secondary stats instead of 1.
Unholy Death Knight PvP Talents for Leveling
- Necrotic Aura is a solid DPS boost since a large portion of our AoE is magical damage.
- Doomburst is the only third PvP talent that provides extra DPS throughput.
- Bloodforged Armor gives some nice defensive benefit.
Unholy Death Knight DPS Spec, Builds, and Talents


Copy the Unholy DK talents, paste them into the game.
Raid Build
Mythic+ Build
Leveling Build
PvP Talents (War Mode)
In this section, we will rank the PvP talents that are best for leveling and doing open-world content.
PvP talents enabled in the outdoor world:
- 10% increase in World Quest rewards at maximum level.
- 10% more experience gained while leveling.
- Earn Conquest Points, which can reward gear every week.
With the benefits of enabling War Mode for leveling and PvE content, it is recommended to enable the feature to maximize your leveling and rewards at maximum level. However, you will make yourself available for open-world PvP, and the possibility of being "ganked" while leveling or doing World Quests exists.
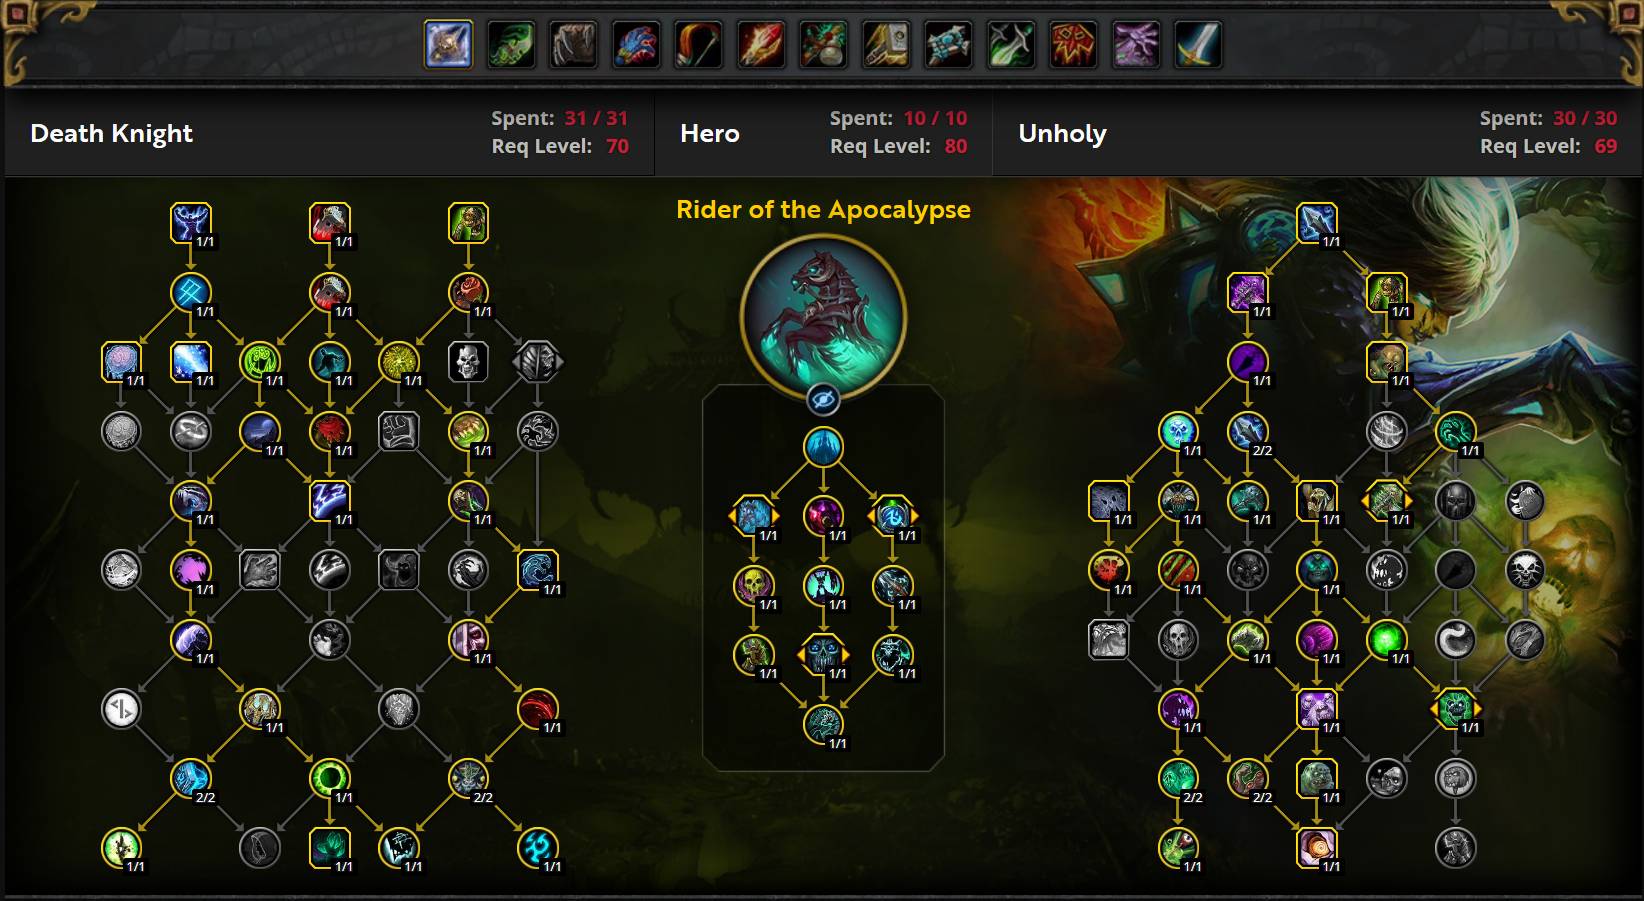
Best Hero Talents for Unholy Death Knight in The War Within
Raiding Hero Talents for Unholy Death Knight
Rider of the Apocalypse
Rider of the Apocalypse is generally the best hero talent for us in a raiding environment. It has minimal impact on our actual rotation but provides the most throughput. The horsemen themselves deal great damage and enhance our burst windows. Additionally, we gain solid mobility through Death Charge, which allows us to briefly mount a horse and move around while fighting the raid boss.
San'layn
San'layn slightly lags behind Rider in pure Single Target. The main downside of this spec is its randomness in damage output. You can experience great procs and deal massive damage, or you may get unlucky and do significantly less. However, it excels in low-target cleave, where the high damage from Death Coil combined with Improved Death Coil performs exceptionally well. Additionally, San'layn alters the gameplay by requiring high uptime during Dark Transformation windows, and any downtime results in a loss of the Essence of the Blood Queen buff, which can be detrimental.
Mythic+ Hero Talents for Unholy Death Knight
Rider of the Apocalypse
Rider of the Apocalypse is your preferred Mythic+ Hero Talent. It is simple to play and usually requires minimal setup to begin dealing damage. However, it does have a drawback in low-target dungeons, where San'Layn performs better. Additionally, Death Charge offers good mobility, while On a Paler Horse unfortunately does not work in Mythic+ or Raid environments.
San'layn
San'layn's damage throughput is heavily influenced by the dungeon type and key level. In lower keys, where trash dies too quickly, San'Layn tends to fall short since there's not enough time to trigger Infliction of Sorrow on the pack. However, in higher keys and especially those with lower target counts, San'Layn outperforms Rider. The tier set combined with Death Coil cleave offers excellent cleave damage and strong priority damage. The main downside is the spec's randomness, as it relies heavily on Blood Beast procs to deal substantial damage.
Unholy Death Knight DPS Stat Priority
The Basics of Stats for Unholy Death Knight
The most common stat priority you will find in your sims for Unholy Death Knights is as follows:
- Haste
- Mastery
- Critical Strike
- Versatility
Unholy Death Knights prioritize Mastery and Haste in The War Within. These two stats are significantly stronger than both Crit and Versatility. San'Layn generally values Haste more since it extends Dark Transformation windows.
Typically, a higher item level piece of gear will provide a bigger upgrade than focusing solely on secondary stats. However, certain setups and playstyles may have different stat preferences.
For Mythic+ and AoE-based fights, the priority shifts slightly:
- Mastery
- Haste
- Versatility
- Critical Strike
Getting a Better Understanding of Unholy Death Knight Stats
- Mastery: Through Mastery: Dreadblade, increases Shadow and minion damage, which are major sources of your total damage output.
- Haste: Increases attack speed, Rune regeneration rate, and decreases the Global Cooldown.
- Critical Strike: Increases your chance of landing critical hits with all spells and abilities.
- Versatility: Increases all damage and healing done while reducing damage taken.
Your pets and minions inherit your stats dynamically, although with a brief delay (0-5 seconds). This means you do not need to apply buffs before summoning them. However, for optimal performance, it is often recommended to activate Berserking 15 seconds before Dark Transformation to ensure pets gain its effects.
Unholy Death Knight DPS Rotation, Cooldowns, and Abilities
Single-Target Rotation for Unholy Death Knight
- Cast Soul Reaper if the target is below 35%.
- Use Scourge Strike / Clawing Shadows if the target has Chains of Ice on it.
- Cast Outbreak to maintain Virulent Plague on the target.
- Use Death Coil when you have 80+ Runic Power, a Sudden Doom proc, or when your Death Rot debuff is about to expire.
- Use Festering Strike to apply Festering Wounds if the target has 2 or fewer wounds.
- Use Scourge Strike when the target has at least 1 Festering Wound.
- Use Death Coil.
Single-Target Openers for Unholy Death Knight in The War Within
- Use Raise Abomination as you reach the boss.
- Use Death and Decay.
- Use Festering Strike.
- Use Apocalypse + Potion.
- Use Dark Transformation + Potion.
- Use Scourge Strike three times.
- Use Unholy Assault + Racial + Trinket.
When it comes to timing your trinkets, you can just macro them with Unholy Assault in all your openers.
If you are lucky enough to receive Power Infusion, ask for it when you use Unholy Assault in the opener!
Rotation during Dark Transformation with San'layn
With the San'layn Hero Talents, your rotation changes significantly during Dark Transformation windows. Scourge Strike and Death Coil gain extra value from their transformation into Vampiric Strike, as well as from Infliction of Sorrow, Frenzied Bloodthirst, and the Season 2 tier set. Stacking and maintaining Essence of the Blood Queen adds even more value. Because of this, we drop all spells except for Scourge Strike and Death Coil:
- Use Death Coil.
- Use Vampiric Strike.
Before equipping the Season 2 tier set, Vampiric Strike has slightly higher priority than Death Coil. This results in a very spam-heavy rotation, pressing only two buttons for the duration of Dark Transformation. Once Dark Transformation ends, use Scourge Strike to burst your DoT, reapply diseases, and return to the core rotation. During this phase, "vamp fishing" is used to extend the Essence of the Blood Queen buff into the next window.
Vampiric Strike Fishing
Maintaining Essence of the Blood Queen is key when using San'layn Hero Talents. The buff is quickly stacked seven times during Dark Transformation and should then be extended to the next Dark Transformation window. Since Dark Transformation lasts around 20 seconds, only one proc is needed in between casts to bridge the 25-second gap.
Two key priority changes:
- Use Death and Decay as often as possible to benefit from Blood-Soaked Ground.
- Prioritize Death Coil to maximize proc chances.
Once a proc occurs, use Vampiric Strike to extend the buff into the next Dark Transformation window. At this point, revert to the standard rotation.
Multiple Target Rotation for Unholy Death Knight
Unholy's AoE rotation focuses on maintaining high Plaguebringer uptime, generating and bursting a large number of Festering Wounds, and spamming Epidemic. The goal is to maximize DoT damage, generate plenty of Wounds in AoE, and spend the resulting Runic Power efficiently on Epidemic.
- Use Raise Abomination.
- Use Defile to deal AoE damage and enable cleave.
- Use Scourge Strike to initiate Plaguebringer.
- Use Dark Transformation (applies Virulent Plague via Unholy Blight). Use Outbreak if neither Raise Abomination nor Dark Transformation was used.
- Use Abomination Limb.
- Use Unholy Assault + Festering Strike (use Festering Strike twice if Unholy Assault is not ready).
- Use Vile Contagion.
- Use Apocalypse.
- Spam Scourge Strike to burst your Festering Wounds.
- Use Defile when your Cleaving Strikes buff runs out.
- Use Epidemic if you get a proc of Sudden Doom, or if you cannot use more Scourge Strike to burst Wounds.
- Continue with Scourge Strike spam, Epidemic spam, maintain Cleaving Strikes with Defile/Death and Decay, and maintain your DoTs with Outbreak.
- After you run out of Defile/Death and Decay, switch to the single-target rotation with Epidemic at 2+ targets (without Improved Death Coil, 4+ targets with it). This is the only time you use Festering Strike outside the initial GCDs in the opener on the pack.
The idea is to get your disease up and Plaguebringer quickly. We also make sure to use Defile early to start dealing damage and enabling the Scourge Strike cleave. We then build up Wounds on one target to use on Vile Contagion. If you do not use Vile Contagion, only use Festering Strike to enable Apocalypse. After this point, we prioritize Scourge Strike cleave to burst our Wounds, using Epidemic only when we get procs of Sudden Doom or if we run out of Runes. We also maintain Cleaving Strikes as much as possible and keep up our DoTs with Outbreak.
Unholy Death Knight DPS Gems and Consumables
Best Gems for Unholy Death Knight
The War Within offers the Culminating Blasphemite epic gem, which provides a solid increase in Strength while also boosting your Crit with each unique gem color you equip. Making the most of this effect can be worthwhile, but it depends on your current stats and talents. The best gems to use, in the following priority, are:
Best Flask for Unholy Death Knight in The War Within
You should be drinking the Flask of Alchemical Chaos at all times.
Best Potion for Unholy Death Knight in The War Within
Your stat potion should be Tempered Potion. Use these when you will do the most damage with your abilities, likely during your cooldowns and/or Bloodlust / Heroism. You can also obtain Fleeting Tempered Potion from Cauldrons that can be spawned by Alchemists.
You should keep a stock of Invigorating Healing Potion to use when at low health. If you have a Warlock in the group, grab their Healthstone and use it as well. Do not macro these together, they are best used separately! You can also obtain Fleeting Invigorating Healing Potion from Cauldrons that can be spawned by Alchemists.
Best Food for Unholy Death Knight in The War Within
The best food for Unholy Death Knights is Chippy Tea, as we benefit greatly from its stats. Our spec scales well with Mastery, making it a better choice than Strength-based feasts.
Additionally, if you can afford it, consider using Crystallized Augment Runes to further boost your primary stat. However, keep in mind that Augment Runes are costly and will be lost upon death, so use them strategically!
Best Enchants for Unholy Death Knights
| Slot | Enchantment |
| Necklace | Magnificent Jeweler's Setting (adds up to 2 sockets to a Ring or Neck) |
| Weapon | Rune of the Fallen Crusader in all content. |
| Chest | Enchant Chest - Crystalline Radiance |
| Bracers | Enchant Bracer - Chant of Armored Avoidance |
| Legs | Stormbound Armor Kit |
| Boots |
Enchant Boots - Defender's March (Stamina) Enchant Boots - Scout's March (Movement Speed) |
| Rings | Enchant Ring - Radiant Haste |
| Cloak |
Unholy Death Knight DPS Gear and Best in Slot
This section will cover everything you need to know about equipping your character correctly.
BiS Gear for Unholy Death Knight
| Slot | Item | Source |
| Helm | Hollow Sentinel's Stonemask | Tier Set: Catalyst / Vault / Raid |
| Neck | Salhadaar's Folly | Nexus King Salhadaar |
| Shoulder | Hollow Sentinel's Perches | Tier Set: Catalyst / Vault / Raid |
| Cloak | Reshii Wraps | Reshii Wraps |
| Chest | Hollow Sentinel's Breastplate | Tier Set: Catalyst / Vault / Raid |
| Bracers | Everforged Vambraces | Blacksmithing |
| Gloves | Breached Containment Guards | Forgeweaver Araz |
| Belt | Everforged Greatbelt | Blacksmithing |
| Legs | Hollow Sentinel's Stonekilt | Tier Set: Catalyst / Vault / Raid |
| Boots | Interloper's Plated Sabatons | The Soul Hunters |
| Ring #1 | Ring of the Panoply | Tazavesh: Streets of Wonder |
| Ring #2 | Whispers of K'aresh | Eco-Dome Al'dani |
| Trinket #1 | Cursed Stone Idol | Halls of Atonement |
| Trinket #2 | Astral Antenna | Loom’ithar |
| Weapon | Fatebound Crusader | Eco-Dome Al'dani |
Best Trinkets for Unholy Death Knight in The War Within Season 3
Raiding Trinket Tier List for Unholy Death Knight
This Trinket Tier List is single-target biased, as this tends to be the most important aspect of Raiding. Other aspects of the trinkets are also baked into the rankings, such as their ease of use.
S-Tier
A-Tier
B-Tier
- Ara-Kara Sacbrood
- Eradicating Arcanocore
- Void Pactstone
- So'leah's Secret Technique
- Incorporeal Essence-Gorger
C-Tier
- Void-Touched Fragment
- Incorporeal Warpclaw
- Depleted K'areshi Battery
- Soulbreaker's Sigil
- Soulbinder's Embrace
- Ticking Sack of Terror
- Screams of a Forgotten Sky
- Azhiccaran Parapodia
Mythic+ Trinket Tier List for Unholy Death Knight
This Trinket Tier List is more AoE focused as Mythic+ values AoE damage significantly more. We still look for a good balance between Single Target and AoE though! You can either choose to run one active and one passive or run double active to have a trinket up for every Dark Transformation window.
S-Tier
A-Tier
- Araz's Ritual Forge
- Improvised Seaforium Pacemaker
- Signet of the Priory
- Cursed Stone Idol
- Unyielding Netherprism
B-Tier
- Ara-Kara Sacbrood
- Eradicating Arcanocore
- Void Pactstone
- So'leah's Secret Technique
- Incorporeal Essence-Gorger
C-Tier
- Void-Touched Fragment
- Incorporeal Warpclaw
- Depleted K'areshi Battery
- Soulbreaker's Sigil
- Soulbinder's Embrace
- Ticking Sack of Terror
- Screams of a Forgotten Sky
- Azhiccaran Parapodia
The War Within Season 3 Tier Set for Unholy Death Knight
Our Season 3 Tier Set is now specific to the Hero Talents we run, with unique effects for both Rider of the Apocalypse and San'layn. The sets are strong with the following raw cumulative values:
- Rider 2-set: 3.7%
- Rider 4-set: 14.7%
- San'layn 2-set: 13.5%
- San'layn 4-set: 25.2%
You only need 4 pieces out of 5 to get both set bonuses. We recommend you get all items except for the Gloves, due to their Versatility stat. Check out the BiS List for more information.
Rider of the Apocalypse
- 2-piece bonus: Summons Whitemane for 10 seconds when you cast Apocalypse. Her Undead spells deal 20% increased damage and infect 1 additional target, while her Death Coil deals 35% increased damage. This is a completely passive tier set that adds strong value to the Apocalypse talent, making it much more valuable.
- 4-piece bonus: Whitemane casts her Death Coil and Epidemic when you use these abilities. Additionally, Death Coil deals 40% increased damage to targets affected by Undead. This greatly boosts Death Coil and increases the priority of using it over Epidemic in AoE, making the choice more complex.
San'layn
- 2-piece bonus: Infliction of Sorrow extends your disease by an additional 4 seconds (7 seconds total) on your main target. Essence of the Blood Queen also increases your Mastery by 0.5% per stack. This makes the ramping nature of Gift of the San'layn windows even stronger.
- 4-piece bonus: Infliction of Sorrow deals 35% increased damage, while Vampiric Strike increases the damage of your ghoul by 20% for 8 seconds, stacking with multiple applications. This further empowers Gift of the San'layn with higher Infliction damage and a substantial pet buff as you spam Vampiric Strike.
Addons for Unholy Death Knight
Generic Addons for Death Knights
- ElvUI
- Boss Mods: Deadly Boss Mods or Bigwigs
- GTFO
- Parrot or Mik's Scrolling Battle Text
- Weak Auras
- Recount / Skada / Details!
- Omen Threat Meter
- TellMeWhen
- Grid and GridClickSets (Optional)
Specific Addons for Unholy Death Knights
- Currently, we do not believe that you need any additional addons to play your specialisation to its full potential.
Macros for Unholy Death Knight
Generic Macros for Death Knights
Raise Ally
- #showtooltip Raise Ally
- /cast [@mouseover,help][@target]Raise Ally
This macro casts Raise Ally on your mouseover target, if they are a friendly player. Otherwise, it casts Raise Ally on your current target.
Mind Freeze
- #showtooltip Mind Freeze
- /cast [@focus,harm,nodead][] Mind Freeze
This macro allows you to interrupt your focus target, if you have one, and if not to simply interrupt your current target.
Specific Macros for Frost Death Knights
Opener Macros
These two macros help reduce the number of buttons you need to press in your opener (when running Summon Gargoyle)!
- #showtooltip Summon Gargoyle
- /cast Summon Gargoyle
- /cast Dark Transformation
Here is your second one for when you cast Unholy Assault! It is a good idea to add in a "/w PRIESTNAME PI me Please" here if you are getting PI.
- #showtooltip Unholy Assault
- /cast Unholy Assault
- /use 13
Outbreak Mouseover Macro
- #showtooltip Outbreak
- /cast [target=mouseover,exists] Outbreak; Outbreak
This macro will cast Outbreak on your mouseover target.
Dismissing Pet
- /petdismiss [pet]
This macro allows you to dismiss your pet, which might be required for dungeons, especially if you also have All Will Serve talent.
@Cursor Macros
- #showtooltip Death and Decay
- /cast [@cursor] Death and Decay
- #showtooltip Anti-magic Zone
- /cast [@cursor] Anti-magic Zone
These macros allow you to quickly plant your Death and Decay/Defile or Anti-Magic Zone on your cursor.
Pet Macros
Controlling your pet is a great way of optimizing your DPS and gameplay, here are some useful macros for that!
Move your pet to where you want.
- /petmoveto
Make it follow you so it does not get stuck somewhere!
- /petfollow
Resummoning the pet is sometimes the last resort to get it to you. This macro will dismiss your pet if you have it and raise it if you do not. Be careful to spam this as it can accidentally dismiss your pet twice, leaving you waiting for 30 seconds before you can summon it again.
- /script PetDismiss()
- /cast [nopet] Raise Dead
Control Undead
Controlling an Undead creature in dungeons is a nice way to add some minor extra damage, as well as control a specific mob for however long you want. It does need re-controlling every 2 minutes, and this macro is perfect for that! It will target your pet, dismiss it, and then instantly control it again.
- #showtooltip Control Undead
- /target pet
- /script PetDismiss()
- /cast Control Undead
WeakAuras for Unholy Death Knight
WeakAuras is an essential tool for Unholy Death Knight and DPS players, offering unparalleled customization to enhance your gameplay. Rather than focusing on specific examples, we recommend exploring Wago.io, where you’ll find an extensive library of WeakAuras to suit your needs.
If you are unfamiliar with WeakAuras, it is an incredibly powerful and widely-used AddOn that allows you to create custom displays for nearly everything in the game. This includes tracking buffs, debuffs, cooldowns, Focus, resources, and much more.
To import a WeakAura, visit Wago.io and select one that fits your preferences. Click the "Copy WeakAura Import String" button to copy it to your clipboard. Next, log into the game and type /wa in the chat box to open the WeakAuras interface. Navigate to the "Import" section, press Ctrl+V to paste the copied string, and click "Import". You’re ready to go!
Mastering WeakAuras and customizing it to your playstyle is highly recommended for any serious raider. With countless options available on Wago.io, you can tailor your interface to optimize your performance and focus on what truly matters in combat.
Unholy Death Knight Frequently Asked Questions
Do I Need to Play Around Procs of Runic Corruption?
No, there's no need to play around Runic Corruption procs. If you get multiple procs, the remaining duration is added to the new one, ensuring no overlap is wasted.
Do I Need a Specific Amount of Haste?
There aren't any strict Haste breakpoints to target. Focus on getting as much Haste as possible for single-target situations, but always verify your stat priorities with simulations to ensure the best setup for your character.
How Should Soul Reaper Be Used in the Rotation When the Target Hits 35%?
You should use Soul Reaper on cooldown whenever the target's health is at 35% or below. You can also cast it before the target reaches 35% health, provided their health will drop below 35% by the time the Soul Reaper debuff expires. Always save a Rune to ensure you can use Soul Reaper as soon as it becomes available.


Digital Aura Portal - FZCO
Building A1, Dubai Digital Park, Dubai Silicon Oasis, Dubai, United Arab Emirates Premises Number 72647 - 001
Business registration number: 70647