


+15 More
Digital Aura Portal - FZCO
Building A1, Dubai Digital Park, Dubai Silicon Oasis, Dubai, United Arab Emirates Premises Number 72647 - 001
Business registration number: 70647
gamer-choice.com © 2026
Digital Aura Portal - FZCO
Building A1, Dubai Digital Park, Dubai Silicon Oasis, Dubai, United Arab Emirates Premises Number 72647 - 001
Business registration number: 70647
The rumored Turbine boss ARC isn’t actually what most players would classify as a Baron. Instead, it appears to be an entirely different type of high-tier ARC that visually resembles a gigantic airborne Shredder. Despite looking terrifying and dealing absurd amounts of damage, the Turbine is surprisingly manageable once you understand how its mechanics work and which strategies are the safest.
In this ARC Raiders Turbine boss guide, I’ll explain how to kill Turbine efficiently, what loot it drops, which weak points matter the most, and the best loadout setups you should bring into the fight.
ARC Raiders Turbine Boss Guide Quick Summary:
If you need help farming Riven Tides loot or unlocking the new ship model trinkets quickly, check out our ARC Raiders Riven Tides Boost at Gamer Choice.

Buy ARC Raiders Boosts
Get gear, XP, and progression fast with ARC Raiders boosts!

Honestly, Turbine is either dramatically weaker than players originally expected, or the community figured out optimal strategies almost immediately after discovering it. Either way, this boss is nowhere near as threatening as encounters like Queen or Matriarch, even though it can still vaporize you in seconds if you make mistakes.
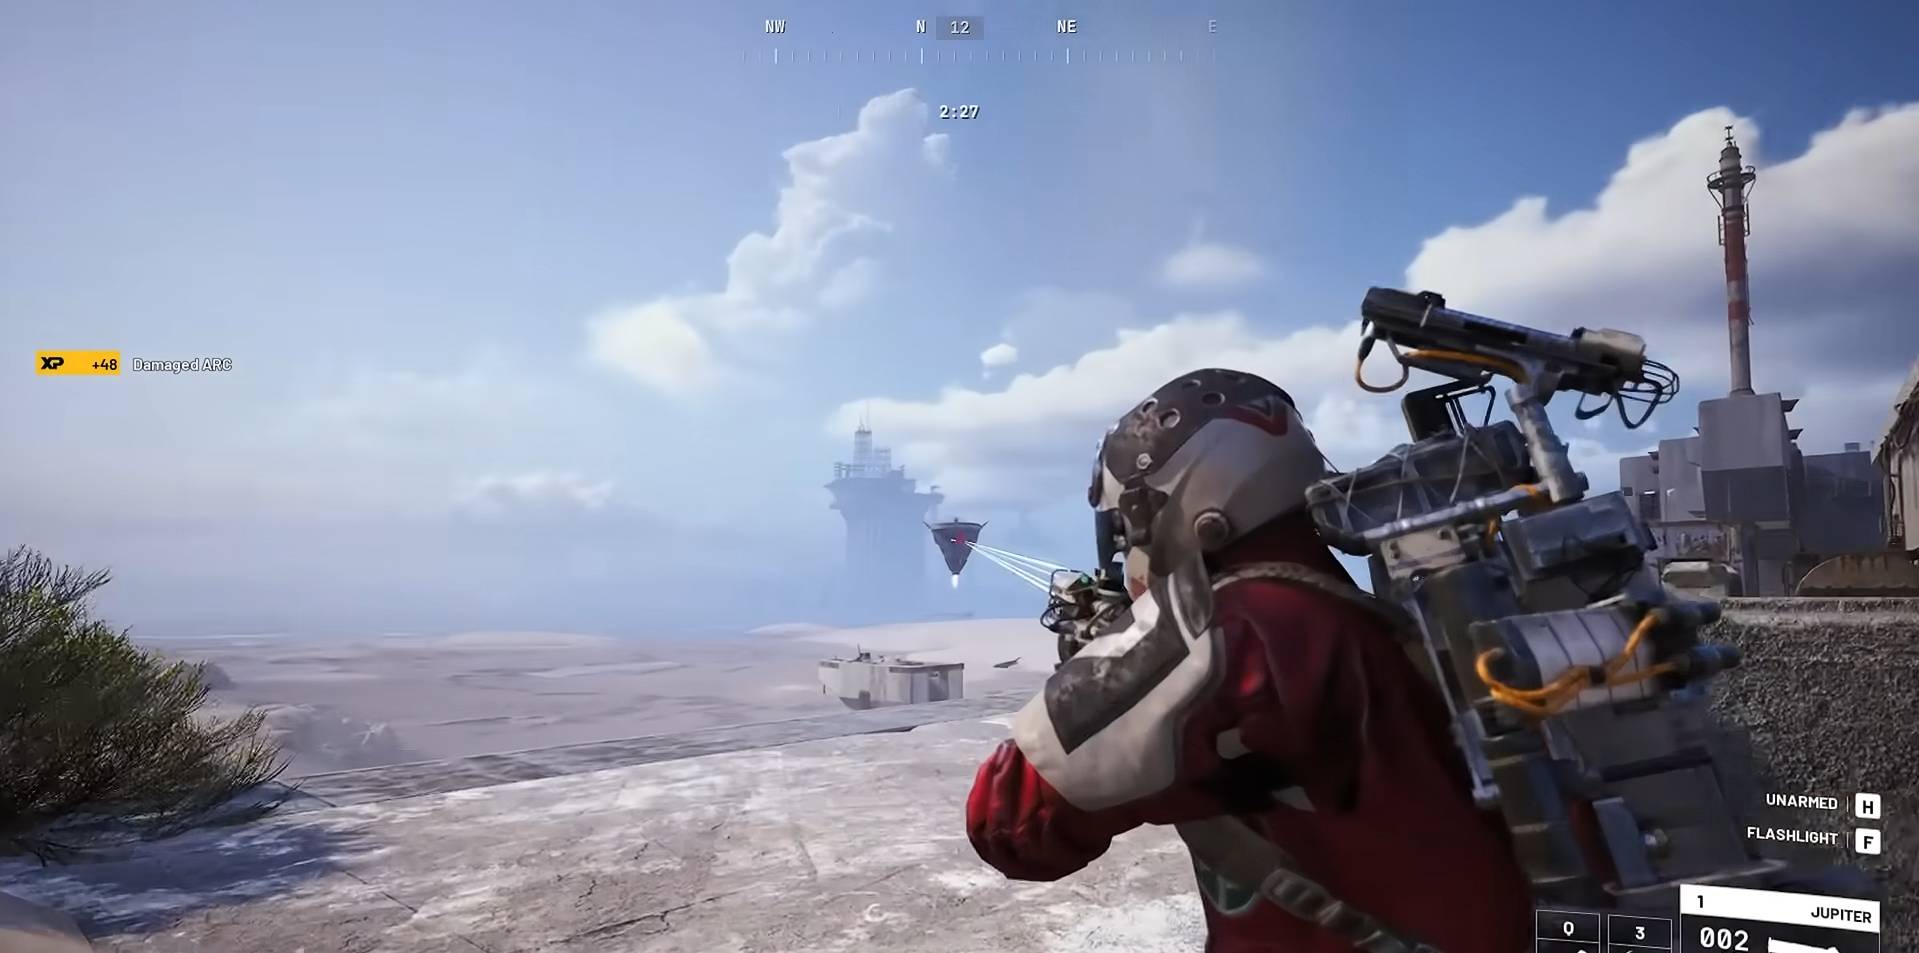
Turbine usually appears during the second half of a raid, typically between the 13-minute and 16-minute mark. If it fails to spawn during that timeframe, it generally means your lobby simply didn’t roll the event, so you’ll need to extract and queue again.
There are currently several viable ways to deal with Turbine, ranging from straightforward ranged combat to what many players would consider full-on cheesing. I’ll break down all three approaches.
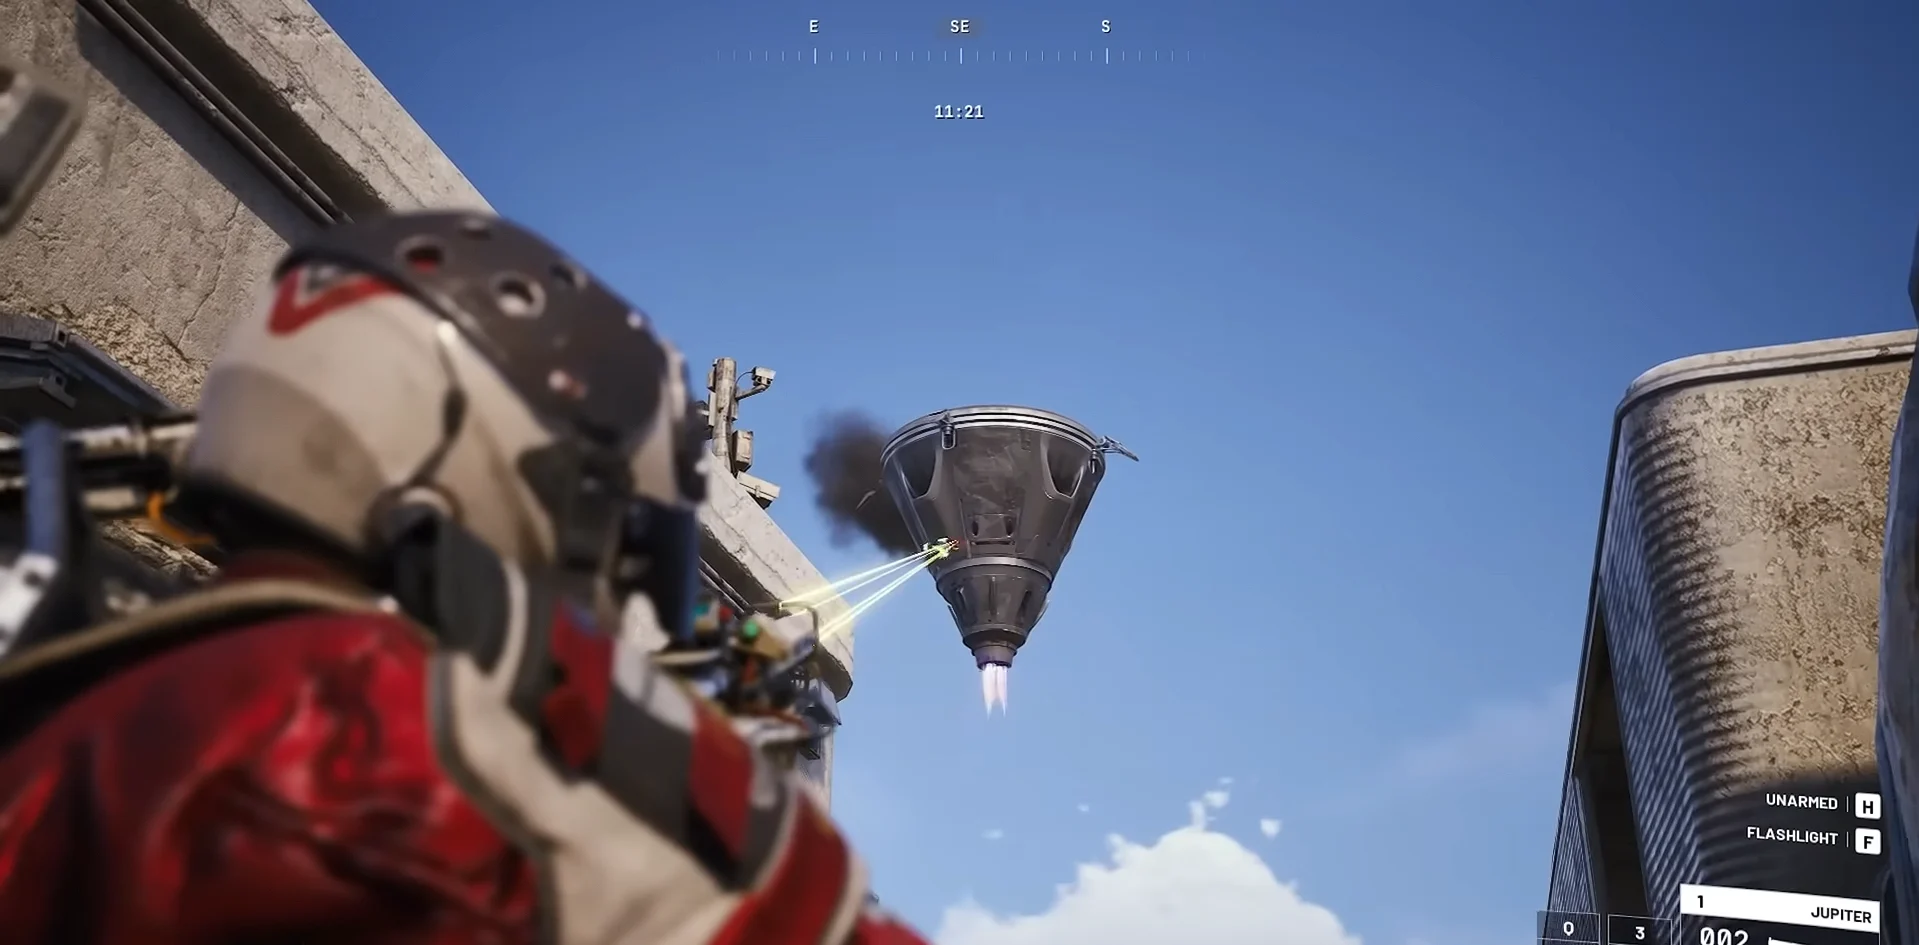
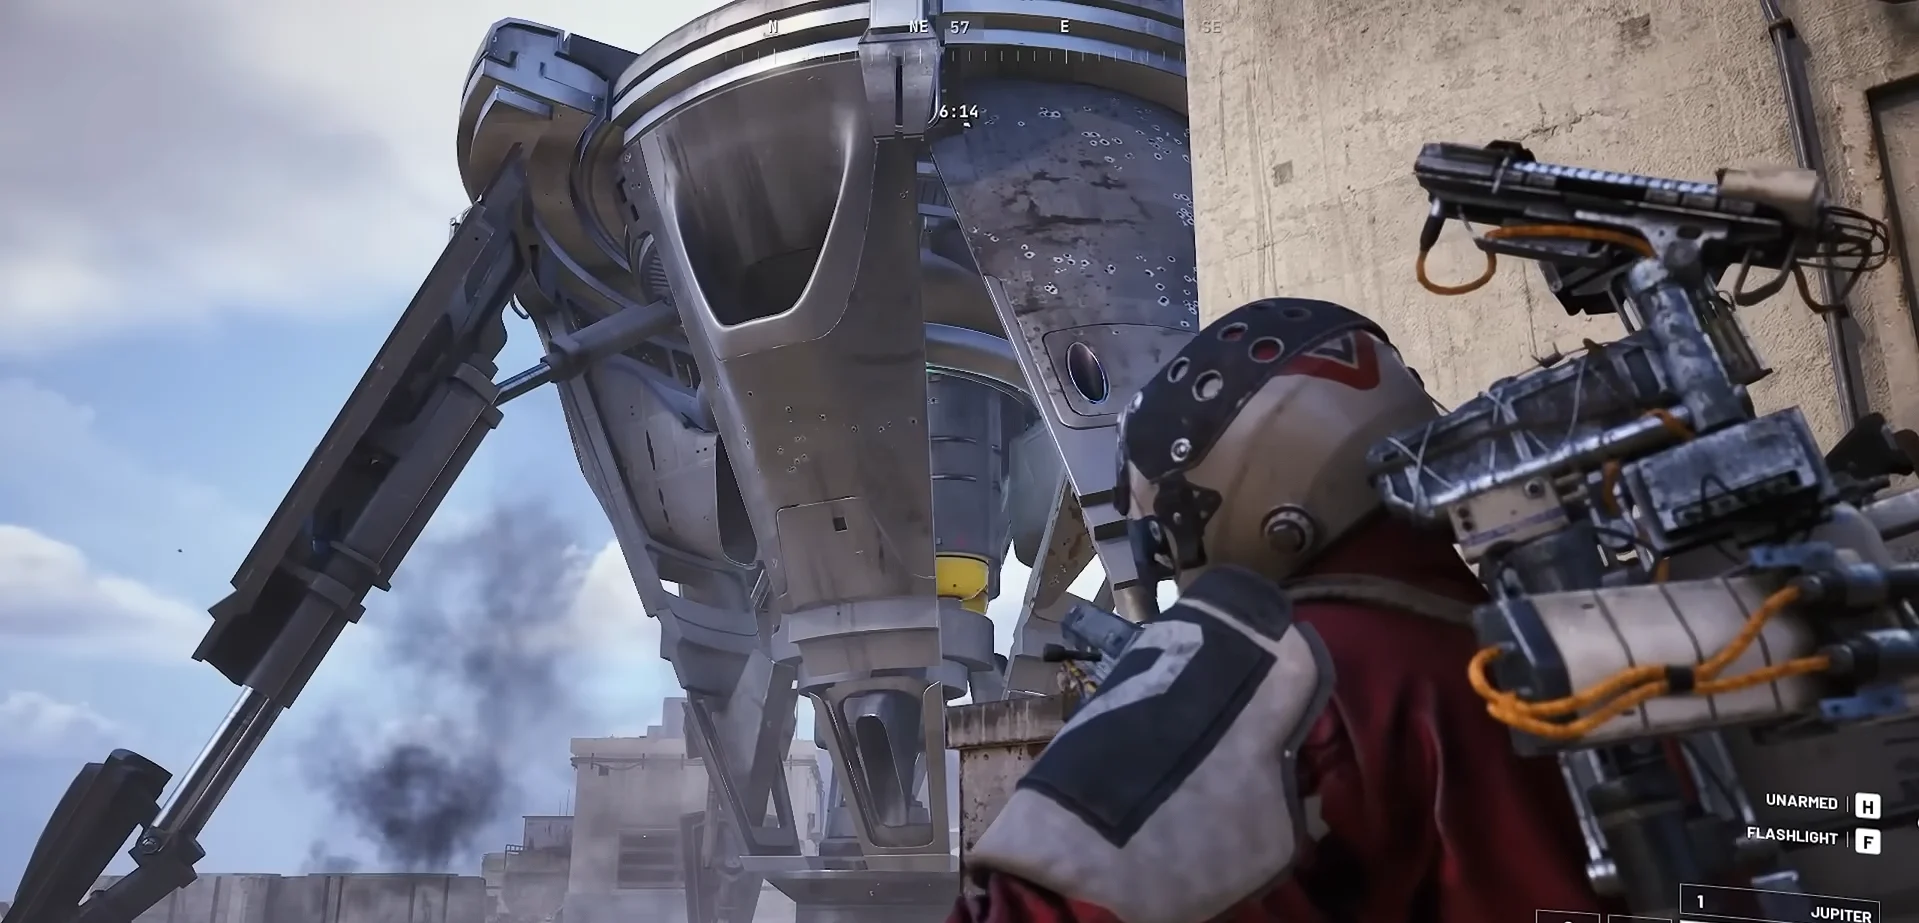
The core mechanic of the Turbine fight revolves around destroying its armor plating so you can access the vulnerable underbelly beneath it. Since the boss resembles an oversized flying Shredder, many of the same combat principles apply here as well.
However, unlike standard Shredders, Turbine deals catastrophic damage if you stay exposed for too long. Fighting it in open terrain is basically suicide unless you massively outgear the encounter.
Here’s the safest and most reliable strategy to kill Turbine in ARC Raiders:
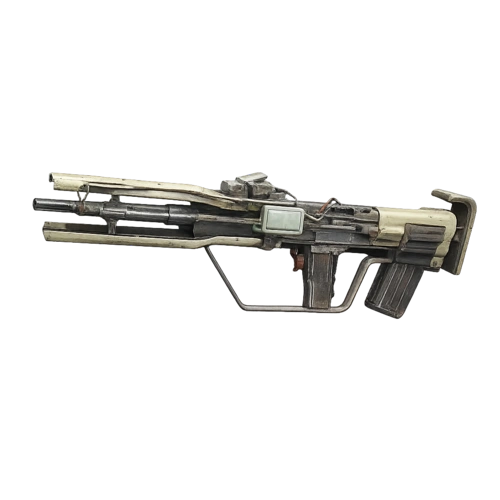
Turbine’s rotating armor plates absorb a ridiculous amount of incoming damage, which means weak penetration weapons struggle badly against it. Community testing quickly showed that Jupiter performs exceptionally well because of its overpenetration and long-range consistency.
Equalizer also performs well, while Bettina surprisingly becomes extremely useful during close-range phases. These weapons can punch through armor much more effectively than standard firearms.
The ideal fighting location is a building with enclosed walls and doors. Turbine launches lightning projectiles that explode in an area and can sometimes clip players through partial cover if positioned badly.
If you attempt this encounter in the open, expect to get deleted almost instantly. Turbine’s missile barrage is brutal, especially when multiple rockets connect at once.
The safest way to fight Turbine is essentially to play a constant game of peek-and-hide. Wait for the missile volley, remain behind cover, then quickly re-peek and unload damage before hiding again.
The problem is that Turbine often chains attacks aggressively once it locks onto you, so your timing needs to be fast and deliberate. Hesitating for even a second can cost your entire shield bar.
While this method is the most straightforward approach overall, there’s another strategy players are currently abusing that feels much closer to cheesing than a legitimate boss fight.
At the moment, there’s an extremely effective cheese strategy that allows you to kill Turbine with minimal danger. Whether this eventually gets patched or not is impossible to know, but right now it’s probably the easiest boss exploit available in ARC Raiders.
And yes, of course I’m sharing it.
Here’s how the Turbine cheese strategy works:
Jupiter is the key to the entire strategy because it has essentially unlimited effective range and no meaningful damage falloff. More importantly, its overpenetration allows shots to pass through multiple armor sections simultaneously.
This lets you deal weak point damage from absurd distances.
You need a position that gives you vision over a huge portion of the map. Some locations work particularly well for this strategy:
From my testing, Azzurro Beach consistently felt like the safest and most reliable location overall.
This strategy only works if Turbine remains far enough away that its AI doesn’t properly engage its aggressive missile phase. If you stand too close, it will instantly begin bombarding you with lightning rockets and the entire cheese falls apart.
The downside of this method is ammo consumption. You’ll burn through a lot more rounds than you would during a standard fight. Still, the safety tradeoff is absolutely worth it.
The only real danger comes from enemy Raiders noticing your position while you’re focused on the boss. Ideally, you either run this with a teammate covering your flank or try persuading a random solo player into cooperating and splitting the loot afterward.
Buy ARC Raiders Items
Get Weapons, Blueprints, and Keys in ARC Raiders
The third approach is significantly riskier but surprisingly effective once mastered. This method focuses entirely on close-range combat.
Yes, staying close to Turbine is dangerous. However, if you manage to force it into landing near proper cover, the fight becomes dramatically easier for a short window.
To pull this strategy off effectively, you’ll want Bettina or Deadline mines.
Here’s how the close-range strategy works:
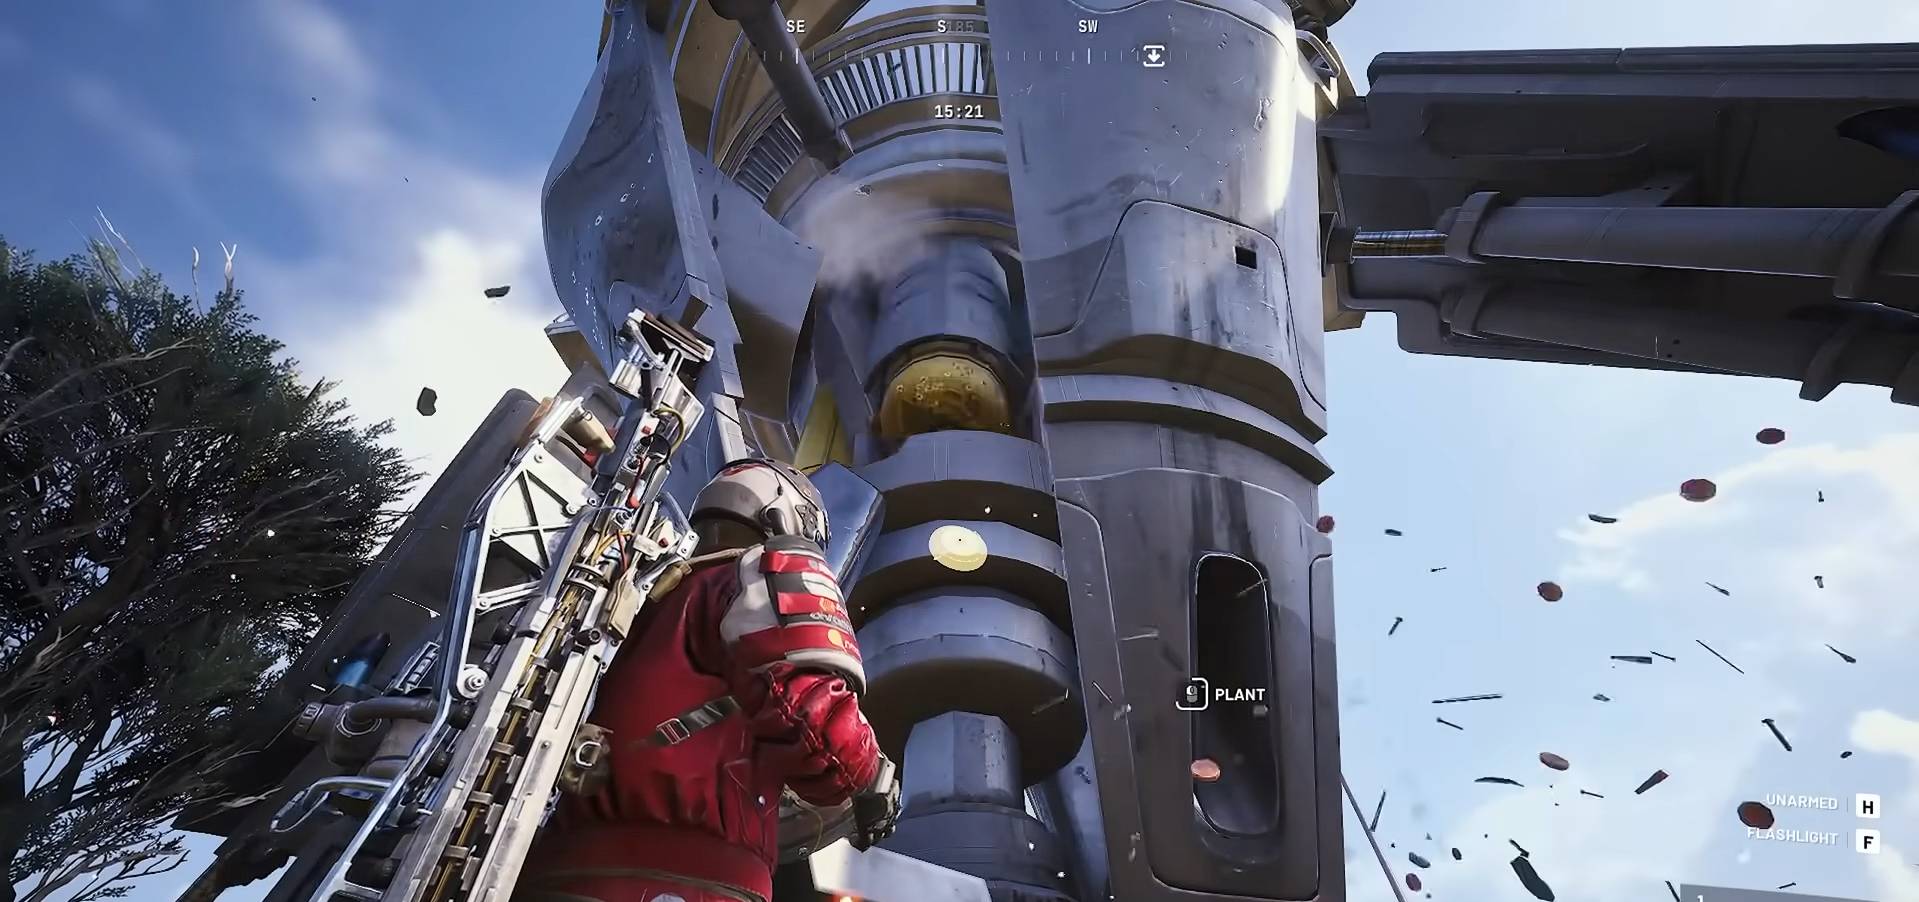
When Turbine lands, it deploys defensive landmines around its body while exposing vulnerable yellow canisters underneath its armor.
The mines activate within roughly 10 meters, but currently they don’t deal particularly high damage. Their main purpose seems to be functioning as an alarm system for the boss.
While Turbine is grounded, it temporarily becomes almost defenseless. It won’t immediately attack unless it detects incoming damage.
This creates a short but incredibly valuable damage window.
You can either:
From my own experience, the Deadline approach is significantly stronger overall. The problem is simply forcing Turbine into landing in a favorable location consistently.
The safest loop usually looks like this:
Turbine currently doesn’t have a massive attack pool. In fact, during all my encounters, it only consistently used two major abilities.
Turbine launches an energy projectile that splits into multiple self-tracking rockets targeting nearby players. Once they connect, they explode and apply heavy electrical damage.
Even a single rocket can completely destroy blue shields and remove roughly half your health bar immediately.
Whenever Turbine lands, it deploys mines around itself to protect the exposed underbelly area.
The mines currently don’t deal devastating damage, but triggering one alerts Turbine and shortens your damage opportunity significantly. If you accidentally trigger a mine, your best option is usually to immediately rush the weak point and maximize damage before the boss takes off again.
As of now, I haven’t observed any additional attack patterns beyond these two abilities. If more mechanics are discovered later, this section will probably need updating.
Turbine has two primary weak points players should focus on.
The first weak spot is the set of exposed yellow canisters that become visible when Turbine lands.
You can technically damage them while the boss is airborne by breaking through the rotating armor plates first, but that process takes forever unless you’re using Jupiter. In most cases, it’s far more efficient to simply wait for the landing phase.
The second weak point appears to be located near the top section of Turbine’s head assembly.
Simply taking higher ground usually isn’t enough because Turbine constantly moves through the air. However, players can actually ride the boss if they manage to grapple onto it using Snap Hook or the new mobility gadget unlocked later from Turbine-related progression.
That gadget is the Powered Descender, which I’ll explain below.
Despite functioning as a major boss encounter, Turbine surprisingly doesn’t drop any legendary crafting materials like Queen or Matriarch.
Still, the encounter remains highly valuable because of its unique progression drops.
Here’s the current Turbine loot table in ARC Raiders:
The most important drop by far is the Turbine Compressor.
You need two of them to complete the final stage of the Avian Alarm project, and they’re also required for crafting the new Powered Descender gadget.
Powered Descender allows players to descend slowly and completely negate fall damage, making vertical movement on Riven Tides dramatically safer.
The blueprint itself doesn’t drop directly from Turbine. Instead, it can be found elsewhere on the Riven Tides map. Thankfully, the blueprint seems fairly common overall, so obtaining it usually isn’t difficult.
Even though Turbine sits somewhere between a major ARC and a true endgame boss, this encounter still demands proper preparation. Going in undergeared is an easy way to lose valuable loot.
I’d honestly argue that Turbine was intentionally designed as the “solo player boss” of ARC Raiders. Multiple Turbines can spawn in a single raid, and unlike Queen encounters, you don’t need special map conditions to trigger the fight.
Still, that doesn’t mean you should underestimate it.
Here’s the best loadout setup for fighting Turbine:
| Type | Name | Explanation |
|---|---|---|
| Weapons | Primary: Jupiter/Equalizer/Bettina. Secondary: Any weapon you’re comfortable PvPing with. | On average, it takes around 60 shots from Jupiter to take down a Turbine. Take 12-14 energy clips to have enough. You won’t need that much on Equalizer, as you’ll use it as an armor breaker. Take like 6-8 energy clips. |
| Grenades | Deadline | Wolfpack or other nades won’t do anything to it. I’ve seen people put laser mines, predicting where it lands, but that feels like a gamble rather than an actual strategy. |
| Healing | Blue bandages or Healing Spray, lots of shield rechargers. | Turbine’s attacks chew through your health like no tomorrow, so bring lots of healing items. |
| Augment | Looting Mk. 3 (Safekeeper), Tactical Mk. 3 (Defensive) | Safekeeper will allow you to quickly stow away your legendary Primary if the fight goes south. The Tactical Mk. 3 is there to restore your shields if you run out of shield rechargers cause it has an integrated one. |
| Utility | Barricade/Snap Hook/Powered Descender | A barricade can somewhat help you to avoid the damage if you get caught in the open. Snap Hook and Powered Descender are for aggressive plays if you decide to climb on top of the Turbine and place mines. |
Preparing properly for Turbine runs is extremely important because many of the strongest weapons and gadgets used in this encounter require rare blueprints and expensive crafting materials.
If you’re struggling to unlock specific gear pieces, check out the ARC Raiders Blueprints service at Gamer Choice and grab the equipment blueprints you still need.
Boss encounters in ARC Raiders heavily reward preparation, positioning, and patience. Go into the fight with a plan already prepared, know where your fallback cover is located, and avoid panicking during missile phases.

Buy ARC Raiders Coins
Secure ARC Raiders Coins fast and upgrade your loadout!
Turbine is a high-tier flying ARC enemy introduced on the Riven Tides map. It sits somewhere between a traditional mini-boss and a full-scale ARC boss encounter. The machine attacks players with tracking electrical missiles and deploys land mines whenever it lands to protect its vulnerable areas.
You can only encounter Turbine on the Riven Tides map. The boss usually appears during the second half of the raid, most commonly around the 13 to 16-minute mark after deployment.
The safest strategy is using Jupiter at long range to bypass parts of the armor and damage the exposed yellow canisters directly. Another effective method is waiting for Turbine to land and then placing Deadlines near its vulnerable sections to deal heavy burst damage.
Jupiter is currently considered the strongest weapon for the fight because of its armor penetration and long-range effectiveness. Equalizer is excellent for stripping armor plates quickly, while Bettina works well against exposed canisters during grounded phases. Deadline explosives are also extremely powerful for close-range damage setups.
Turbine drops a mixture of advanced ARC crafting materials alongside its unique item, the Turbine Compressor. Players can also receive valuable ammunition types, including Hullcracker ammo, depending on the loot roll.