Escape from Tarkov Reserve Map Beginner's Guide
The secret Federal State Reserve Agency complex in Tarkov, part of Russia’s “Rosrezerv” facilities, is a fortified military site created to safeguard enormous supply caches in case of World War III. Structures like this are usually hidden in remote or inconspicuous locations, connected by Russia’s extensive railway network, and built with hermetically sealed storage depots (sometimes deep in caves or old mines). These bases are heavily defended against both air and ground assaults, with Spetsnaz detachments believed to have guarded Tarkov’s Reserve before evacuation. Stocked with enough resources to sustain a city through nuclear winter, the installation now lies open — and much of the wealth inside remains for PMCs and Raiders to discover.
The Reserve map is considered by many Escape from Tarkov players as the most competitive and profitable battleground. The lure of high-end loot ensures fierce firefights; squads clash constantly, and surviving an entire Raid is never guaranteed. The sheer number of military-grade item spawns, combined with the presence of powerful NPCs, also makes Reserve one of the best maps to run as a Player Scav.
Buy EFT Roubles
Stock up on EFT roubles and gear up now!
Shop now
Here are some of the Reserve's main features:
Usable heavy-weapon emplacements around the map, including belt-fed machineguns and AGS automatic grenade launchers. Anyone wanting to try the NSV “Utes” or AGS-30 will find them here.
The toughest Tarkov Boss, Glukhar, roams Reserve alongside six armored, well-trained guards. They are extremely dangerous but drop some of the best gear in the game.
Abundant top-tier loot: rifles, ammo, and military gear spawn openly, with many stashes accessible without keys. It’s easy to overload your inventory every Raid.
Close to 30 usable keys that open valuable locked rooms. Entering the Reserve map without at least some priority keys means missing out on prime loot.
Because of all this, Reserve is dominated by geared veterans and organized squads. Going in unprepared is a recipe for disaster.
Share your thoughts in the comments if you’d like us to cover Streets of Tarkov in the same depth once it’s released. Until then, check out our Streets of Tarkov preview!
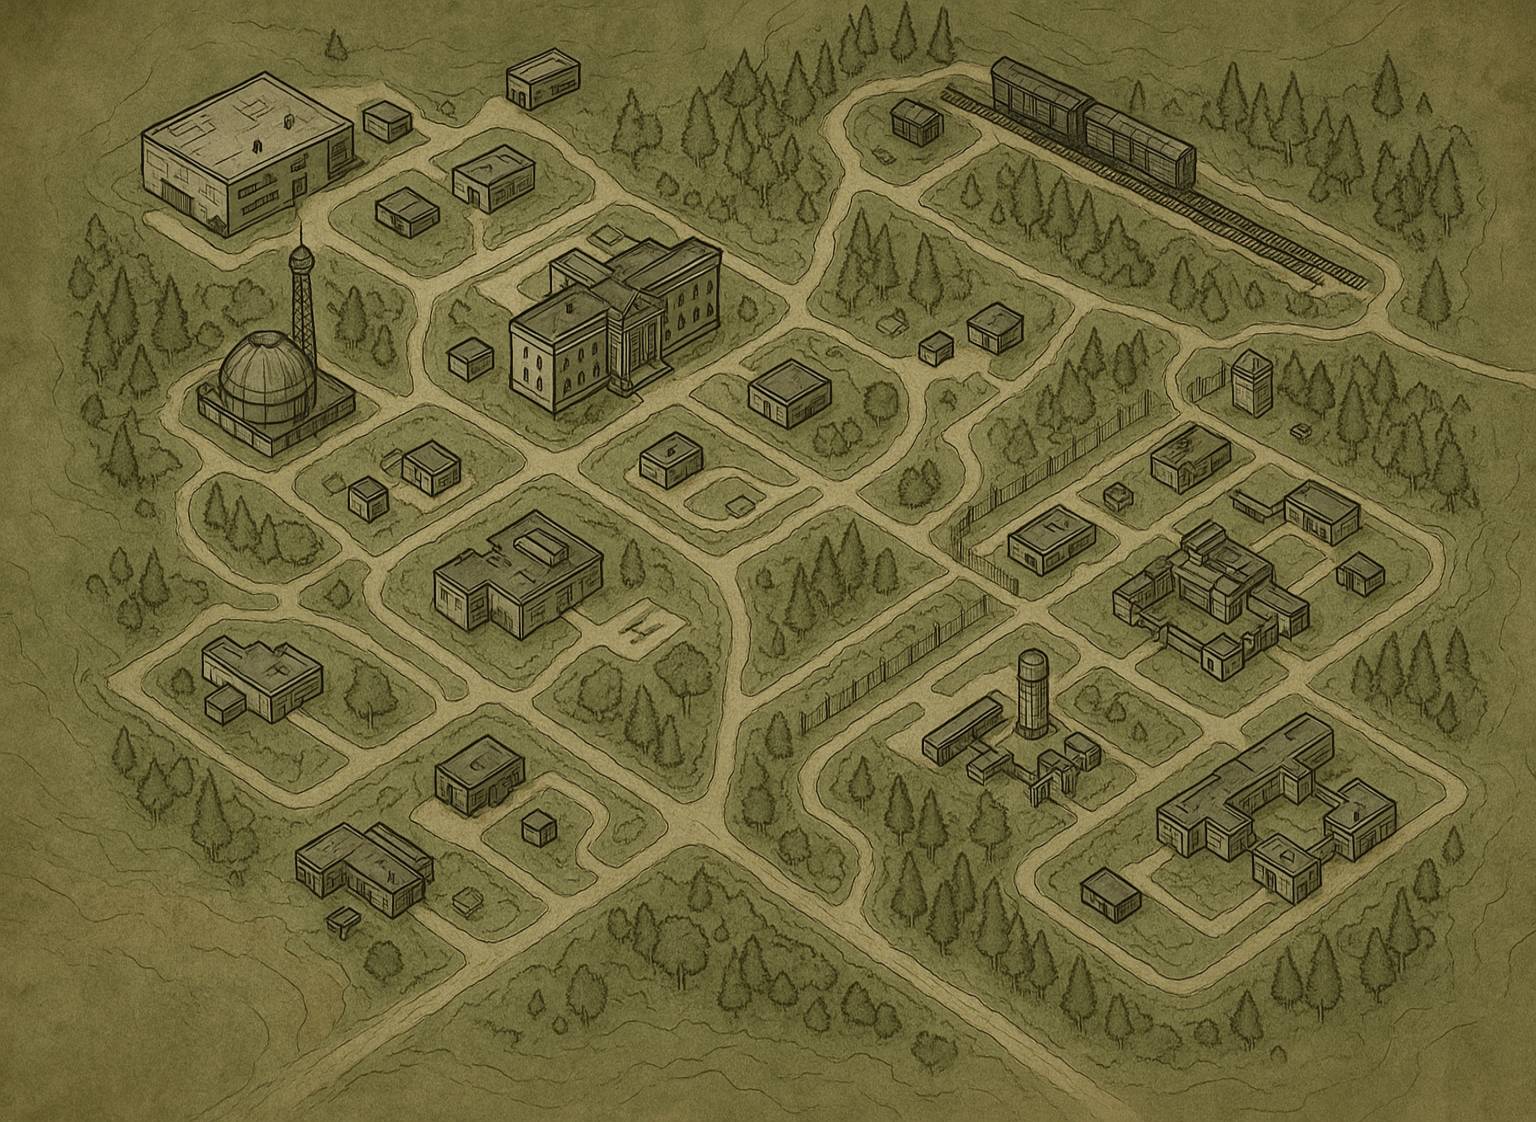
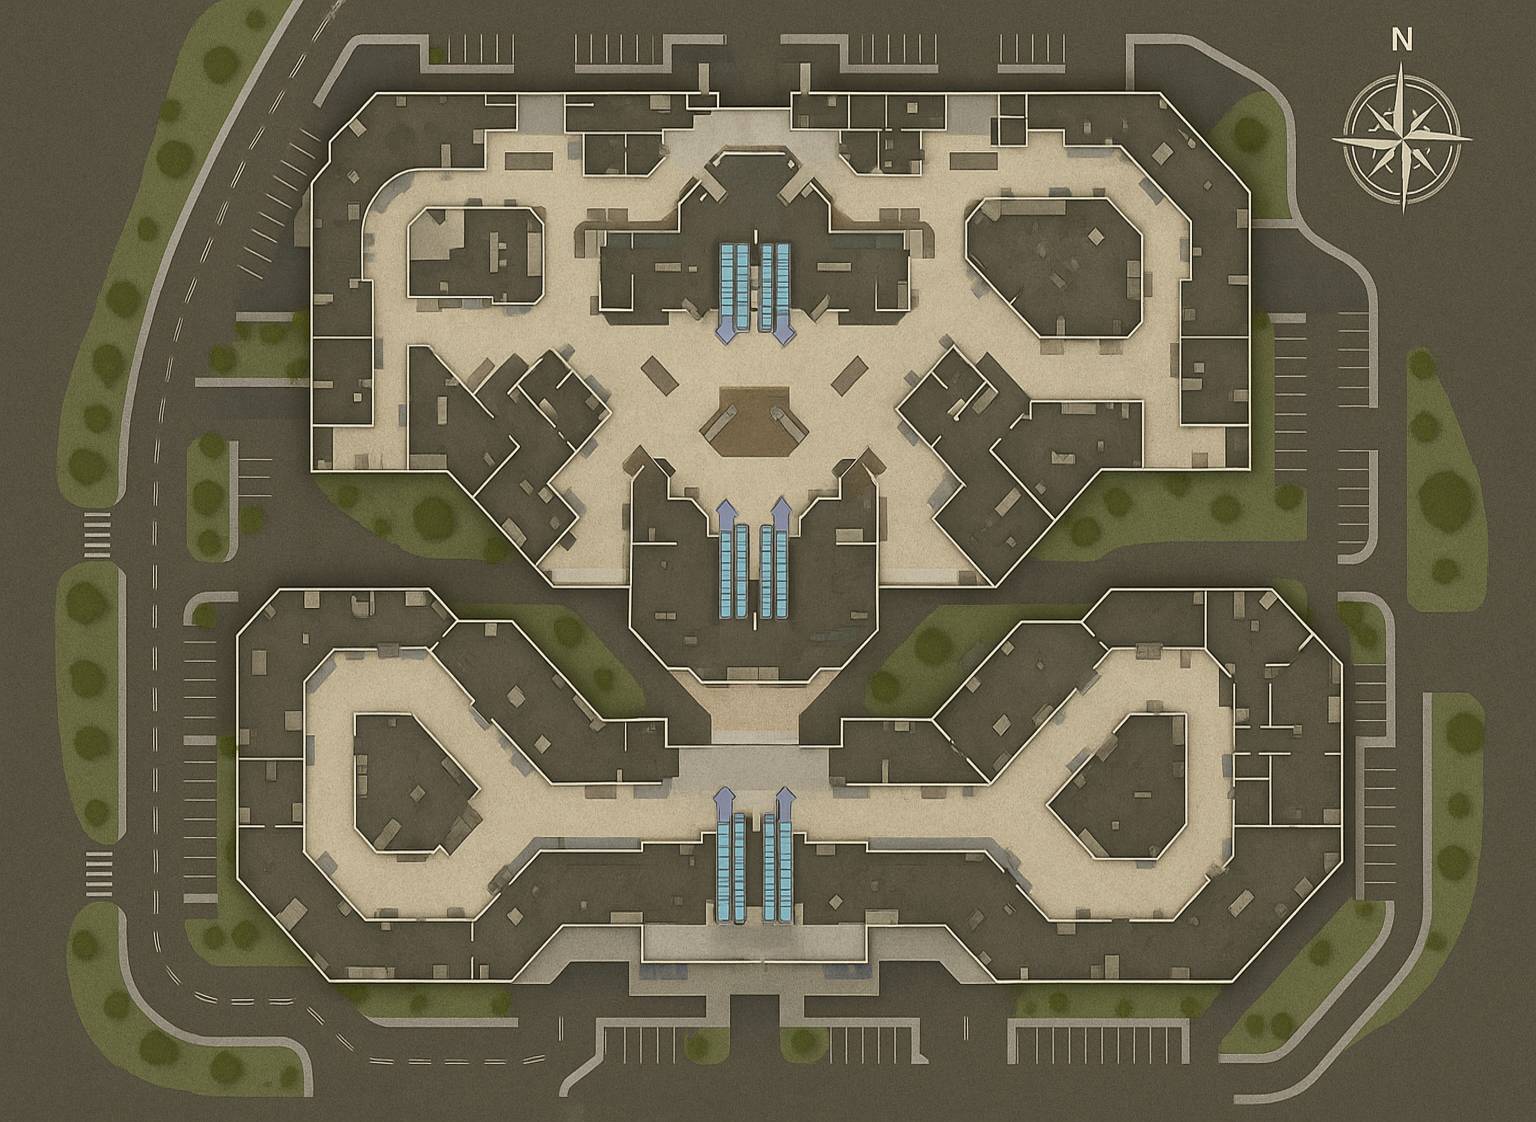
Points of Interest
The Reserve map is one of Tarkov’s most dangerous yet rewarding locations. Hidden bunkers, fortified workshops, and abandoned barracks all hold loot worth fighting for. Below are its major points of interest with loot highlights included.
Note1: Click on the map image to open the full version in a new tab.
Note2: We plan to expand this section with more detail over time, separating grouped points and adding new ones.
1. White Pawn / North Pawn
This four-story northern barracks housed much of the base’s personnel. The rooftop provides a strong vantage point, though it is exposed to the Dome. To fully loot, you’ll need:
RB-ORB2 Key – dropped by Scavs, found on Woods at RUAF Roadblock, or inside Reserve’s Dome tunnels.
RB-ORB1 Key – dropped by Scavs, or found in Interchange’s Adik shop.
A helicopter in the central square serves as a landmark (nose facing South Pawn, tail toward North Pawn). It contains loot but requires crossing dangerous open ground. A podium west of the helicopter hides a Scav corpse with rare valuables.
Location: Western Reserve, north of the helicopter, south of Dome/White Queen.
Possible Loot:
Second floor locked room (RB-ORB2): weapon mods, ammo, File Cabinet, Weapon Boxes.
Fourth floor locked room (RB-ORB1): AK rifles on racks, ammo, mods.
Roof: jackets, Iridium module, ammo, Grenade Box, duffle bag.
Helicopter: intelligence folder, Weapon Crates, Weapon Box, jacket on nearby forklift.
Podium: Scav body with rare loot (Bitcoins, Roler watch, etc.), Duffle Bag, Weapon Crate above (very risky).
2. Black Pawn / West Pawn
This is another barracks building with four floors, but its basement hides the infamous “Marked Room.” The RB-BK Key, found in Shturman’s stash on Woods, is required for access.
Location: West Reserve, west of helicopter, southwest of Dome.
Possible Loot:
Marked Room (RB-BK): Weapon Case, VPX, Keytool, Lab Red Keycard, jewelry, loose weapon spawns.
Second basement room (RB-TB): weapons on racks, attachments, mods.
Second floor locked (RB-ORB3): rifles, mods, ammo, File Cabinets.
3. School / South Pawn
Also called Black Bishop, this fortified academic building has sandbagged positions and heavy weapons. To loot fully, you’ll need:
RB-AM Key – Scav drop, opens ground floor west staircase.
RB-AK Key – Scav drop or found in White Queen Guard Shack, opens second floor west room.
Location: Western Reserve, south of White Pawn, east of White Bishop.
Possible Loot:
Ground floor locked (RB-AM): jackets, mods, COFDM, toolboxes, filters.
Second floor locked (RB-AK): PC Blocks, Tetriz, graphics cards.
Third floor classrooms: military electronics, gyros, cables, COFDM, toolbox.
Roof/lower roof: mods, heavy weapon emplacement crates.
4. West Bunkers / E1 Bunkers
Anti-aircraft emplacements with tanks and bunkers. Open terrain makes this area risky to cross.
Location: West Reserve, southwest of Pawns, west of Station.
Possible Loot:
Behind AA vehicle: possible military battery.
Inside bunkers: gyros and phased array elements.
By entrenched tank: batteries and OFZ shells.
5. White Queen / Dome
Reserve’s radar dome and surrounding area feature a tunnel complex, guard shacks, and heavy emplacements. “Cliff Descent” extraction lies behind the Dome, requiring Paracord and Ice Pick without armor.
Location: North Reserve, north of White Pawn.
Possible Loot:
Right Guard Shack (RB-KPRL): Weapon Box, Safes, cabinets.
Left Guard Shack: Safe, PC Block, intelligence folder, cabinets.
Main Dome: gyros, tech loot, SVD-S, Weapon Case, mods, safes.
Tunnels: fuel tanks, hoses, COFDM, phased arrays, intelligence, safes, cabinets.
6. White Knight
Eastern workshop with a BMP-2 inside. To loot fully, use RB-MP22 Key.
Location: Central Reserve, north of Station, south of Dome.
Possible Loot:
Ground floor: toolboxes, jackets, batteries, shells.
Second floor locked (RB-MP22): mods, batteries, rifles, ammo box.
Third floor: File Cabinet, provisions, duffle bag, toolbox, mods.
Roof: mod spawns.
7. Black Knight
Western counterpart workshop to White Knight. Offices on the top floor, with a locked room needing RB-MP21 Key.
Location: Central Reserve, north of Station, south of Dome.
Possible Loot:
Ground floor: jackets, toolboxes, batteries, mods.
Second floor locked (RB-MP21): ammo, Weapon Crate, mods, toolbox, cabinets.
Third floor: paracord, File Cabinets, PC Blocks, loose loot.
Roof: Weapon Crate, mods.
8. Garages
Large vehicle hangar requiring RB-ST Key for locked storage.
Location: Central Reserve, north of Station, south of Dome.
Possible Loot:
Open area: Weapon Box in truck, duffles, provisions.
Locked area (RB-ST): gyros, batteries, mods, weapons, OFZ shells, grenade boxes.
9. White King
Airspace Control Center and central PvP hotspot. Requires RB-GN and RB-OP Keys.
Location: Dead center Reserve, between Pawns and Knights, south of Dome.
Possible Loot:
Server rooms: Virtex, phased arrays, circuits, cables.
Basement locked (RB-GN): toolboxes, filter absorber, batteries.
Basement locked (RB-OP): intelligence, Prokill medallion, money, cabinets.
Second floor: gyros, cables, Tetriz.
Third floor: Weapon Box, cabinets, loose loot.
Roof: SVDS, mods, ammo.
10. The Station / K-Station
Freight station with storage and weapon emplacements. Glukhar’s patrol often passes here.
Location: Central Reserve, south of Knights, west of Rook.
Possible Loot:
Loose tech loot, technical crates, Weapon Boxes in train cars, fuel, paracord.
11. Hermetic Bunker
Massive underground depot with Raider spawns and “Bunker Hermetic Door” extraction. Keys required: RB-PS81, RB-PS82, RB-PSP1, RB-PSP2.
Location: South Reserve, beneath western warehouses, south of Station.
Possible Loot:
Main bunker: batteries, military/technical spawns.
SE storage (RB-PS81): medical, technical, ration crates.
NE storage (RB-PS82): ration crates.
SW storage (RB-PSP2): ration crates.
NW storage (RB-PSP1): toolbox, ration crates, medical, technical, fuel tanks.
12. White Rook
Train repair hangar connected to the Armored Train extraction. Accessible roofs provide strong vantage points.
Location: Southeast Reserve, east of Station, north of Barracks.
Possible Loot:
Armored Train: Weapon Crate.
Ground floor: Weapon Crate, jacket, toolbox.
Lower roof: Weapon Box, SVDS.
Upper roof: RB-TB Key, ammo, provisions, dead Scav with loot.
Buy EFT Boost
Get EFT boosts now! Dominate raids and farm gear!
Shop now
Conclusion
Escape from Tarkov is punishing, particularly for new players. This Reserve map guide is designed to ease that learning curve, helping you navigate keys, loot, and extraction points. With preparation and map knowledge, Reserve shifts from a deadly gauntlet to a rewarding treasure hunt. Gamer Choice will continue delivering guides to help players master every map in Tarkov.